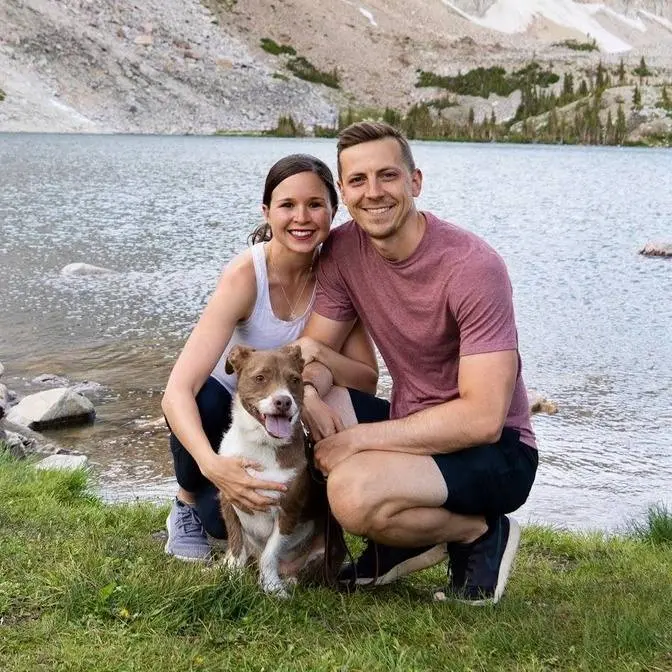
We are officially calling Austin our "home base" now as we try to finish and move into our van! Over the last few days we have worked a ton of hours trying to make some big progress and have accomplished a few big things: we got our shower walls up, created and installed our headliner shelf, installed the battery isolator, and started to cut and stain butcher block. We still have a lot to do, but we're inching closer!
ABOUT US Hi y'all! We’re Adam and Kathryn, an adventurous married couple living in a Sprinter van! You can often find us scoping out the best coffee shops, eating tacos, climbing mountains, cuddling our fur child Kona, and dreaming about Hawaii.
We created Adventures of A+K to help busy, budget conscious, and adventurous travelers maximize their vacation time and money wherever they go through detailed travel guides, vlogs, and resources. Our goal: to help you spend less time (and stress!) planning your trip and more time enjoying it!
We will be sharing 1-2 travel vlogs a week, so please SUBSCRIBE to follow along on our adventures! :) ____ Note: We’ve linked a handful items so you can see exactly which products we take with us. Full disclosure--if you click on these links and make a purchase on Amazon, we get a small commission at no extra cost to you. We will only ever recommend products we truly love, actually use during our adventures, and think you can benefit from too!
If you missed our last vlog we road tripped from Washington to Texas and
we're now calling this our home base while we finish the van
and hopefully take off at the end of this month. It's gonna be tight so
we are leaving for Italy or we're supposed to leave for Italy on Thursday
we're still kind of talking about if we're gonna actually do that or not or
cancel the trip. I hope not cancel the trip. But we only
have like three-ish days to work on the van until we
leave and then when we get back we'll have
maybe maybe two weeks. We're kind of reworking a few things trying to get
this van done because we have to hit the road at
by August 3rd at the absolute latest. We have somewhere we need to be on August
6th so it's crunch time but thankfully my mom and dad have been
awesome and they've done a little bit of work on the van while we've been gone
so let's show you what we've done since our last van video.
Okay if you look here one really noticeable thing here the bright red
here is called Red Guard and this is a water
sealant or protectant for the wood here so and then tomorrow
hopefully we're getting to put on the FRP board which is like the
the walling of the shower. You might also notice some
wires and some boxes on the wall so we've started to kind of get wires
running through stuff. Nothing's wired up yet and we're not
professionals at electrical so we don't plan to cover that in too much detail.
Thankfully my dad's really knowledgeable on it but we do have some wires coming
out of some spots where our outlets and our light switches will go which is
exciting. Like this one! Something we were working on last time
I was here was the windows here and now it's kind of mostly finished
now but I'm super impressed with this because
it's got all framed out here which is really beautiful to me and
then there's a quarter inch gap here all along the inside edge here where
we'll make a reflectix so that it'll keep the heat out and keep
the cool in and vice versa so it'll go up in
there and then it could slide up in there. One big thing that Adam
worked on today is getting our headliner shelf made so
he made a template and then this is what it'll look like so basically
this is the part that will this is the bottom part so this is the part that
will like be right above our heads and this is
the top part where we'll actually store stuff.
So we have done polyurethane on this and the next step is to actually put the
headliner fabric on this side that way it kind of
blends in a little bit better we also have some brackets that we've painted
that will be used to actually attach it to the
headliner. So this is the butcher block counter top
that's going to go on top of our dresser so we cut it to size we sanded the edges
here so that it's it's nice there and smooth
and then what this monstrosity of a design
is is took a drill bit a certain type of drill bit to drill out these holes
and the point of this was to hopefully take some of the mass some of the weight
off of this make it a little lighter maybe save a little fuel economy and
just overall weight on the on the band super heavy
dense and heavy so so obviously this is the part that will be
underneath the counter so it's not going to be the part you see just wanted to
mention that i think it's obvious but just in case you're
wondering what our style is all about there you go
so the goal for tonight is to get the headliner shelf done that way we can
install it first thing tomorrow and also get going on the butcher block
like preparation i guess to be stained so we're going to sand it
do the wood conditioning and then hopefully do the first layer maybe two
layers of stain tomorrow because it's a really long process
through the butcher block there's like after you stain it there's like multiple
like 12 hour steps so it's like a multi-day thing so we're trying to
get that going yeah so we have a wild monday night on our hands here
we're gonna go make some steak and then get back to it
so the next step for the headliner is we're placing this headliner shelf on
top of the headliner fabric that we bought
it is this black headliner fabric from joann fabrics it's like a foam
kind of backing and then it's the black fabric on the other side
we couldn't really find a headliner fabric that perfectly matched
our headliner and without going to see it in person
it was just going to be too complicated so we got this because there are a lot
of black accents in the van so it should look okay
for like a more detailed um video of how to actually do the whole headliner shelf
we've been watching this person's video i think their youtube name is our
caravan we'll link to them below it's been super helpful
we're honestly just on such a time crunch right now that we can't show like
every little step but we highly recommend checking out that video if
you want to build one yourself as i cut this i'm leaving some space on
each side of the shelf a little extra fabric because we're
going to fold it over and then we're going to
use spray adhesive to attach it in order to make sure this looks nice when we
fold it over because on these curves like if you can see like
it wouldn't it would be like kind of bunched looking
we're going to cut slits all around the curved spots that way when we
fold it over there's kind of like a little bit of a gap i guess that makes
it so it it lays flat on the side that you'd
actually see
and our last task for the night before we go to bed is to work on the butcher
block we're going to sand it twice with two different like levels of grit
and then we're going to put on the wood conditioner and then we're going to go
to sleep and then tomorrow morning we will start
to stain it so the reason that you condition the wood before you
stain it is to basically make it so when you do stain it it's more like an even
finish if you don't pre-condition the wood it
could be a little like splotchy looking we don't want that
it's another day of the van build and we're getting some really good stuff
done let me show you we got the headliner
shelf all in
and we tested it and our two empty backpacking packs fit in here
and we can fit two sleeping bags in here and i'm really happy because that was
our biggest requirement that's why we built the shelf is we needed to be able
to store our backpacking gear and the bags when they're full are pretty
large and so we weren't sure if this would work but it does work and we'll
just store all the extra backpacking stuff in our closet and i think it's
gonna work out perfectly we also now have the kitchen butcher
block cut to fit the sink it's really cool one thing that kind of
sucks though is um the butcher blocks are not the same so
they ended up sending us two different kinds of wood so
the thickness of like the wood on the butcher block isn't the same which
really kind of sucks and we're trying to not be perfectionist about it but it's
too late now to do anything unless we want to spend more money and
wait because we actually had to order these so home depot kind of messed up a
bit it's kind of a bummer but we'll just say it adds character to the van
okay so my big project today is to get the walls in the shower
so what this brown paper is is a template of the back walls of the wall
that you're looking at right when you're right when you're facing it so i made a
i got some paper i kind of cut it to size and then where
the parts that don't fit along the edges i added some tape here
to try to kind of fill in the gaps and so now this paper
is laying on top of the it's called frp board
this is the shower walls so i'm laying this on here i'm going to trace it
and then i'm going to take this bad boy
and cut it out so the frp board that i was practicing on
is thinner than the actual frp board that we're using so
the uh the metal shears here this is kind of difficult so we're
another exciting thing that we've done today which is a continuation of last
night's activity is staying our dresser butcher block this is after
the second coat may add a third i'm going to compare it
to the flooring and see how it how it looks compared to that we
have the first wall of the frp cut now we're going to put it in
we're using this frp adhesive to attach it to the shower walls
in this v-notch trowel
once we got the frp board on we used a j roller to
push the frp board against the wall and the adhesive compress it
and just make sure it was evenly spread out and now we've put some wood up to
hold it in place and let it sit overnight and we're going to start
making templates for all the other parts
another late night at the van build central uh
so we just i made templates for the walls
of the side walls of the bathroom and then we laid the templates out
onto the full sheet of frp board traced it out and then cut it out with
the jigsaw and then we placed them inside the
shower to make sure that they fit they didn't at first so we made some
modifications and now they fit really really well so it's
dark now we don't really feel like applying the frp adhesive in the dark
so we're going to wait till tomorrow to get the shower finished but things are
looking really good for the shower we should have all the walls up tomorrow
morning so our next step is very similar to last
night we are going to be sanding and conditioning our table
and also the piece that goes next to the table that makes the bed
so this is not butcher block it's just regular wood i don't remember what kind
of wood it is but we still need to sand it
condition it so we can stain it tomorrow we bought a fancy new sander today
because the other one wasn't doing so hot so
excited to try it out i've learned that i don't really like sanding
it's not the best sensation on your hand as it's like vibrating
and it kind of hurts getting all the pencil marks and glue off isn't as easy
as i thought it would be that's a wrap
on tonight it's time to go to bed all right so a big step forward so our
first task for today was to get all the shower walls in yesterday we got this
back one on uh and so first thing this morning got
this guy on the one over here and then i cut the rest of the
trim pieces all around so all that's left to finish it off is to add the
caulking around so that it's water tight rain delay
so one thing that has gone wrong today is i stained our tabletop and noticed
that there were scratches all over it and we don't know how it
happened because we swear that when we sanded it last night we
we did it the correct way so we're not sure if something else happened or what
but so now i get to sand it down again which
is a lot of hard work it's a good shoulder workout and then restain it so
kind of a bummer to get delays because we're already behind but
that's just how it's been going so the next fun task of the van build is
installing an isolator so this will allow the as we're driving
the alternator will charge the house batteries
so it's been a uh quite a process even just learning how this works
it's actually a simple thing but trying to figure out what i actually need to do
it so uh there's a diagram that connects the
alternator to the battery to the back batteries the house batteries so the
seats are off because i had to get to the battery to
unplug the battery basically so that i could
unplug the airbags and so it doesn't set off like a sensor alarm which you'll
have to pay for if and you have to go to the dealer and
pay for them to re redo it so to fix it so uh we learned
that last time and they helped us out they give us a free
one yeah yeah they gave us our freebie so the seats are off and i'm running
these thick wires up under uh from the battery under the
driver's seat under this channel here under the passenger seat the heater's in
there and then up under through here under
this uh casing i guess it's gonna go up and over
and back to our control panel back there and then eventually to our batteries
so with the isolator this gives us three options to charge from so
we've got the isolator so while we're driving it'll charge the house batteries
the solar will be charging the house batteries and then if we're in a pinch
or a pickle we can plug into the isolator for shore
power like at a campsite or a house a
friend's house something like that so we are taking care of on power which is
good because if say we're up in the pacific northwest for a long time and
the sun's not really out i'm sure the solar the solar powers still
do charge but maybe just not as well so it's nice to have options so
we can charge all of our electronics and work from the van and all that fun stuff
so that's a wrap on another day of the van build i'm exhausted
are you exhausted so tired it's been a long
few days yeah so we actually have half a day
tomorrow to work on the van before we go to italy we're so excited
we are doing it we we're maybe gonna cancel but we're gonna
go you might notice adam got a fresh new haircut for our trip
snuck away can't go on vacation looking like a scrub
so we do have half a day tomorrow to work on the van before we have to catch
our flight and it's the fourth of july so we're both off tomorrow
but we don't want to have to wait to post this vlog until we're back so
this is the end of this vlog we do hope that we'll have one more van update
vlog for you before our van tour huge big exciting
goes live which we're nowhere near ready for that yet so we'll see what happens
but ways to go just so you know to expect the next few
weeks we're gonna have tons of italy vlogs like a ton of them
so stay tuned for that and then when we get back from italy we're gonna have
probably two weeks to work on the van so we'll try to squeeze out another van
update vlog for you guys but yeah it's gonna be crunch time when
we get back we have a lot to do we don't have much time
so we'll see what happens but wish us luck
yeah we're gonna enjoy our time in italy try not to stress about the van
then we get back we're gonna hit it pretty hard and it will get done and
it's gonna be awesome and we cannot wait can't wait
we're back if you missed our
oh this is a kind of our sanding our love you know what i got time
for splotchy butcher block