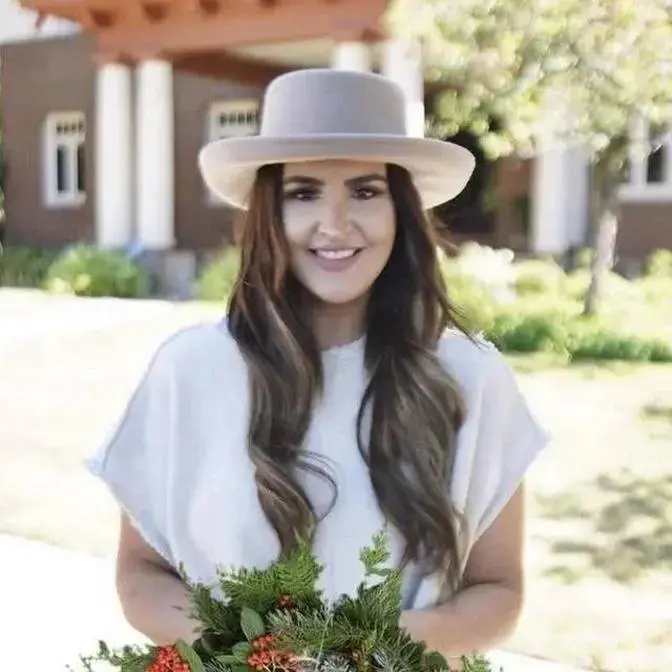
Brushes: ALL the brushes I used were E.L.F brushes from Walmart! ELF usually has their own section of brushes and makeup all between $1-$3! Love how inexpensive they are yet really can compare to some higher quality brushes!
Hey guys, today we're going to start out this look using L'Oreal True Match Lumi in the
color Nude Beige, and we are going to just squirt some of this on the back of our palm
and use our e.l.f. powder brush to buff this into the skin.
I have found a world of difference by not using my hands.
I used to just use my hands to rub in foundation, and I always looked a little bit smeary.
This really makes it look just perfect.
I always have just this much more natural look to my foundation when I apply it with
a brush.
I also like to dab it into my skin instead of doing circle motions.
That also can cause streaks, so I just like to dab it into my skin and it makes it just
look perfect.
Also make sure that you get down on your chin and neck area so that it's all blended in
together.
Okay, once we get all of that in, we are going to take our Rimmel London Natural Bronzer
in the color Sun Bronze, and we are going to start contouring.
This is one of my favorite things to do, and we start out with the cheeks.
You're going to start right beneath the ear, at the top of your ear, and you're going to
go kind of just like halfway down your cheek.
It's going to look a little bit crazy, but we will buff this in later.
This is all part of contouring.
It's going to make your face look a lot thinner, and it just makes it look perfect.
I love contouring.
Once you have finished applying to the cheeks, now you can move up onto your forehead area
and make sure that you're buffing this into your hairline so that there is no space there.
Once I'm done contouring, I'm now going to take my same foundation brush, and I'm going
to use circular motions, just buffing this in.
This really helps it to not have so much harsh lines.
Make sure that you don't forget this step because this is probably one of the most important
steps.
Next, we're going to take our Maybelline Cover Stick Concealer in the color Light Beige,
and we're going to finish off this contouring look.
One of my favorite places to apply this is underneath the eyes.
It really gives you this awake look.
You just feel so much better.
I feel like it completes every look that I do when I put this beneath my eyes.
I also love to put it on my nose, on my forehead, between my eyes, and under my chin.
Now I know I look completely ridiculous, but I promise we're going to buff this out, and
it's going to look really normal.
This really just completes the entire look of the contouring, and it kind of looks silly
if you just do one without the other, so make sure that you highlight your face.
Next, we're going to set the foundation with Rimmel London Stay Matte in the color Transparent.
This also is my lifesaver go-to product.
Anytime I start to feel oily throughout the day, I just apply this on my T-zones or wherever
I look shiny, and I look completely matte again.
This seriously is my favorite product.
I never have to wash my foundation off and redo it throughout the day because of this
product.
Moving on to our eyebrows, I highly recommend Anastasia Dip Brow Pomade.
I use the color Chocolate, but obviously if you have lighter hair, you're going to want
to go with something a lot lighter than what I use.
This is something I highly recommend.
I have tried in the past, I have tried eyeshadows, eyeliner, really everything.
Nothing has compared to how much I love this product.
So I have a better eyebrow tutorial that I will link below.
It seems that it kind of got blurry throughout here, I don't know what happened, but it's
not that easy to see.
I will, again, like I said, link my better eyebrow tutorial beneath this video.
Moving on to eyeshadow, we're going to take our LORAC Pro Palette, and we're going to
first start out with the color Taupe.
I love this color no matter what look I'm going for.
I always use this underneath as a base because it's super, super light.
I like to start out with this in my crease, and I also like to put it up underneath my
eyebrow and just kind of tie all that in together.
Next we'll be taking the color White from the same palette, and we are going to use
this to highlight the eyes.
I like to put this underneath my arch on my eyebrow and in the inner parts of my eye.
Next we'll be taking the color Espresso from the same palette, and I like to use my ELF
Eyeshadow Sea Brush.
It's just like a little flat brush, and I barely put any on this, but I'm going to be
putting this in my crease just to make it a lot darker.
I really, really like this look.
Now I'll be taking the color Garnet, and I'm just going to be putting this on the outer
parts of my eye and on the top of my eyelid.
I only put this in about halfway on top of my eyelid, and I leave the inner parts to
put a little bit more highlight in there.
For this look I also like to put gold on there, so I'm going to be putting the color Gold
again from the same palette just in front of where I put the last color Garnet on the
top of my eyelid, and this is going to kind of go in a little bit farther.
Again this is going to look a little ridiculous until you buff it all in together.
That's another really important thing I hate when I don't buff it in very well.
It looks really, really silly, so make sure that you take that step after you apply all
your eyeshadow and you blend it in really well.
Moving on to eyeliner, my very favorite eyeliner is the Maybelline Gel.
I like it in the color Blackest Black.
I have found that this is so much better than pencil or just the regular stick eyeliner
that you can buy.
I feel like that never goes on dark enough for me, and I usually have to reapply it a
few times a day.
So this I have found, this is seriously my favorite thing ever because I put it on once
and it's good for the rest of the day.
I like to apply mine starting out in the center of my eyelid, and I just pull it to the outer
corner.
I like to have a really strong cat eye, that's something that I like to do honestly on a
daily basis no matter if it's for a party or for just being casual, I like to have a
cat eye.
I do it really thin, you really just have to pull from the center to the outer part
of your eye, and then I like to just fill in from the bottom corner of my eye up to
the top to give it that cat eye look.
Moving on to another very favorite part of this look is using my NYC white eyeliner.
I like to apply this on my waterline.
This seriously makes a huge difference with making you look awake.
It really brightens your eye and makes your eyes also appear a lot larger than they are.
So if you have really small eyes, never forget this step.
This is seriously a huge step with making your eyes just look bigger and brighter and
a little bit more alive.
Taking my ELF concealer brush, now I'm going to be dabbing this into Garnet.
The color that I used earlier, I like to apply this just underneath my eyes.
I don't do this for just a casual day look, but I like to do this for nights or for parties
or for anything else, just not usually, typically I don't do this for a casual look.
This really ties it in together at the end with the plumish colored lips that I like
to do.
It all really just ties it in together with the eyes and the lips matching.
So I love this.
Taking my ELF blending brush, now I'm going to really just blend all of this together.
You want to make sure there's no harsh lines at all.
It just all is really smooth and blended perfectly.
Next we're going to be taking our L'Oreal Telescopic Mascara.
I switched from my old mascara about a year ago to this one and I will never, ever, ever
be switching back.
This is seriously my ultimate favorite.
If you have ever applied mascara on your bottom lashes and within a few minutes you see that
there's just black smears everywhere underneath.
I have never once had that problem with this mascara and I used to always have that problem
with old mascaras so I never used to wear mascara on my bottom lashes for that reason.
You totally can get away with it with this.
It dries seriously instantly.
I also barely apply any on my upper lashes just because I wear lash extensions so I don't
really need it up there.
I just put it up there kind of just to hold them together but I do not need them up there.
But again, like I said, the bottom lashes, if you have that problem, I promise you will
not have that problem with this mascara.
Moving on to blush, we're going to be taking our E.L.F. Bronzing Brush and I love this
color Deep Wine by Maybelline.
This is seriously one of my very, very favorites.
I barely, barely dab any on, any product on and I just kind of sweep it on the apples
of my cheeks just above where I contoured earlier.
Taking my same E.L.F. Powder Brush, I'm now just going to kind of buff all this together.
So there's again, no harsh lines.
This really just helps smooth everything out that you did earlier, your blush, your bronzer,
and all the contouring you did.
This really just helps smooth it out so make sure that you don't forget this step.
Next, I'll be taking two different colored lipsticks, both Maybelline.
One is Touch of Spice and one is Plum Perfect.
I'm going to start out with Touch of Spice.
This one is something that I do more on a casual day.
I literally probably wear this every single day.
I love this color.
And I, for this look, I didn't use lip liner, sometimes I do.
But for this one, I did not use lip liner.
So we're just going to kind of outer, I always start with doing the outer parts of my lips
and then just filling in that bottom lip.
And then after I am done with this one, I will apply the Plum Perfect on top of this.
This really is that, gives it that cranberry color that I've been loving, loving, loving
this holiday season.
I'm also going to share with you guys a secret that I do to help my lips look a little bit
bigger.
I have very, very small lips so I like to put a shadow underneath my bottom lip.
I just use my e.l.f. concealer brush and I use that same taupe color that I used earlier.
It's really light but it really does make your bottom lip look a lot larger if you apply
this underneath.
After I have applied it, I like to take just my bigger brush and buff it out so that there's
not really like an obvious line that there is eyeshadow underneath my lip.
Next you're going to want to take a white or a shimmery color powder and you're going
to apply this on your cupid's bow.
This really also makes your lips look powdier and it totally finishes off this look.
Lastly I'll be putting on this Plum Perfect lipstick on top of this one and I will be
posting my final pictures of what this look looked like with my hair and my clothes on
and thank you guys for watching.
I will see you guys in my next video.