Lone Star 30" Vertical Smoker Seasoning | Offset Smoker - This video is a how to and or I seasoned my Lone Star Grillz 30" Vertical Smoker or Offset Smoker. The next video will be about adjusting the baffle plates to maintain a constant heat in the Cook Chamber. Then I will start with some Pork Butts (Pulled Pork) and so on.
Overall Dimensions: 56" length x 34" width x 78" height
Constructed from 1/4" thick new steel (included)
Cook Chamber Dimensions: 30" x 36"
Square Firebox Dimensions: 24" x 24" x 22"
Product Details: 6 sliding/pull-out food trays framed with angle in the main chamber 1 21" x 23" sliding/pull-out food tray framed with angle in the fire box (adjustable) Fully flanged doors to keep your heat inside main chamber Heat deflector Adjustable tuning plates to keep the temperature even from one side to the other 1 Tel-Tru stainless steel temperature gauge Stainless steel cool-touch handles 2 industrial heavy duty 5" wheels and 2 heavy duty 5" swivel wheels for easy mobility (cart models only) 24" x 42" lower log rack is framed in 2" x 2" x 1/8" angle can be used for your wood or anything you want 1 1/4" drain with steel cap 10" x 50" table Fire box is ready for propane log starter Painted with three coats of high heat paint Adjustable 5" smoke stack Total cooking area: 4150 sq/in. Weight: 950 lbs Main chamber cooking grate: 26" x 23.5" Fire box grate: 21" x 23" Our 1/2" thick fire grate carries a lifetime burn out warranty Product Use: The main chamber holds several gallons of water to steam and moisturize the meat while cooking. Drain out of the bottom cap when finished to clean out.
Contact Lone Star Grillz 3284 Interstate 45 S Willis, TX 77318
PERKS for YOUTUBE MEMBERS 💲5 Gets you Bi-Weekly written recipes, Acces to private live streams, Acces to the Exclusive Smokin and Grillin wit AB (TBD), Your name at the end of the video (credits). Become a YouTube member and Thank you in advance!
If your like this video and would like to see more don't forget to like, share, and subscribe and hit the bell for a notification of the latest video.
DISCLAIMER: This video and description contains affiliate links, which means that if you click on one of the product links, I’ll receive a small commission. This helps support the channel and allows us to continue to make videos like this. Thank you for the support!
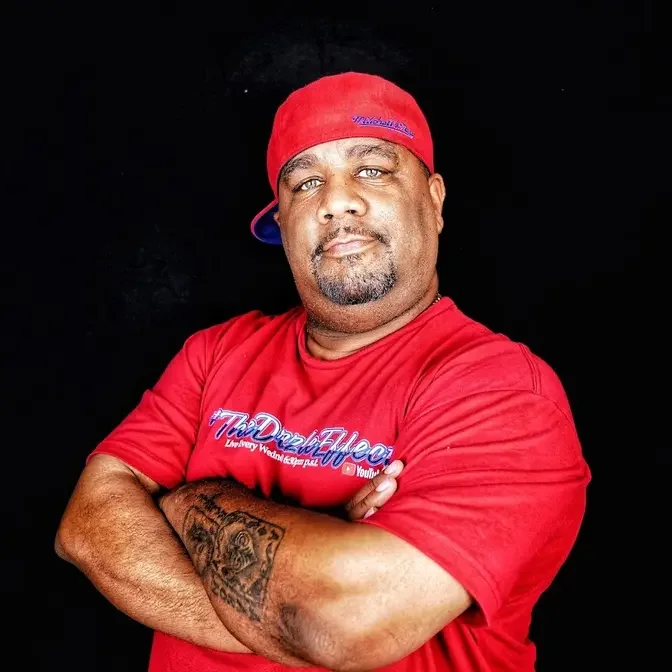
Welcome back to my channel, Smokin' and Grillin' with me, A.B.
All right, so what you just saw is, I just went ahead and used this chimney. You got to get
yourself one of these weed burners. Instead of putting something on the bottom of it,
you know, waiting for it to get started, we're going to expedite it. So I'm here,
it's myself, it's Kev, he's behind the camera. We got Mad Dog back there. You guys are going
to see him in just a minute. Hey, we finna go ahead and get this smoker going. Anyway,
we're getting ready to do our seasoning. You guys just saw this process. As soon as this
fully lights, and I can feel the heat up here, once everything starts getting towards, you know,
becoming a little bit of white, we finna open up this box, and then we're going to go ahead and
just put it inside. Here's what we're getting ready to do. Got four cans of this right here,
this spray cooking oil. You know what I mean? Went with like the store brand bought,
trying to get this as cheap as possible. Reason being, we finna open this up and waste some oil.
Right, right, right. So what we're getting ready to do is we finna spray this whole thing down.
Meanwhile, we got the coals over there. Those are still going. But right now,
we just finna spray this whole thing, get it nice and oily, then we're going to bake it.
I'm going to take you guys through the whole process. And again, what we're doing is we're
seasoning. Hey, you guys got to remember this. We're outside, and there are all types of elements
that we're taking with us. Yeah, yeah, yeah. Ignore that noise at the back. Hey,
the dog looking at me through the crack of the gate right now. Don't worry,
when we're done seasoning this grill, we're going to cook that dog.
All right, look, got it open. So this is what we're going to do. We're going to take all the
grates out. Then we're going to go ahead and take a can, then we're going to be able to spray,
you know, both sides, spray this door, and spray that back. Then what we're going to do is once we're
done with that, we're going to go ahead and add, you know, we put one ingredient, we'll spray that
one. We'll put this one in, we'll spray that one, and then we'll go that way. Hey, now the reason I
got Mad Dog here is because you guys have seen that we did a brisket together, and that brisket
was he and I doing injected versus non-injected. So here we go. Easy to season. Now, remember,
we only did, the cook was on an insulated smoker, so we didn't have to watch it. The temperature
pretty much held itself for like 12 to 14 hours. This, on the other hand, is going to fluctuate,
so you're going to keep having to add, well, you got to keep watching this for the entire 12 hours
or for however long it takes to cook it, because you have to keep feeding this beast with wood so
that you keep your temperatures up. Remember, that's the most important thing whenever you're
cooking ribs, brisket, pulled pork. Consistent temperatures are going to make it so that your
cook times don't extend as long as they should be. Shorten your cook time, more consistent,
so you're not having to deal with fluctuating temperatures. Taking you guys along, here we go.
Now here, we're just removing the grates. That way, when we spray it, you can get
every piece of metal completely coated. Then if you look up at the top, it came with three
sausage hangers. So taking those out too, but we're going to spray those individually and put them back
in. Hey, now this was like the cool part right here. Just taking the can, you know what,
and just coating everything, all of the bare metal, everything that's inside of the smoke chamber.
So listen, you just want to spray it. Now I want to say this, you can look and see
some of it's kind of thick. The more you spray on there, probably the more you're going to have
to wipe up, because we constantly was wiping it. When it came up on temperature, it started
doing a little running. So I guess the pro tip would be hold your can of spray about five inches
away and just coat it. You can probably go even further with that. And then as you can see, we
left one grate in, and what we're doing is right here, when I pulled it out, I sprayed it in the
back. Every piece must be coated. Now, as I started installing the grates back in, we started
coating them, you know, one by one. And then from there on, you know, it's really like self-explanatory,
but you want to make sure that you get it everywhere. Look, I got it everywhere. Even
places where meat's not going to touch. The main thing is you want that bare metal to have that
cooking spray, you know, sprayed on it. Now, check it out. You saw me spray down all of the sides,
did the grates, put them back inside. Everything is completely coated with some cooking spray.
Now, I'm getting ready to close it up, and then we're going to go ahead and work on the grill.
Got this closed. Now, we'll open this part up, and what I'm going to do is I'm going to spray
this down. I'm going to wipe it off, clean it up, and then I'm going to go ahead and spray it,
and then we're going to go ahead and put some fire in this box. Got the coals. Getting ready
to dump these in the inside right here. All right. I'm going to take some of the bark,
some of the kindling. We're just going to add this on top just to help get it started,
you know, just a little bit quicker. Now, as you can see, listen, when you put those small sticks
or bark or whatever, anything small, we call that kindling. It helps get you a fire quick
to help start those larger logs. Okay, look. You saw me just put the fire in there. You can see
the smoke kind of like going out that way. It's coming out the same way the door is open,
but if you come around this way, I'm going to just show you. Got two chimneys up top.
These are the vents. So listen, I'm going to open it.
In there. Now you're starting to get some draw. Open this one over here, and there you go. So
now we're starting to get some circulation. It won't be as much smoke coming out the other side.
So now we're starting to get some draw. It'll start heating up inside the box,
and we'll go from there. Now, kindling caught. You see the coals going. What I'm getting ready
to do is I'm getting ready to put one of these logs on here. We'll just go ahead and put it on
top. We got a nice fire going, and then what I'm going to do is I'm going to close this door a
little bit, and then we're going to let that go ahead and heat up, and then we're going to start
monitoring the temperature that's inside the box. Now remember, the easiest way to get your fire
started is kindling one log, which I have right there, and after that, once the base is caught,
then we start adding more logs to it. Now we're going to add another one.
Just add it like that, and then this one here, I'll just put on top.
Listen, we're going to leave the door open because we want to get maximum draw.
So listen, it's all coming in this way, coming out the chimney, and going that way. I'm going
to close it just a little bit just to force some of that heat in the inside, but right now,
the main thing is I want to get these logs and get them caught and get those lit so that we can
start producing some real heat. All right. Now, listen, we got it up to 450 degrees.
Let that bake for about, I think we let that bake for about two hours. Now we got to minimize a
little bit. We got it at 350 degrees. We're going to let that just continue until these logs burn
out. I'm going to take the camera around and show you guys just how we got it set up. Look,
got the door completely closed. Man, standing close to this, I can feel the heat coming off
of this right now, but everything is baking good. We were looking at the griddle plate.
Griddle plate looks good also. Again, we had 350 degrees on both of these, 350 here, 350 there.
We got both of the ducts up top. Both of those are open. And then again, I'm going to take you
guys around so you can just see the setup. It's been holding this 350. I just actually put another
log on it. It went from about 325 to 350, and I'm going to show you that also. But I just want to
say, hey, listen, this is just like the seasoning for it. I like how it's coming along. It's kind
of like quick. It's burned off all of the fingerprints and all of that on here. You got
that blue translucent heat wave coming off the top. And listen, I'm from Los Angeles, so listen,
a lot of us, we always thought that when you get a lot of smoke, and I'm going to say us,
because that was including myself. Listen, when you get all of that smoke, that's no good, folks.
You're not doing nothing but putting that dirty smoke on your food. It took me a long time to
learn that, but now I got it. I got what I'm looking for. I got a quality Lone Star grill
right here. Hey, this smoker right here is going to do it. We're getting ready to do some briskets.
And I keep saying briskets, because, man, I got a brisket out there with somebody's name on it.
Hey, so let me take you guys around. Let me show you that, and then I'm going to bring you back.
We're going to open this up so I can just show you what it looks like, show you the grate,
show you the back. And after that, we're going to wrap this up. We open that. You can see she's
been burning some logs. I can't really get down there in there, but you can see right there,
look, it's burning, burning real nice. You know, the heat, this is that clean smoke.
The heat travels inside the smoker, and then it goes from there. Now I'm going to close this back.
We're going to let this burn out. Now I'm going to bring you guys. Now you want to take a look
at this right here. As you can see, look, you can see how it's starting to bake on there.
That's all that cooking spray. So if you want to look at it, look at it just like this.
This is nothing but a giant cast iron skillet. All we're doing is seasoning the skillet. So what we're
doing is just seasoning, you know, the smoker, but this is it. You can see, look right here.
You can see the drips high, kind of like stock, but this is coating it. And listen, the more and
more I cook on this, the thicker and thicker this gets. And now I'm finished to show you what the
griddle looks like. There we go. We're starting to get that color on it. Listen, we're going to
keep seasoning this until we get it right. It won't be long before I can put an omelet on here
and then it'll be your original nonstick surface. Hey, so there you have it. A seasoned Lone Star
vertical stick burner. Look, heat on this side. You got your smoking chamber on this side.
Next time I get ready to use it, we're getting ready to start playing with those baffle plates.
We got to figure that out and find out where the hot zones are and all of that. So I think I'm
going to start off with like a pork butt or something like that. Maybe put a couple of ribs
somewhere up here at the top. I noticed one thing though. Listen, you know, I know heat rises. So
listen, you get a lot of heat up at the top, you know, it just passing through here. I guess it
accumulates and then it pulls out of this way. But from what I know about draw, listen, it comes
out of the firebox. The heat over here is probably going to come and we know it's going to be the
hottest up here at the top, but it'll be the left hand side. So I'm going to figure all that out.
I'm going to take you guys with me. And once we get that set, we're getting ready to do a brisket,
but I want to make sure we got it. You know, we got it all set right now. I like the way the
seasoning is going. I'm going to go ahead and let this continue to burn. I'm not going to put
nothing out. We're just going to let it bake until the fire completely burns out. And after that,
we're going to go from there. Hey, so thank you guys for watching. You know what? Hope you guys
learned something. Listen, I'm learning. You can learn right along with myself. Hey, so listen,
if you're new to my channel, let me just go ahead and say, Hey, thank you for watching. You know
what? Don't forget to subscribe. Like this video. You know what? Let me know down in the comment
section below. If you want to see more of these videos using this lone star grill or, you know,
any type of grill. Cause I told you guys it's time to live up to my name. Outside of that,
I just want to say thank you. And I'm out of here. You guys. Peace.