
Easy Plant-Based Almond Milk and Yogurt Recipe | No Instant Pot, Yogurt Maker, or Thermometer
Hey everybody, we are up in Bar Harbor, Maine this weekend taking a little staycation at
Cormac's parents house up here, which has been really nice. I'm going to be making some homemade
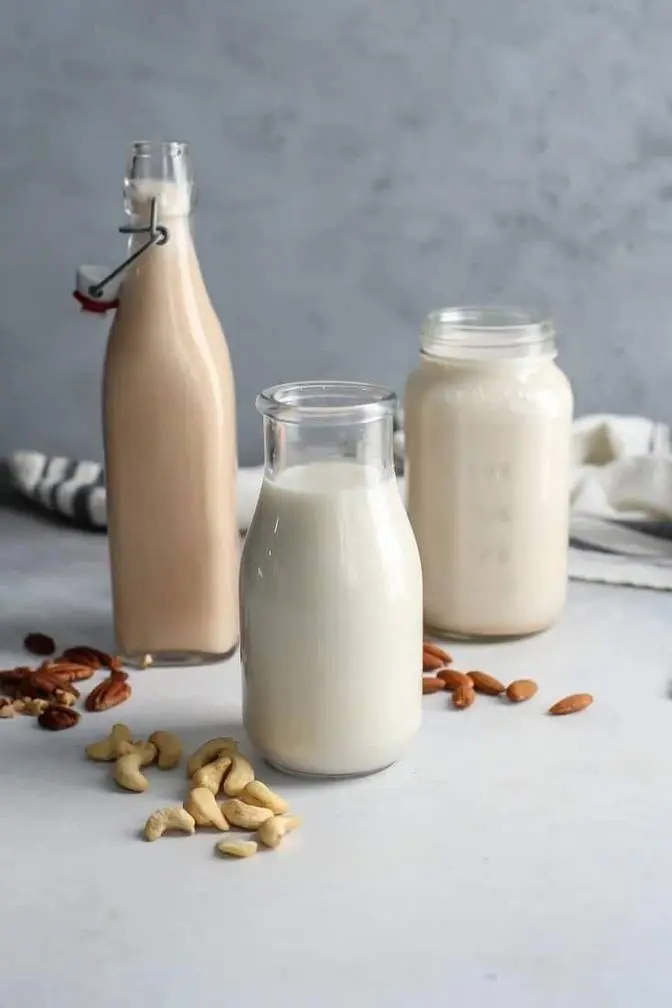
almond milk, which is just two ingredients, very easy to make. And then the other part of this
video is to then use that same almond milk to make almond milk yogurt, which is something I've
been kind of playing with. I've been doing some oat milk yogurt and almond milk yogurt and having
a really good time making it, but I found it a bit of a learning curve in the sense that usually
when there's recipes posted or videos, you have to have an instant pot or yogurt maker. And like
people have, you use a thermometer and all those things are great, but I didn't have any. And I've
actually been making it without those things. So I just wanted to make a really simple video of how
to make awesome yogurt. And you save a lot of money on vegan yogurt by making it at home. And
it is really just so easy. So let's get started. The first thing we're going to make is the almond
milk. So I've got my Vitamix high speed blender here. All we're going to need is some almonds
and water. So the ratio of almonds and water can vary depending on what you're going to use the
almond milk for. If I'm just using it for, you know, on top of granola or for baking or other
things like that, I'll just do a one to five ratio. So one cup of almonds to five cups of water.
Since I'm going to use this for yogurt, I want it to be a little bit thicker and creamier. I'm
going to use one and a half cups of almonds for six cups of water because I'm going to use six
cups for the yogurt. So basically one to four then if you want a much creamier almond milk.
So let's measure this out. Take this over to the blender. Almonds and water for about one minute
and 30 seconds here, just to ensure I'm really getting the most milk I can out of them.
I'll blend it up here. Once you've blended up your almonds, what you're going to need is just a big
bowl or pot like I have here. So I just use this strainer to give some structure to my cheesecloth.
You can also use a nut milk bag. That also works. I've used different kinds of cheesecloth. I really
like this one because the grain is much closer together. I use one that was farther apart and
lets a lot more of the actual almond pulp through, which I don't like. So this is a really good one.
You can experiment with different stuff, but I just wash this and reuse it. All right,
so we're going to put this in here and just pour our almond milk in. I forgot to mention that this
is actually two overlapping pieces of cheesecloth, which creates a tighter knit that helps in better
separating the almond pulp from the milk. So let this drain for a minute or two on its own if it's
as full as mine is here, just to make it easier when you're bringing the cheesecloth together
so you can squeeze out the milk. If you're not using a nut milk bag like I'm not here,
just draw the ends of your cheesecloth tightly together and then start twisting and squeezing
the bag to help squeeze out the milk. Just a warning that this part is a bit of a workout.
The actual face of me getting that done. You got enough of it?
Are you getting tired of this? My hands are getting tired. At the end of this process,
you will be left with almond pulp. I used to just compost this, but have recently been
experimenting with various recipes that use it, so I'm not just wasting this byproduct of making
almond milk. So far, I've made some really good gluten-free crackers, chocolate granola balls,
date-sweetened chocolate chip cookies. You can freeze it for a rainy day when you're ready to
experiment. Now you can just pour your almond milk into a jar and refrigerate. If you prefer
to flavor your milk, you can add maple syrup, dates, or vanilla to the almonds and water before
you blend it together. This almond milk stays fresh for about four to five days. So if you're
just going for almond milk at this point, you're actually just done. If you are going to be making
yogurt, we're going to need our blender again. And you don't really need to wash your blender
because we're just going to use it right again. We just made about six cups of almond milk,
so we're just going to pour all of that back into the blender to make our yogurt. I just want to
show you guys the book that I got this yogurt recipe from. It's called The Homemade Vegan Pantry
by Miyoko Skinner. I'm not sure how you say her name. This book is just absolutely beautiful.
There are a lot of really awesome recipes in here for like staples in your house, like condiments,
like homemade mustard. She has a yogurt recipe. You can make cultured cheese, which I've been
playing with a lot too. I've been really getting into like these cultures after starting up with
sourdough. We have six cups of almond milk in here. Her recipe is for four cups, so the measurements
might be a little bit wonky. This makes a lot of yogurt. We're going to be putting it in here.
And it basically, I mean, you can see it's the size of my head, basically almost fills up this
whole jar. So four cups is probably enough, but I'm going to do the six cups worth because I like
to just make big batches of this so we can eat it during the week. We're going to need a third cup
of cashews if you're making four cups of almond milk. So I'm going to do a third cup and then a
half of a third cup. If you don't have a tapioca flour, you can also use corn starch or
sheila's arrowroot powder. They're all kind of the same, do the same thing. So if you're doing
just the four cups of almond milk, then you'll do two tablespoons of whatever starch you're using.
I'll do three tablespoons since I'm doing six cups. So this will just help thicken it when we heat it
on the stove. The nice thing about blending all this together is you don't have to worry about
it clumping or anything. The one time I don't wear my apron. All right, so the last thing we're
going to add is agar powder. This might, you might have to order this online if you can't find it in
a store. I haven't ever found it in a store, so I just order online. You just have it around.
So a quarter teaspoon if you're doing four cups, a quarter and an eighth teaspoon if you're doing
six cups. Can I get a paw? Good girl. Oh yeah, you went through. Once everything is blended up,
we're just going to pour it into a large pot to heat it on the stove.
So instead of using a thermometer, I just heat this with a medium heat and just continuously
stir it until it seems to get thick. I don't want to let it get to a boil or start burning on the
consistency is when it's done. And at this point you also might want to, if you don't have a yogurt
maker or an instapot, turn your oven light on and let that start heating up in there. So that's going
to actually be our incubator instead of using a fancy tool. We're just going to use the oven light
in the stove to ferment this over a period of time. So let's turn this up to medium.
And I didn't bring any of my trusty spatulas, so we are going to use this guy.
Stir continuously while your mixture heats up and starts to thicken over a medium heat.
If it starts to steam, turn down the temperature slightly while the mixture thickens.
This part will take a bit of patience, but eventually you can see
this mixture starts to thicken up. So once it reaches the texture, almost like yogurt tubes
or like go-gurt, we're just going to let this cool off. I might actually set this outside
since it's kind of chilly out today. You could also do an ice bath on the bowl and this will
thicken up even more as it cools. We don't want it to be too hot when we put in our culture because
it would kill the live bacteria that's in the culture. So this is the final texture. Once
the yogurt has cooled, you can see that it's thickened a lot more. The yogurt mixture has
cooled enough now. I have just stuck my finger in. It's just still lukewarm, I would say.
Nothing close to being hot, so it should be safe to put in our culture. This is a previous yogurt,
the last of a yogurt that I made. You see it's a little bit thicker than
what this is right now because it's still warm. If you don't have your own vegan yogurt culture,
you can just buy some plain vegan yogurt from the store. The reason I just love making homemade
yogurt is that like a half cup, you know, little tub of it is like two dollars, which is what I
used to start this. And I'm making probably six, probably actually seven cups of yogurt
for just the cost of the almonds really and the tapioca starch and agar, not very much.
So it's much, much cheaper to do this by yourself. So we're just going to add in three to four
tablespoons of your previous culture. So here I'm using my last batch of yogurt as my starter.
If you don't already have a yogurt starter, you can just buy a plain vegan yogurt that has
live active cultures in it and use that as your initial starter.
Add that in and then just stir it in thoroughly. You're going to then need a very clean glass jar
to put your yogurt into. This isn't, this is my favorite jar ever. It works perfect for yogurt
making. I'm just going to pour this in here. So what's happening when your yogurt is fermenting
is that the live bacteria from your culture is beginning to ferment the milk and turn it into
lactic acid. So this lactic acid then results in thickening yogurt and creating that signature
tart yogurt taste. Just a note about your jar. It's helpful to have a little extra space at
the top because this will puff up a little bit. I know the first time I did it, I did it in a
regular mason jar and the yogurt was literally like squeezing out the sides. So make sure you
have a little extra space so it doesn't kind of explode at the top. I'm just going to put my lid
on and put this in the oven with the light on so it incubates. The timing of this really depends
on the temperature you have fermenting in. I'd say so far my timing for this has been about six
or seven hours. And the way you know it's done is just by tasting it. So the longer you ferment
this, the more tangy it will get. So if you like a little bit milder yogurt, you will ferment it
for a shorter period of time, probably about six hours. So we're going to put it in here and
this is already warm in here. We're going to go do a hike and just have some fun today and we'll be
back at 4 30 to test her out. Our hike this day was beautiful but definitely slippery as there
had been a lot of rain and much of the hike is actually climbing up rock. We had a delicious
treat at the top. Homemade cranberry lemon granola bars which I think are my favorite flavor
and it's now 4 30 and so we're going to do a little taste test of the yogurt to see if it is done.
Nice and warm. It smells yogurt-y. I'm just going to give it a quick stir.
It's definitely thickened up a bit more. Thickens up a bit more as it ferments.
It's ready. It's definitely tangy. So to stop the fermentation you just cool it. So I'm just
going to leave it in the fridge. What we'll do is we'll just refrigerate this overnight and then
tomorrow morning I'm going to try and show you guys how to make it like a fruit yogurt. So
something with like dates to sweeten it and some fruit so it's not just plain. And yeah we're just
going to hang out tonight. We'll see you in the morning. We're here on our second day and the
I'm going to do one bowl just plain and top with some homemade granola. The other one I just wanted
to show you how to make like a fruit flavored yogurt. So it's not an exact recipe that I have
yet but I'll kind of show you what I've been doing so far. And I'm sure it depends on the fruit that
you use how sweet it is or not. So I'm going to just measure out one cup of frozen berries.
And these are blueberries blackberries and raspberries. Measure out your berries and
put them in a microwave safe bowl or a pot to defrost them. Here I just microwave the fruit
for about a minute to soften it. Then add those to your blender with a tablespoon of maple syrup or
two to four dates depending on how sweet you like it. Let's go whiz this up for a second. I didn't
have my smaller blender container so I just used maple syrup instead of dates as I normally would
since those are a whole food. Got some homemade granola there. We're just going to spoon in some yogurt.
You can then add your berries to the yogurt and mix it together or just leave them on the side.
Instead of blending the berries you could also just mash them with a fork if you like them to
be more chunky. I like having like chunks of fruit like or like like a large bit of fruit if I want
it versus like having it all mixed in all together because then you can like you know you can choose
as you go along how mixed in you want it. Very particular. Very particular. But I'm just going to
enjoy the granola that I made that is just eating dates. There's raisins and some sunflower seeds,
pumpkin seeds, cranberries. This is good. I could definitely say this is your best batch. Yeah.
This is good. The berries are really nice. Yes. This is yogurt.
I'd definitely call this yogurt. Yeah. Yeah. It's pretty exciting.
Yeah this would also be good with some granola.
I actually want to put some of that on mine. So that stuff. Yeah. Or you can just have some of mine.
Yeah this has been my like favorite pre-dinner snack now with like granola yogurt and granola.
Or I have it for dessert actually sometimes. Did you want any more granola? No I'm good.
I'm just gonna pour the rest of these berries in here. Did you do a video on the granola?
No I haven't. Your granola is also very good. You want a bite? This looks so good.
That's good. This is a treat. I'll include um here or something how much this actually costs
to make. I'm guessing it's probably about seven cups of yogurt for I'll I'll put it here. I don't
I don't know I'll have to do the calculation but not for us. It's the amount. Yeah this actually
is really good. I'll also include some instructions on how to make um oat milk.
It's very similar to almond milk and oat milk yogurt because I know so the nice thing about
oat milk is that it'll thicken itself so you don't have to add the tapioca starch or the agar powder.
You just heat it up just itself and it'll thicken up.
But I don't think it tastes it's the texture is a little more goopy. So this has almonds,
cashews, and oats? No. So the the whiteness is just almonds. The man who recorded this whole video.
I was thinking that in my head but
only one person needs to remember how it's made. What's the status on the trailer?
Right now we just need to order the wall panels and we probably need to put some sort of insulation
in the garage as well. So we have to order the wall panels, clear out the downstairs of the garage
that just kind of turned into a junk trap from all the construction in the upstairs
for Lobster Lift. And we'll put some insulation and get a space heater in there so that while
we're working it's pretty warm because I imagine that we probably don't have that much more time
before it gets really cold. Yeah. So we'll be putting the wall panels up next. Yep.
It's gonna be a lot of work but we gotta do it. Thank you for watching, like and subscribe,
and eat more plants. Thank you for bearing through that taste test with us. We definitely had a bit
less energy the second day of the film and we're trying to muster all the enthusiasm we could.
Thank you so much for watching as always and if you haven't yet please subscribe to our channel
so that you can stay up to date on our exciting projects. Ready? Eat more plants.
Eat more plants. High five. Reluctant. Are you falling? Are you falling?