
Garden Quickies Volume 1 - Episodes 1 to 10
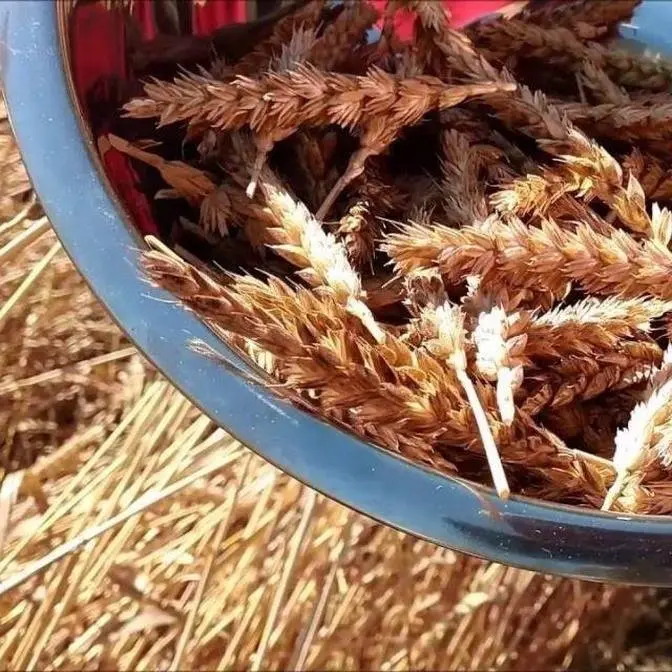
There's just not enough time. As a gardener, there's never enough time in the day to do all
that I need to, let alone all that I want to. I know I'm not alone and many of you feel this
crunch too. Since I started this channel I've always strived to jam as much information as
possible into each and every video. What I've noticed though is that some garden questions
address the problems in a hyper-focused in-depth but concise format that growers on the go like
you and I can digest, learn from, and then implement. Thus enter the garden quickie. In
these highly specific videos we can get to the heat of the question without any of that outside
noise. I've assembled a compilation of the first 10 garden quickie videos for you here today.
I've also included links in the description to each and every one of the videos. In this
fast-paced world of ever-shrinking free time, hopefully these are just what your garden ordered.
Enjoy. Hey everyone, welcome to the very first ever garden quickie. It's the show where we
tackle the most pressing garden issues of the day in two minutes or less. I'm Jeff from the
Ripe Tomato Farms and today we're talking garlic scapes. Garlic growers in the northern United
States and Canada will notice in late spring and early summer a thicker robust tall stalk
growing right out of the center of the plant. Don't be alarmed, that right there is what we
call the garlic scape. It's actually the flowering stem and bud of hardneck garlic,
and as cool as it is it's actually a massive drain on the garlic plant. And if you're like me
and you really only want big garlic bulbs then they must be pruned off. You want to wait until
they grow taller than the rest of the plant and start to curl. Cut them down to as far as you can
go without damaging the rest of the foliage and that's it. Your garlic plant will now get the
clues to forget about flowering and put all of their energy back into the bulb production.
Fantastic! That's just what we want. But what happens to all those garlic scapes that we
collected? Don't throw them away, they're delicious. Literally tons of mouth-watering
recipes exist for cooking garlic scapes online and being a highly seasonal delicacy,
seeing them available at the store for more than a week or two is quite rare. So don't just toss
them aside, toss them into a frying pan instead. Garlic is amazing, one of those rare plants where
we get two delicious crops for the price of one. Be sure to like and subscribe and we'll see you
in the next one. There's two types of tomatoes based on their growth, both need support but in
different ways. I'm Jeff from the Ripe Tomato Farms, welcome to the next episode of the Garden
Quickie where in two minutes or less we tackle your garden's most pressing issues. In today's
episode we're talking tomato support and like we mentioned there's two different kinds of tomatoes
that you're going to be growing. Determinate or bush type and indeterminate or the vine type.
And all but the smallest varieties of the determinate tomatoes need support. Tomatoes are
dense and they weigh a lot and even the most compact kinds of tomato plants can become top
heavy and fall over with the extra weight of the fruit. Staking, tying or trellising your tomato
plant has three main benefits. First it gets them off the ground and takes away that invitation to
pests, rot and disease. It also allows for ease of maintenance for pruning, watering and of course
the harvest. And finally it most definitely saves space by training the plants upwards. So you can
plant more tomatoes in a given area. To stake our tomatoes we're going to need two things,
a vertical structure and a fastener. Vertical structures can be anything from a vine up above,
an intricate fence or trellis or simply a stake in the ground. Your fasteners can be anything from
store-bought tomato clips to the free twist ties you get at the grocery store. Avoid fasteners such
as bare wire, fishing line and even low weight thread as those things can cut into the stem
and destroy the plant. Tomatoes like most plants have nodes. These are the sections of the stem
between the branches. You can tie up your tomatoes on every node or every second node,
it's really your preference. Try not to tie off your tomato plants directly below a branch,
rather aim for directly above. Fastening directly below a branch can actually cause the main stem
to break if the wind, weight and conditions hit just right. As your tomato plants grow,
keep an eye on those upper nodes. Tie them off as need be, supporting your crops along their
growing journey. Happy staking guys! Green onions. There's a million ways to grow them
but one of the easiest ways to get a lot of green onions fast is to grow them from seed. Did you
know that you can skip buying green onion seeds at the store every spring and just harvest them
from your own garden? It's not at all hard? Let me show you how. I'm Jeff from the Ripe Tomato Farms,
welcome to another episode of the Garden Quickie where we tackle your garden's most pressing issues
in two minutes or less. And today we're focusing on the green onion seeds, more specifically how
to grow, flower and harvest your own seeds, giving you one more path to unlimited green onions.
Green onions, also known as scallions, are a mild allium variant grown for their delicious green
stalks. Because they're a relatively fast grower and we only harvest the foliage rather than a
resource-expensive fruiting body, they are an ideal candidate for growing from seed. However, even
though they're really easy to grow and they readily go to flower for us, green onions are still a
meaning they only seed in their second year. So if you're planning on harvesting a bunch of green
onion seeds for sale or for future crops, plan on doing so a year in advance. Okay, timing aside,
green onions will readily flower in their second year. They do this by sending up a huge flower
stalk around mid-spring. All alliums have what we call perfect flowers, meaning they have both
male parts or stamens and female parts or pistils. However, these guys cannot self-pollinate.
Because of this, multiple flowering stalks are usually necessary, as are pollinating insects
such as bees. And further to that, it is advisable to grow your green onions outdoors in the spring
and summer. These are the things that are going to contribute to the most viable seed.
Once pollinated, the flower stalks will slowly turn brown over the course of early summer. Leave
them on the plant as long as possible. Onion seeds are heavy and they won't fly away in the wind, so
don't worry about that. Once the flower head really turns brown and dries out, you can see the black
seeds formed in their own little individual packets. Now you can go ahead and collect the heads from
Shake the seeds into an envelope, deli cup, or similar container and store in a cool dry place.
I've had green onion seeds germinate at least six years after harvesting,
so the seeds can last a fair amount of time. You're going to end up with a lot of them,
so pass the seeds along to a family member or someone that's just getting into gardening.
Green onions are a great first-time crop for beginners and you'll have more than enough to
There's two ways that I like to harvest lettuce,
each with its own set of advantages depending on the situation. Hi I'm Jeff from the Right Tomato
Farms and welcome to another exciting episode of the Garden Quickie, where in two minutes or less
we tackle the most important gardening questions of the day. And today we're talking about how to
harvest your lettuce. It's literally my favorite time in the garden and that's harvest time.
Finally, after a long cold spring this upright heirloom romaine is ripe for the picking. Great,
but how to harvest it? Well that all depends. There's two ways to harvest, the cut and come
again method and the all at once method. Let's cover the cut and come again method first.
With this method it's pretty self-explanatory. We're harvesting the outside older leaves of
We do this in the hopes to keep the plant alive and producing so that we may come back again and
again and harvest some more. Sounds great and it really is, most of the time. Provided the conditions
and the variety of lettuce are right, we can keep revisiting the partially harvested plant
time and time again up to a point. The second method is where we simply cut down the lettuce
right at the root collar or just below and harvest the whole plant all at once. This is the method
that we'd choose if we were pulling lettuce for a market or maybe the variety didn't support
multiple harvests, you know like icebergs, or we just simply needed it all and cutting off a few
leaves wasn't going to be enough. But then under normal circumstances why would we ever choose not
to multi-harvest? Well even if they can harvest over and over a lettuce's life is finite. Some
varieties last longer than others and some seasons well it simply doesn't work to multi-harvest.
Right now entering the heat of summer lettuce will begin to bolt or flower no matter what we do.
To maximize the harvest it's sometimes wise to cut it all down at once and live to plant another day
when the weather is cooler. So next time you're gearing up to cut down that lettuce
take a second to think which method best fits this particular harvest.
Zucchini, the powerhouse squash that produces bounty by the bucket loads. But what if we were
to grow them in buckets? Is that even possible? Well it is. Container zucchini is most definitely
a reality and it's not that hard. I'm Jeff from the Ripe Tomato Farms and welcome to another episode
of the Garden Quickie where in two minutes or less we tackle the most pressing issues
of your garden. And today we're talking how to grow container zucchini. In this episode
there's three things that we have to cover. Soil, pot size, and the actual planting. You can grow
your container zucchinis right from seed but I always do mine from starter plants. You can do
them from starter plants that you've made yourself or ones that you buy at the store. It's just a
much easier process doing from a well-started zucchini plant than it is trying to do it directly
from seed. Before we get going with the planting let's look at what we need to start. Zucchini
enjoy a rich organic filled well-drained soil that's slightly acidic. Most commercial potting
mixes will do great in this regard. Conversely you can also make your own DIY potting mix
and I'll throw a link in the description if that's something you're interested in. For pots
it's all about the size. You can use grow bags, baskets, buckets, standard pots, just about anything
that can hold soil but drain water. Fill your pot or container all the way to the top with the soil
mix and make a depression in the center as deep as the zucchini plant is from the bottom of its pot
right up to the first whorl of leaves. Place the plant in the middle and backfill and done. Well
sort of. Mulch a nice thick one inch layer of straw, leaves, or grass clippings. Bare soil evaporates
water fast and heats up as the summer progresses. You don't want to have to water these guys daily
as any nutrients that you built up in the soil will simply be washed away. And speaking of
watering, quite literally the easiest way to water zucchinis that you're growing in containers
is from the bottom. Let the soil in that pot soak up as much water as it can possibly hold
then put your zucchini in your favorite sunny location. These plants are going to need a
minimum of six hours of direct sun every day, more if you can give it. As the summer progresses and
your zucchini plant starts to grow bigger and bigger, quite likely you're going to need to add
nutrients to the pot. Remember growing in pots or containers is a closed system. Once the zucchini
plant uses up all the nutrients in this soil it's got nowhere else to go for food. Make sure to
fertilize with an all-around organic blend not super high in nitrogen. Fairly soon after planting
watch for the flowers. There's two kinds, male and female. It's the female flowers that produce
the fruit. For such a large plant to be able to be grown in pots and containers is really quite
amazing. But they can and they do surprisingly well, which is great news for patio growers
and gardeners like me who always seem to be short on space. When summer hits it can hit fast. In less
than two minutes your zucchini can go from this to this. You know what else can happen in two minutes
or less? Garden quickies. Where we aim to tackle the most pressing gardening issues of the day
and today it's all about watering. There's five key watering tips that I wanted to share with you
today. We got less than two minutes so let's get going. Watering tip number one and it's a biggie
and it's the time of day that you water. In the heat of summer the best times of day to water
in order of preference is morning, afternoon and then evening. Watering your plants in the morning
sets them up to tackle the heat of the day and is by far the best option. Watering in the afternoon
you know during that midday heat can alleviate some stress definitely but it's wasteful due to
evaporation. You'll lose more water than the plants can take up and watering at night can have the
effect of keeping the foliage damp when you don't really want it to be and crops like tomatoes and
zucchinis can start to develop leaf problems and even disease. If you have the option always water
in the morning and to expand on that looking at this zucchini here tip number two don't water the
leaves. Like we said it can invite disease and really the plant's roots are the workhorse of
water uptake. Let them do their job. Try to water your plants at the base rather than from up top.
It's more efficient and it's better for the plants. At number three we have length of watering. Longer
is always better. Short frequent waterings tend to grow plants with short shallow root systems
and plants with shallow root systems are far more susceptible to drought
and heat issues. Water more thoroughly but less frequently for healthier more resilient crops.
Here's a neat trick for you container growers. Water from below. Have you ever noticed how much
water pours out the bottom when you water your pots and containers from above? Hint it's 50% or
more sometimes. Not only is that a huge waste of water it's also messy and on top of that how much
nutrients are lost in the process. Let your plants soak up as much water as they can for four to five
hours and the chores of watering your pots every day are a thing of the past. And finally the last
watering tip is not a watering technique at all. It's to mulch. Make sure the top of your soil is
covered with a thick layer of mulch at all times. It'll mitigate extreme heat and of course
evaporation. Have a look at this corn bed here that I watered nearly a week ago. For the last five days
we've had extreme heat up over 100 degrees Fahrenheit yet the soil below is as moist as
anything. You gotta mulch. It's the best thing you can do for your plants. Well other than watching
more episodes of the Garden Quickie of course. Tomato pruning. This isn't one of those necessary
chores like watering or mulching. Your plants can and will grow just fine without it but if you're
growing indeterminate or vine type tomatoes most certainly your plants and thus the harvest can
benefit from some managed pruning. Hi I'm Jeff from the Ripe Tomato Farms and welcome to another episode
of the Garden Quickie where in two minutes or less we tackle your garden's most pressing issues.
Today it's all about pruning your tomatoes. Before we get started let's touch on the four
main reasons of why you'd want to prune your tomatoes in the first place. First up it keeps
the plants manageable. Indeterminate tomatoes know no bounds and will continue to grow forever
if left unchecked. Second you can maximize production by focusing on fruit development
instead of ungodly amounts of foliage. Third it improves air circulation to minimize pests and
disease outbreaks. And finally pruning your tomatoes allows them to shed unwanted lower leaves and
stems that are simply a drain on the plants and they can also be a conduit for pests and fungal
outbreaks. Okay we've made the leap to do it so let's get to pruning. When managing our indeterminate
tomatoes there's two types of pruning. Removing the suckers and stem or foliar management. Let's
focus on the suckers first because that's the easiest. Suckers are the easily identified 45
degree shoots that spring out of a stem axle. That is where a side shoot meets the main trunk.
Suckers are hyper vigorous shoots that are almost tomato plants unto themselves. Left alone and
they'll just become main stems and will actually produce fruit pretty readily. Great stuff but a
single tomato plant can only do so much and too many suckers left to run wild will be a massive
drain on the plant and most won't produce before the season comes to an end. Ironically leaving you
with less of a tomato harvest overall. Pruning them is easy. No tools required. Just pinch off the
little shoots with your fingers. They pop off surprisingly easy when they're young. As for how
many to prune I prune all the suckers up to the first branch of the plant with flower clusters.
If you do this when flowering starts you should only need to do this maybe once or twice a year.
The second type of pruning is removing old or sick or really really low branches. We do this to keep
the airflow nice and high and the plant health at a premium. Using clean clippers snip off any leaves
that are touching the ground and if you have to remove entire branches. Don't go too crazy with
this type of pruning however the plant does need foliage to protect the fruit from the ever
increasing heat of the summer sun. Usually if you just focus on removing the leaves that are touching
the ground you know those really really low ones and any obvious sick or dying leaves you'll be
just fine. Hey happy pruning guys and all the best with your tomatoes. One of the most important
factors governing the success of our crops is spacing. Just like this sweet corn behind me here
the space between your plants and rows has a huge effect on your plant's health and productivity.
However corn is a bit of a unique one in that spacing governs not only growth and health
but also pollination and crop viability. It's the fine line between having enough space for these
large vigorous plants to grow but also being close enough to get adequate pollination for the ears to
develop. Welcome to another episode of the garden quickie where in two minutes or less we tackle the
most pressing garden questions of the day and today we're talking corn spacing. A little less
than three weeks ago we seeded this eight foot bed with golden bantam sweet corn. I sowed the
seeds at a spacing of four to six inches. It worked out great and nearly all the seeds sprouted but
much like carrots or beets we've sown far more than we need. About double in fact. Corn should
be spaced about 10 to 12 inches apart from each other. Closer than that and the plants begin to
compete with each other for water and nutrients. And for a big vigorous plant like corn that's not
going to end well. But any further apart and the corn won't receive adequate pollination. You see
corn is entirely anamophilous or wind pollinated so it requires other corn plants in a specific
density of spacing to get max pollination and thus max harvest. It's best to thin when the plants are
about four inches tall and have three to four blades. Don't pull them out simply cut them off
right at the root collar. These plants here are a little bit large and I definitely want to thin
them at a much younger age at least a week or so ago. Either way if you seeded at a six inch spacing
simply cut down every second plant right at the root collar like we mentioned. Now the root collar
is where the stem meets the soil. Easy stuff that's it shouldn't take you long and your corn will be
well on its way to an epic harvest later this summer. Know what else doesn't take that long?
Garden quickies. I hope you enjoyed this episode and you'll consider checking out the next one.
Weeds. No matter how long you've been gardening weeds are inevitable. I agree they can be a
nuisance some of the time but really they're not the big bad enemy that they're made out to be.
Hi I'm Jeff from the Right Tomato Farms and welcome to another episode of the Garden Quickie where in
two minutes or less we tackle your garden's most pressing issues and today it's all about weeds.
In my world weeds are an indicator. An indicator of a healthy supportive soil. You see weeds are
simply a crop that I didn't plant. You see for the last 10 years I've been using weeds to boost my
garden for amazing yields. I do it in five different ways and there's only about 90 seconds
left so we better get to it. The first way that I use weeds such as these dandelions here is as a
dormant bed cover crop. Weeds protect your garden's most precious resource by eliminating erosion,
moderating temperature swings and keeping the soil bioactive and for little to no effort on our part.
The second way that I use weeds in my garden is to chop and drop which is basically just like it
sounds. Simply cut the weeds down and mulch them in place. The foliage then returns valuable nutrients
and organic matter back to your soil which is perfect to facilitate the next crop. The next way
that I use weeds is very similar in that I just chop them up and use them as a mulch around the
Green mulches like weeds can boost your plants to unreal yields and being free the price is just
right. If it's the end of the season and you no longer have any plants around that you need to
mulch, simply put the weeds and all their leaves into your compost to help boost future soils
and future amending. Composts aren't just for kitchen scraps anymore. Weed foliage is full of
amazing micronutrients and trace elements for you to make the best future soils with. On top of that
weeds break down super fast and being a green they can actually speed up your compost.
Last but not least the final way that I use weeds in my garden is to make a weed tea fertilizer.
A while back I did a whole video on the process but essentially what it is is you just ferment
the weeds in a bucket of water for around six weeks or longer if you have the patience,
strain it and then use the liquid solution like you would any organic liquid fertilizer.
You see weeds by their very nature can pull more nutrients out of the ground than most plants and
that makes the resulting tea concoction probably the most complete amazing feeding boost that you
could ever give your plants, truly. The other bonus of weed teas unlike a lot of the other methods
is that you can store this stuff for a couple years so even if you don't have an immediate
use for it store it and use it on future gardens. I hope that by using weeds in these five ways
the next time you see a dandelion or a clover or even a buttercup you'll look at it in a different
more positive way. Potatoes. Amazing plants that grow more potatoes out of the root nodules
just below the soil surface. The single most famous root crop has another distinction
in that more potato plants can be grown from the potatoes themselves thus creating an infinite
cycle of bounty. Hi I'm Jeff from the Ripe Tomato Farms and welcome to another episode of the Garden
Quickie where in two minutes or less we address the most asked garden questions of the day
and today it's all about sprouting or chitting your potatoes. During select times of the year
you can buy seed potatoes for planting but did you know that likely you already have all you need to
get started right at home? That's right you can create infinite potato yields by simply using
your grocery store potatoes. I start this process about a month before I want to be planting my
potatoes out in the garden. Baby potatoes can be harvested in as little as 60 to 70 days
so you can do this several times a year up to two months before your first fall frost.
Getting your potatoes to sprout and to a plantable state is a three-step process
but it's much easier than people realize. Think about it how many of us have done it purely by
accident? First rinse off your potatoes in cold water. Many store-bought spuds are sprayed with
growth inhibitors you know to prevent them from sprouting during transport and storage so you
want to try and wash that stuff off. As a bonus the moisture may also help to trigger sprouting.
Second place the potatoes in a shallow dish or deli cup or even a box in a cool dark place for
a couple of weeks. It's at this time that the potato eyes emerge or become more pronounced.
Now potato eyes are the dormant stem buds from which new plants are going to form.
And note a single potato plant can have many many viable eyes so you don't need to chit a bunch of
them to get enough potato plants. Lastly once you can see that the eyes are starting to form
and are really noticeable pull the potatoes out into some light at least six to eight hours a day
and watch them sprout. At this point if your soil temperatures are above 40 45 degrees fahrenheit
you can go ahead and plant them in the ground. You want to cut off sections of the tuber that
is sprouted rather than planting the whole thing with multiple sprouts. Remember you've got to
observe proper potato spacing. If it's too cold out or the space isn't ready yet you can do what
I do and create little potato starter plants giving you more time to plant out your potatoes
in the garden at your leisure. Good stuff. Thanks for watching guys and hey if garden quickies are
your thing be sure to click on this playlist here as we explore and solve more growing issues
in two minutes or less.