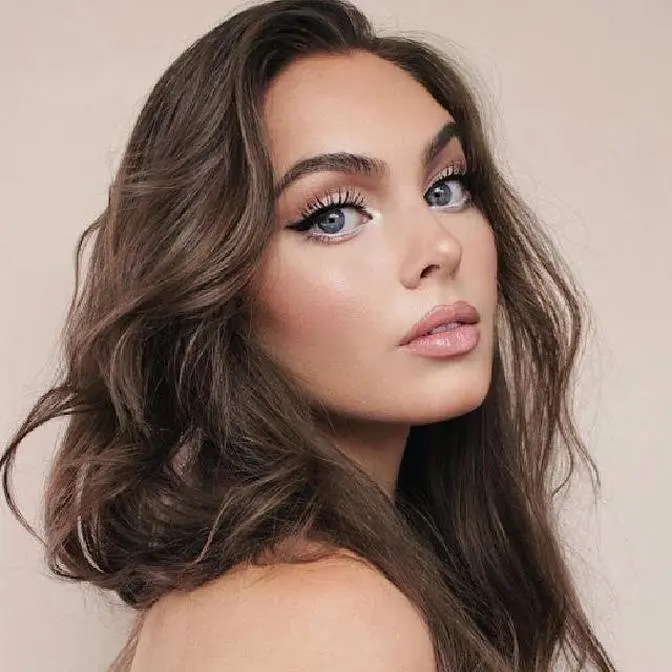
22 Video Views·Feb 16, 2025 #1 #2 #3 Hey hey, it's Jackie & THUMBS UP for Holland Roden as Lydia Martin from mtv TEEN WOLF Braided Hairstyles Tutorial! In this tutorial I'll show you how to get the look and recreate the braided headband, milkmaid braids, side braid & multi-braided half up half down style - if you want a part two with more Lydia hairstyles without plaits, let me know in the comments :) xo
See my LYDIA MARTIN MAKEUP LOOK here: https://youtu.be/-QzId9CuUm8
More info on all the products used to create each Lydia look is listed below! Ps. I love Dylan O'brien & Tyler Posey lmao
I love Holland Roden and this isn’t my first tutorial on the beauty, if you are looking for more makeup & hair inspiration for the beautiful actress, check out my older tutorial here: https://www.youtube.com/watch?v=qY4h2_8Bwc8&t=3s
Let me know what your fav style from todays video that you would wear?! I think style number 1 with the headband braid and curls is my fav! Make sure as always to vote in the poll! I love to see the results :)
BTW for the Lydia Martin Hair colour, my hair is already auburn and I did spray in my roots the L'Oreal Root Cover Up in Red on roots. Great product for emergency root touch up and when I have my skin very fair and change my camera settings, I can look like I have red hair! I also tested out the Clairol Colour Crave in Shimmering Copper and I love how it added to the style.
LYDIA TEEN WOLF INSPIRED OUTFITS
LYDIA DRESS #1
Dress from LuLu*s:
https://goo.gl/C51hfN
Earrings from Claire’s
Buxom Gloss in Kimberly (Sparkling Bubblegum)
LYDIA OUTFIT #2:
Mesh Dotted Top from Forever21
Undershirt from Aritzia, it has straps I just tucked them into a strapless bra
Red lipcolour is Benefit Punch Pop gloss in strawberry
LYDIA OUTFIT #3
Floral top from Modcloth.com - there are so many more similar options to Lydia’s dress out there though, I just went with something I already had!
LYDIA OUTFIT #4
Tank from Aerie
Sweater from ShopRuche.com
Added a small pendant to complete the look
Pink Lipcolour is NYX Ombre Lip shade with Revlon Skyline Pink in the centre
MY LYDIA INSPIRED SCENT: Finished off each look with my new Marc Jacobs Daisy Perfume - 10th anniversary edition! See the fragrance here: https://goo.gl/YezFhb
HAIR PRODUCTS
OSIS Volume Up Volume Spray
Living Proof Heat Protectant
Pantene Airspray
Bellami Wand (medium barrel 32 mm - 32mm) & Bellami
Balayage 220g 22" Ombre Hair Extensions #2 Dark Brown/ #6 Chestnut Brown
My exact extensions here: https://goo.gl/DgtHBo
Have you seen my latest series of hairstyles featuring the cw RIVERDALE Hairstyles with Cheryl Blossom, Betty Cooper, Veronica Lodge & Josie and The Pussycats? Check it out here: https://youtu.be/J8UjX-bnkHM
Also, did you spot my Beauty Box in my set? See my “Everyday Princess Picks” with Essie here: http://www.essie.ca//jackiewyersxessie
ALL MY LINKS:
❣ INSTAGRAM: http://instagram.com/jackiewyers
(if you try out these looks be sure to tag me & use the hashtag #JMakeupDay so I can look through your posts and spam ya!! )
❣ TWITTER: https://twitter.com/jackiewyers
❣ FACEBOOK : "LIKE" https://www.facebook.com/JackieWyersB...
❣ WEHEARTIT: http://weheartit.com/JackieWyers
Disclaimer: Not Sponsored, I love TEEN WOLF & hope you loved this tutorial!
Ps. if your reading this… comment “Stydia for Life!”
hey it's Jackie and welcome back to my channel for today's video I have a
series of hairstyles inspired by Lydia Martin from Teen Wolf and this has been
requested a lot on my channel so I asked you guys to send me your favorite looks
on Instagram and Twitter and I got a lot of them so I did narrow it down to my
favorite braided hairstyles from the show but if you want to see a part two
of some more simple but equally as cute hairstyles then be sure to give this
video a big thumbs up and leave me a comment letting me know you want a part
two because I can definitely do that and also last thing before I get started I
did just start up a vlog channel so if you want to see a little bit more about
my life then click the I and go over there and subscribe hope to see you over
on there but anyways let's just get started with this hairstyle
starting with my natural hair I have already added in some l'oreal root
touch-up in a red shade for the illusion of warmer toned hair up in my roots and
of course let's start with a heat protectant this one is from living proof
and then take a section from behind your ear and you want this section to be
substantial because we want the braid to be thick but at the same time you don't
want to take too much hair from the side so it depends on your hair thickness
divide the section into two and I decided because my hair is on the
thinner side to add a one clip weft of extensions in there and I'm going to
just braid this all the way down and use the mini elastic to tie it off gently
expand the braids you don't want to do this too much and start to get a frizzy
or messy texture because hers is pretty polished and then I'm taking a three
clip weft of extensions to match her volume but of course you can always use
just a smaller or braid and then have more of your natural hair to work with
for styling and picking up a top section of my hair and I'm combing this
backwards using a volume spray that I actually got at my benefit shoot
recently so check out my vlog channel if you want to see behind the scenes of
that one and then I'm going to divide that section into two and just pin it
backwards to hold this style in place before I create the braided headband
play with this front section on how you want it I like to have a bit of volume a
little bit of texture there and once it's placed I'm just taking that braid
and I'm laying it over the bobby pins that I just put down and then securing
with a more bobby pins on the side comb the sides of the hair that's
free-flowing over and if the bobby pins that we placed down at the beginning are
in the way then just readjust them and now it's
time to curl the hair I'm using my Bellami six and one curling set I've
had this for years and it never lets me down and I'm going to start with one
side and I'm going to curl it towards my face I like to just pick up sections as
I go and keep those curls going about where my jawline is I start the curl and
then when I get to the other side I'm going to go away from my face so the
curls are actually going the same direction all the way around the head
and I really like how this looks before that soft and bouncy texture and
combing really lightly through the top half of the curls and then teasing at
the bottom adding in my favorite hairspray at this one is the Pantene air
spray to lock in the style and then I decided to do something really fun so I
thought the braids didn't quite pop in my hair enough so I went in with this
Clairol paint in color and then I painted the braids and also a little
highlights going upwards and through the ends of my hair and you're supposed to
go in and apply heat with a blow-dryer to really lock in the color so he did
that but really really low and off camera because it could make it a lot
more frizzy because the style is already complete but I think it looked really
cool and I'm going to use this a couple more times because I don't normally play
with dye in my hair at all but this is wash out and it doesn't damage the hair
and I thought it looked really pretty especially for this redhead look
also how similar is the dress I'm wearing to Lydia's in this episode this
one is from Lulu's so I will have a link down below and for makeup I kept it very
soft super pink on the lips I'm wearing a pretty buxom foot boss on to look too
a classic milkmaid braid so start by creating a center part all the way from
the front of your head to the very back and make sure it's as straight as you
can get it going towards your neck and then I decided to add extensions for
this look - again optional but on one side I went with a two clip weft and
then the other I use singular wefts and I found that the two clips actually were
easier to work with and that the single clips when I was styling kind of lost
her place in my hair so that's a tip I found as I was trying out this style but
the first thing that you got to do for this look is to take down some smaller
sections of hair one piece from in front of your ear and then one behind and this
will be the accent curls later on before going straight into the braid you want
to take a front section that will sweep forward and I'm going to divide this and
bring it underneath the whole section of hair and then I'm going to add it into
the last strand of the normal braid I decided to do a Dutch braid so that the
hair would be easier to tuck over and so that just means I'm braiding under
rather than over and before I section off the braid I'm again readjusting that
front section to be looser and more swooping
and the other side same technique making sure that first piece is sweeping under
the rest of the section divided into three go under rather than over in your
braid so that you get kind of an inverted loop at the front that will
make a pretty shape when you bring the braid over to the other side as for
pinning add a couple bobby pins that throughout the braid and of course make
sure the end is laid flat and now we're just gonna add some really pretty curly
details which really add to the look I'm using the same Bellami curler as before
and I'm curling one away from my face and then one towards add a little bit
more of hairspray and here is my complete look this top is actually from
forever 21 I just picked it up and then I added an Aritzia
tank underneath so I think it's really pretty kind of a sexy a classic look and
next up we have a side braid
for this style again I'm using some heat protectant bringing my hair over to one
side and I'm making sure that the crown section has a bit of a poof
and also I'm adding a bit of teasing to that front section where we are going to
have some detailing so with the curling wand curl away from your face and then
add a couple more curls first going outwards and then inwards when you get
to the back to help shape the braid and give a polished look I added a lighter
set of extensions that I have from years and years ago for extra volume and to
lighten up the braid and then with that front section that we curled use a
couple of bobby pins to give it a flowing texture and I've done this type
of braid before but basically I take the piece that is flowing over my shoulder
divide it in half and I'm going to start a French braid but I'm only gonna French
braid for three like stitches of braids so you're gonna bring it bring in big
chunks and then just braid normally and I really like to do this because it
really sits on the neck a lot better especially when you start to pull it
apart for that thicker look and then I went in with a bubble wand and this one
is from nume and I'm creating a tiny little curls teasing them out so they
look more natural add in some hairspray and then I'm just
loosening up again as I see fit like Lydia and I'm wearing a tiny little
white hair elastic to match her look and just keep on watching if you want to see
this last style which is a really pretty half-up half-down deal with a unique
braid
once again starting with the center part and I'm actually working on straight
hair here so we got a little bit of a variety and I'm picking up a small
section near the hair where it's divided and we're going to divide in two and
create a French twist so we're twisting backwards and every
time you twist a strand around the other one add a section of hair into both
sides and just twist again when you are a little bit above your ear pick up
another section of hair and create a regular braid all the way down and then
tie off with an elastic Lidia style was quite toss old in the front so start to
loosen up that twist and just repeat on the other side make sure the crown
section is brushed backwards before bringing the two braids together at the
back of your head and to tighten up the style you want to do a little butterfly
motion so you twist the tail of the braid up and through the loop and then
tighten and undo the elastics so you just have a flowing hair and now for the
accent braids pick up a small section of hair right underneath that twist create
a normal tiny braid position this over the elastic to hide it and then pin and
I like to wedge the pins into the twist and you might want to do an X so this
really stays put just undo the remainder of the braid and your hair will flow
down so let's repeat I'm braiding the hair again bringing it over using a
bobby pin and watching it into the twist and then undoing the remainder of the
hair and then I'm just adding some straightener to the hair wow I'm sick so
like my sentences are a mess right now but yeah just right in the hair and I
like to add a bit of texture around my face with really subtle curls with the
curling iron and then a little bit of texture spray and let me know which
style are the ones that I've shown is your favorite and make sure to give this
video a thumbs up
thanks for watching I hope you guys enjoy these Lydia Martin inspired
hairstyles and if you did make sure you hit that thumbs up button and subscribe
for more beauty videos every week if you want to see the clothing items that I
picked out for this video they also will be linked down below along with my
Instagram Twitter and Facebook I'm most active on Instagram and Facebook
actually but um Instagram I do tons of live streams so if you want to join into
those and send me requests I love doing live streams over there and of course I
now have a vlog channel so again check that out if you haven't seen it and last
thing I was so excited to get the Marc Jacobs at Daisy perfume this is one that
I already have but I just ran out of and it they sent it over to me but this is
the 10th anniversary edition so that's why it has different packaging but I
thought it was beautiful and she wears so much floral so I thought it totally
worked out um that's about it for the video I just love this and I had a lot
of fun with this tutorial and I'll see you in my next one