
How to paint a portrait from live model in oil painting. Complete guide.
Apr 22, 2025
A good likeness in a portrait of course is very important but in this video I want to show you
there is more. How I try to make a more interesting and animated portrait.
Drawing skills of course are very important but for those who cannot rely on it I have some
useful tips during this video. There are a number of simple things that you can think of
like a palette that invites you to paint. I will explain the importance of reducing tonal values
also reducing the number of brushstrokes. About the danger of an over elaborated portrait.
I show you why my friend plays Bach on the piano and also I show you what my guitar has to do with
Well welcome to my studio. You can see the daylight lamps above my head, on the easel my
self-prepared panel and my vertical palette. On the right the paint and the turps in which
I rinse my brushes. On the left more brushes, kitchen paper and behind that on an elevated
stand the chair for the model. I start the day early because I want to have enough time.
Barry, my model, is coming in half an hour. I have time to treat my panel with a thin layer of
raw umber diluted with turps. This as an impregnation medium to which the paint will
attach easily. The turps or white spirit, whatever you want to call it, will evaporate little by
little and in half an hour it will be perfect to start. In the meantime I show you some sketches
that I made some days before. I make these drawings to get more familiar with the model,
although I know my friend rather well. I gave my model an ipad with a youtube video so it's easier
for him to maintain the pose. I make only one pre-mixture for the local skin tone. Terra Rosa,
yellow oak and titanium white. With a test strip, a piece of paper, I check that close to his face
the only place that's precisely controllable. The rest are half tones and shadows. You can't
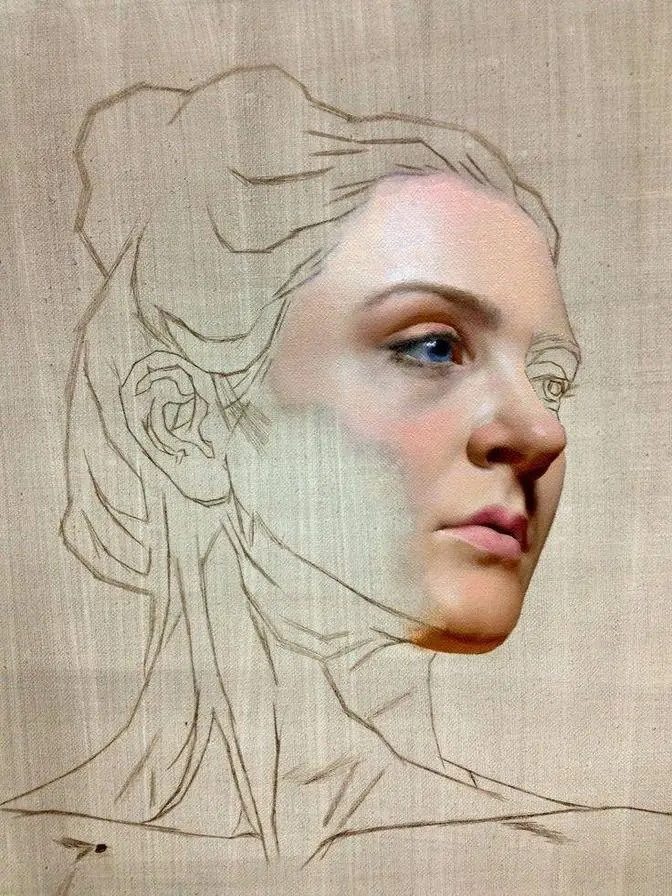
check these. That will be my starting point. But first my drawing. The sketch in raw umber.
I always start with the width of the face.
Then I measure how the width is related to the height.
I draw the midline.
Halfway between the top and the bottom will be the eyes.
I keep measuring and checking during the whole setup.
After about 45 minutes the underpainting is more or less finished.
But I can still make some corrections with turps.
So I start with the basic mixture that I created earlier. The local skin color.
More white to make it lighter.
Crimson for the nose.
For the half tone on the cheek I see if green light is the solution.
Maybe Terra Rosa and Oxide Green. No, that's too green. Cut me in red. That's better.
For the shade under the flap I'll try Transparent Oxide Red. Darker and also Viridian Green.
I keep the shadows more red than I see and I never use black or blue. That doesn't work. Never.
I'm working now with a live model.
The danger of photography is, among other things,
that the light parts are often converted far too light and the dark parts far too dark.
And the colors are barely visible.
If you only work from photography then you have to keep this in mind.
To get a good sense of the overall tonal values I need to make the darkness under the flap now.
Transparent Oxide Red and Ultramarine Blue. That makes a warm kind of black.
Under the tip of the nose a dark shadow. Red and green again.
Connection here. For the beard I use the pre-mixed gray tones.
A blend of Ivory Black, Yellow Ochre and Titanium White in three shades.
Some green for more variety.
When I change color I always clean my brush.
I don't want to mix up colors into the new hub of paint.
For the mustache I add Green Light and Yellow Ochre.
I try to keep the whole in simple planes and make the tonal values
slightly too dark to be able to add more lights on top later.
The ear also in two simple planes.
In the beard the skin color shines through so I add the skin color.
Once again I keep it all schematic.
Because the neck is further away from the light I make the skin color
more gray. I make some new skin color.
And here too I knock down a little bit the color strength with more gray.
For the coat the same combination of Transparent Oxide Red and Ultramarine Blue.
Here too I change colors to appear as lively as possible.
Still missing the cap. I block in the planes in the simplest brush strokes.
I can always see later if I want to elaborate them more.
In the beginning I said likeness is not everything.
There is more. It's like playing piano.
I asked my friend to play Bach. Listen.
She plays all the notes and it's correct.
Notes are there and you can hear what it is.
Now it's music. Maybe you don't hear every single note but you hear passion.
And it's still the same piece of music.
The same goes for the likeness in the portrait.
All the details can be placed correctly. It doesn't mean that's interesting to see.
The power in a portrait is not in the details.
But in a controlled simplification carried out with feeling.
I love to work from life because I see less details and I'm forced to keep it simple.
I want to express passion.
Now about tonal value. That is the relation between the darks and the light.
There can be thousands of colors but at most 10 steps of value.
I try to reduce that number to more or less 5 steps.
Because the fewer the steps the stronger the portrait.
Take a look at the great masters.
A good painting is about a good communication of values.
In this portrait I need an essential part of white in the painting.
Barry came with a dark t-shirt under his coat and I asked him to change that for a white one.
Because I definitely need that white spot.
Now I have pretty much the ducks in a row as Richard Smith says in his book.
Now I can continue but I have to be careful.
I must resist the temptation to fill in too many details.
I don't want a photorealistic painting.
No, I want an authentic piece of artwork.
My piece of artwork.
We are done for today.
A session cannot last too long because the model and I, we get tired.
Think of that.
It's an advice I want to give you.
Maybe you are running on empty.
Realize that.
Painting is about making decisions.
When you get tired you're not able to make good decisions anymore.
The day after the session I make some corrections
and I decided also to paint more of the coat.
That seems better to me.
In a moment I give you all the information about paint, brushes, medium etc.
but I want to show you some things in the end as a conclusion.
You see I needed this white against the darkest part of the portrait
but I repeated the same trick here.
Darkest part, lightest part and here it's sharp.
Here it's vague, lost and found edges.
Important in portrait painting.
Try to find these.
Makes it more interesting.
I didn't do anything more with the cap.
The way it is I like it.
I could do more but do I gain anything?
That makes it more real.
Remember if you want to add more details there's a risk that it can be silly in the end.
I really need the fresh bold brushstroke image of the whole portrait.
Maybe there are some brushstrokes that are not really successful
here or here but if I would make them more realistic
I would lose the freshness of the painting and that's what I really don't want.
This is it.
I know it's my friend.
Maybe the likeness is not 100% but I know it's him.
In all my videos you hear my cousin Will Sofie.
He composed these beautiful tracks exclusively for me.
Thank you Will.
That brings me to my own guitar.
Once Will said to me Ben if you want to make progress
you have to take the instrument out of the case and put it on a stand in your studio.
That invites you to play.
Great advice.
I made progress since then and something like this also applies to a palette.
The small palette is worthless.
A large palette with little paint is also hopeless.
Pamper yourself with good stuff that invites you to paint.
Everything can help.
The colors on my palette.
Below in the description you'll find the brand and the numbers.
I painted this portrait with these five brushes.
The white bristle from the beginning.
Doze Marie classic long flat number 12.
The most I did with the Escoda synthetic flat brush number 10.
The same but smaller for the initial setup in raw umber.
Sporadically I blended some brushstrokes with rosemary classic agate number two.
The glasses and some highlights with rosemary 301 synthetic pointed round number three.
I rinsed these brushes in titan ogreless turps.
I also diluted the paint a few times with it.
By the way gambling gamsoil is a good alternative.
I did not use any other medium.
My panel is a three millimeter DM that I prepared myself.
Well thank you for watching.
I really hope you like it.
See you next time.
Peace.