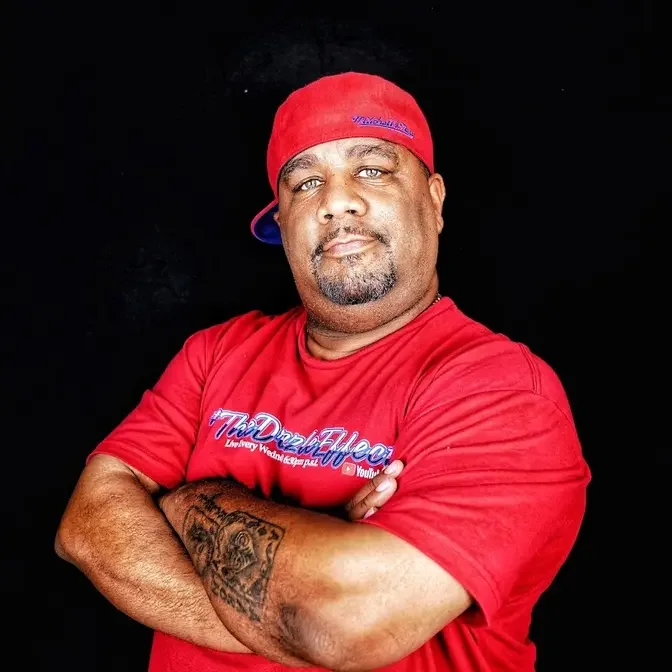
Pulled Pork 101: Easy Smoked Pulled Pork for Beginners - In this video, I’m showing you how to make juicy, tender pulled pork smoked to perfection. This recipe is perfect for beginners and uses my special blend of rubs for amazing flavor. I’ll also share a delicious Southern coleslaw recipe that pairs perfectly for the ultimate pulled pork sandwich. Follow along step-by-step and get ready to impress your family and friends with this classic BBQ favorite!
Seasonings and Rubs: AB's BBQ Rub - https://shorturl.at/hwJV5 AB's Burger Rub - https://shorturl.at/hrABH All Purpose Seasoning: https://shorturl.at/prtH0 The Level Up Series A Rub: https: //shorturl.at/oyAHR The Level Up Series B Rub: https: //shorturl.at/ctET4 The Level Up Series Bundle: https: //shorturl.at/ptDFX
"Subscribe and hit the bell for new recipe alerts!"
Online YouTube Store - https: //shorturl.at/hmpX6
SUBSCRIBE FOR MORE ►►
PERKS for YOUTUBE MEMBERS "For just $5, unlock bi-weekly recipes, private live streams, exclusive content (TBD), and get credited in our videos. Become a YouTube member today! Thank you in advance!". So Join Smokin' and Grillin' wit AB now! - https://shorturl.at/aftEN
DISCLAIMER: This video and description contains affiliate links, which means that if you click on one of the product links, I’ll receive a small commission.
Okay, folks. Look, you didn't already
seen the thumbnail. You know what we
doing, right? We doing pull pork. I
really want to say this is like pull
pork 101. This is great for the
beginner. It's very forgiving. You guys
make one of these, I promise you, after
you make this a couple of times, you
ready for a brisket. Super easy. Let's
get it. Okay, so you guys can see the
ingredients that we're using. Really, we
just going to have some barbecue sauce.
All of that's optional, but these right
here going to be the stars, right? It's
going to be about your seasoning, and
that's where we going to get our
profile. And we got to have a bun,
folks. Now, the full ingredient list is
on my website. That's smoking and
grillingwithab.com and that's
witab.com. Today, I'm going to be using
my Rect RT1200 dual fire plet
grill. Okay, so look, now that we went
over and we talked about we going to be
using a plet grill for this right here.
Now, I want to show you just like a few
tools you're going to need. You're going
to need yourself something like a sharp
knife like this, like a bony or a fillet
knife, something that's a little bit
flexible. But the main thing is we want
it to be sharp. Then we going to need
ourselves like a, you know, a meat
thermometer, right? This is mine. Most
of you guys got one of these. For those
of you guys out there that don't have
it, let's go ahead and get you pick
yourself up one of these. Now, first
thing I'm going to do is I'm going to go
ahead and take my pork butt. Right now,
you guys can look at it. You can see it.
Just these lines you see is just because
I had it sitting on top of a cooling
rack. Right? But I'm going to bring it
over here on this side. And I want to
show you something. You see this fat cap
right here? We want to take some of this
down because we want to make sure that
we get the seasoning a little bit close
to that meat. Right? So, I'll just take
it and we'll just cut it. What I'm doing
now is just trying to see just exactly
how thick this
is. Right? So, what I don't I'm trying
not to score the meat, but if I do,
that'll at least let me know how thick
this is. And then we can just take some
of this off. Like, you see that right
there? That's perfect.
So with this plet grill right here,
super easy, right? I told you it has two
zones, right? It's a dual fire dual
zone, you know, plet grill. So you got a
zone that'll be over this way and one on
this way. We're not going to use this
one. We going to be using this side. So
it's real simple. Push power. It's at
275, but we not going to do 275. We
going to go ahead and drop this down to
250° and we going to let that build up.
See how it says actual right there?
That's 86. That's what it is in the
inside. So once that reaches 250, we
golden. Okay. So look, as we building
up, you know, fire on our plet grill
right now, we going to come over here.
You guys just seen, you know, I trimmed
them. I don't want I could do a little
bit more, but this is enough. And
listen, to go into a little bit more
detail why I trimmed it like that, cuz
listen, after we take the time to put
the binder on here and our seasoning,
what happens then at the end, if you
give that big thick uh cap on there, all
you going to do is all that's going to
slide off. And we want to get some of
that seasoning inside of this meat. You
know, we got right here, right? So today
I'm going to be using which in most
times I'm always using like a uh a
yellow mustard. You know what I mean? So
this is the part where everybody say,
"Man, I don't really like mustard." yada
yada yada. Uh some people say they can
taste it. I'm telling you, I don't.
Everybody else around me, they don't
even The binder has never ever come up,
you know, in the conversation, right? So
I'm just turning it over. We going to
work on the whole thing, but I just want
to get it nice, you know, and
tacky. Right. These are the three things
that I'm going to be using, you know, to
go ahead and get my seasoning, right?
I'm using my barbecue rub. You guys have
any type of barbecue rub or any type of
flavor you want to put on there, that
works. And then for you guys that have
that bee out there, I always put this on
my heavier meats, right? That this right
here, this is the real secret weapon.
Then if I'm looking for to get a little
color and bark, this is my own little
blend right here. That's my pepper,
salt, and a little bit of garlic in
there. Also, it's a combination of all
of this that's going to go on here. This
one right here is just really main
mainly if you look at it right there.
It's mainly just so I can get my bark.
Okay. So, look, I'm going to be starting
with my my beat, right? So, I want you
guys to just pay attention to look at
how I hit this up. Right? So, when I put
this on here, look at the coverage. You
know what I mean? And you can look at
the color. You know what I mean? If you
got to open it up some, that's okay. You
know what I mean? At the end, we going
to add a little bit more to it also. But
you see that right there. And I'mma lift
this up over here like this. And we
going to get it over here, too.
Right. Oh
yeah. Next, I'm getting ready to come
with my barbecue rub. We start adding
this on there. Now, I go heavy with my B
cuz that hits and contacts that meat,
right? This right here is going to give
me that special little flavor that I'm
looking for. All right. So, now this
right here, when I say my little special
blend, this is what I put on the actual
brisket. You know what I mean? I'll put
a little bit of this on here cuz I love
the the bark texture that it's going to
give me, right?
Okay. So, look, my pelle grill is up to
temp. I'm going to go ahead and open
this up. Put these in the inside. Now,
I'mma start with my biggest one and
I'mma put it where it's at least the
hottest. Okay. So, I put my biggest one
that was over here. This is my hottest
part of my, you know, my grill. So, I
put that there. I put this one here. And
both of these is like the fat cat cap
up. I did not go ahead and cover no
times or nothing like that in the very
beginning, but I'mma let you know right
now we coming up on about four and a
half hours, right? I don't look at it
until about 4 and 1/2 hours and I let
the actual protein, which is my pork
shoulders, right? These are going to let
me know, you know, where we are and what
we need to do moving forward. Right now,
we had two of them that were two
different sizes. So, I'm going to open
this up right
now and you guys can look at it. All
right. Now, if you look right here, you
can see the just the size difference,
right? So, I can see right here, if you
look right there, it's starting to dry
just a little bit. I'mma make me up
something, you know, to go ahead and
spritz just to get just a little bit
more moist. We going to continue that.
But I'mma stick this in here right now
in this bigger piece right here. Right.
We going to look at that. You see how
right there where it say
150°. Let's get another spot. We going
to take a
look. This one
says 156. Right. I like to before I put
this in a pan, I like to see this
become 165 to 170 degrees. Right? So,
I'mma go ahead and close this and I'm
not going to come back out here. I'm
going to come back and I'm going to put
a little spritz, which mean I'm going to
spray, you know, right here and just
check. I might do a little rotation. And
other than that, we going to come back
and we'll look at this in about another
hour. Now, look, I want to show you this
part right here. When I stick this in
here, you're not going to really be able
to see it in here like that. I just hit
the bone in down there. So, I back it up
just a little bit. And that right there,
say 176. We're a little high. But this
is a smaller one. This just went in like
butter. You know what I mean? That's a
little high for me. But that's fine. I
don't want to lose no more juices. We
going to capture that when I drop it in
there. That's what I like to feel. And
look at that, folks. This is the thicker
piece of the meat.
165.7. Right. I check it one more time.
Oh, that's like butter. I I already know
this right here is cooked and rendered.
Look, that's a little high. We only
going to go to about 202. So now we
getting ready to take these off. Okay.
So now that we done pulled them out like
this, right? I put on another glove cuz
listen, I'mma show you guys a little
trick that I do. You know what I mean?
This makes a difference. We going to go
ahead and put a couple of ps of this uh
butter right here on the top. Now, you
know how like I do my uh how I do my
ribs. You know, we could add a little
brown sugar onto this also. We just
going to add it on. Just like that.
Okay. So, listen. This is where we at
right now. Everything is completely uh
wrapped up in the trays. I bumped up my
temperature. My temperature is up to uh
275°.
I'm going to put these in right now. We
getting ready to render down any more
fat in there and then we going to
rehydrate that meat as we pull out that
bone as it cools. Right. So, real
simple, folks. Okay. So, now we we'll
come back and we'll check it uh we going
to probe it so that it's like butter,
right? Like I said, we're going to check
it in about an hour. You know what I
mean? Uh then we go from there. We was
kind of close. So, I I'm going to check
this one right now about every 30
minutes. That'll be the safe way. You
know what I Because when we get to 202
to 205, we want to take it out and then
we're going to let it, you know,
manually come down nice and slow. That's
how we going to let it rest. Okay. So,
look, I've already checked everything,
right? Listen, both of these, one is at
203 and the other one's at 206. I've
already, you know, I would like to get
them out at both at 203. So, this is
what we going to do. I've already
powered down. I'm getting ready to take
these, put them on a tray. I'm going to
take them in the inside. I'm probably
going to lay a, you know, like a a towel
over the top just so that it can come
down on its own. Right. We got to get it
where we can at least touch it. And then
I'mma show you how we gonna go ahead and
shred this down. Like I said, it has
cooled enough. So, look, when you do the
bone in version of this, this should
right should come out and just slide out
of here nice and smooth. Right. So, as I
pull this out, I just pull it like
this. All right. So, now you can just
get in here. You know what I mean? Let
me just take this piece right here. Man,
that just breaks open. You know what I
mean? Look at that. You can see the
smoke. You see all of that? Oh my
goodness. I'm just going to go ahead and
just get these pieces in here. Let them
start to cool on their own.
Right. All right. So, here you can see,
you know, you can actually keep
shredding and, you know, to your heart's
content. But I, you know what? Instead
of having all the little the stringy
pulls and all of that, what I like to do
is, you see, when I get it like this, I
like I shredded some of that bark, too.
Look at that. You can see that deep
color that right there. And listen, I
ain't going to lie to you. I've been
eating it, too. Once I got it, you know,
like this, I like to go ahead and add
some more rub to it also. So, you know,
look at that down there. You know, I
just add some here on the top. You just
want to get it down. All right. So, this
is what we'll be using. My sweet and
savory barbecue sauce right here. You
know what I mean? Uh, so now let's go
ahead and just add a little bit to it.
Now, this part completely optional to
everybody. You do not have to add this.
Okay, folks. So, you saw just how easy
it is. Listen, I don't want to over talk
it. You know what I mean? Doing a pork
shoulder, pork butts, whatever you want
to call it. It really gets your
confidence up. After you made this a
couple of times, I believe you got your
legs underneath you. So, you can go
ahead and try brisket. You know what I
mean? So, this ribs and then brisket.
Then after that, you got it. All right.
So, with that being said, listen, if
you're new to my channel, let me take
this time to say thank you for watching
this video. Don't forget to like, smash
that subscribe button, and just tell
everybody out there is a channel out
here that's simplifying these recipes
and taking the mystery out of cooking.
And you know how I usually leave out of
here, folks. I'm going to go ahead and
take a dash over here to my right, and
I'm out. Peace.