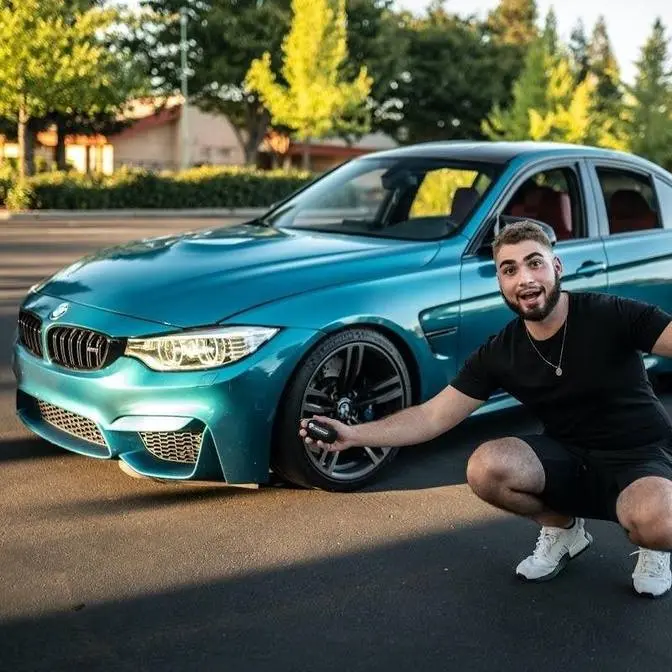
Moment of truth, guys. Disconnected the
battery. Let's see if we got audio.
Moment of truth, guys. We're clicking on
the radio.
Do we have audio?
[Music]
No way. There's no way, dude.
What's up, guys? Welcome back. Welcome
back to another video. And in today's
video, finally been doing some upgrades
to the McLaren. I've had a few things
for this car that I've been trying to
get installed on. I figured might as
well make a dedicated video installing
all three of these products from all
three of these different companies. And
each single one of these products going
to have an in-depth install on my second
channel, which is a channel that I'm
going to start making more in-depth
videos. I know a lot of you guys used to
watch me back in the day cuz I used to
make a lot of in-depth how-to videos.
And then basically now got into more
vlog style, just kind of quick, you
know, entertainment stuff. So anyways,
for those of you guys who want to see
these three installs in depth, make sure
to check out my second channel link down
below where each one of the products
have a separate dedicated video. And in
today's video, we're just going to go
ahead and bang them all out, get them
all installed on the McLaren, so this
thing can become more and more of my
favorite car of the fleet because these
upgrades are going to give me not only
peace of mind, but it's going to
actually make the car drive better and
feel better and uh add more
entertainment. Literally dab it into all
three spaces of this car. And I'll show
you guys why. So, here's all the
products that we have for the McLaren.
And as of right now, we also have the
Valtronic exhaust, but that's going to
be in a whole separate video just
because of how in-depth that's going to
be. So, we have a triple dash cam. So,
we have one for the front windshield,
one for the rear windshield, and then
also right here. This can I think it's
going to be like more of a POV camera.
So, this is a triple camera setup dash
cam, which is what I've been trying to
get so I can get all three perspectives
in this car all at once. They even have
a remote to where you can activate and
deactivate everything at the exact same
time without actually having to finick
with the little buttons that are on this
device. And this bad boy is Bluetooth
connected. And what I love about them as
well, you guys can see, is that they
care about the details. They have the
battery included with it. A lot of
companies don't include batteries. They
don't include SD cards. You could
purchase an SD card separately from
them, but again, the fact that they
actually offer an SD card is pretty sick
as well. And then they also have the
hardwire kit, which we may or may not be
installing that. We'll see. So, huge
special shout out to them for sending us
out this product cuz I've been needing a
dash cam and this is the ultimate dash
cam with all three perspectives which
I'm super stoked to see. This bad boy is
from Motive Supply. It's been a struggle
finding parts for this car, guys. I
didn't find a single CarPlay uh within
the states for this car. So, Motive
Supply was probably one of the few that
actually had it for this car. I reached
out to them and again, huge special
shout out to them for working on this
build as well because Apple CarPlay is
going to transform the infotainment
system in this car. For those of you
guys who don't know, the McLaren
infotainment system is not that great.
It's pretty much outdated and uh yeah,
it's pretty sluggish. So, adding the
Apple CarPlay is going to make it feel
really premium and nice. And I honestly,
guys, I cannot wait for that. And last
but not least, definitely not least, is
these bad boys right here. My front two
shocks when SSR got it diagnosed
completely blown. And at the same time,
my front two wheels are bent. So, I
needed two front shocks. These shocks
from dealer, they quoted me about
$8,000. I forgot they were for the pair.
$8,000 each. These are the ones with the
hideright as well. So, these are very,
very, very expensive. As you guys can
see, these don't look used whatsoever.
And that's because they're completely
rebuilt. These bad boys are rebuilt by
none other but the legends Fast MX. So,
huge shout out to them as well for
partnering up for this video because
these bad boys are going to help
transform the drivability of this car.
Right now, this thing clunks like crazy
on the front end of this car. And with
the the crazy thing is everyone on the
forums are reporting similar issues and
only 15 to 20,000 miles. Again, my car
has 40,000 miles, so my car has a lot
more miles. But again, with only 40,000
mi, you'd assume that these will last a
lot longer. So, they actually refurbish
these to be honestly better than OEF.
And the price point that they sell these
at are pretty much the same cost as used
ones. So, why buy used when you can get
them brand new, refurbished, which are
way, way, way better. So, we're not
going to be installing these just now
just because I actually have to take
this car down to the shop. I also am not
going to be installing the CarPlay just
now because we have to gut a lot of
things in the interior and we're also
trying to diagnose our sound issue. So,
we'll probably do that at the same time
as installing Apple CarPlay. So, in the
meantime, let's just go ahead and get
the dash cam installed because this bad
boy is going to give us the peace of
mind knowing we have 360 protection on
our car, which I'm super stoked, and
also give me some clips to give to you
guys if we catch anything interesting
while driving. So, let's go ahead and
get this SD card out. We got 64 gigs,
which should be more than enough for
this dash cam. We got the Bluetooth
adapter in the packaging. This looks
super nice. I love how compact it is.
There's actually a battery already in
it. And they sent us a spare battery and
a spare 3M. Guys, this is already a
really good sign because all the other
companies I know about are always trying
to figure out ways to save money. And
this company is caring more about the
customer. So, let's go ahead and pull up
on that to activate that. And then we'll
apply the 3M once we get in the car.
Again, we're going to be passing on this
hard wire kit for now. We may or may not
come back to this, but I think we're
going to pass on it for now. And now for
the big boy, baby. Get this thing opened
up. Come on. Come on. Hope I didn't
shake everything up too much. All right.
Right out of the box, we got
instructions. We got some more stuff,
which we don't really care about. Here
are the dash cams. So, we got the main
one that's going to be mounted onto the
dashboard again with some 3M good
quality sticky adhesive. And we got the
other two dash cams as well. And I'm
assuming back here is going to be all
the wiring you're going to need. And uh
looks like there's some extra 3M, which
is again super super super nice.
Instructions,
all the wiring we're going to need. So,
let's go ahead and just peel this off
real quick. We do have this polarizing
lens, which helps pretty much reduce uh
any glare that's going to be coming
through our windshield. So, I mean,
obviously, you don't have to install it,
but I mean, might as well. It comes with
it. Again, the attention to detail is
just amazing. I guess at this point,
guys, we're pretty much ready to install
it. We got all the dash cams. We got all
the wiring out. Once again, everything
is their own brand. No random products
from other companies in their kit. This
also has their own brand, Type-C, which
is super nice. Let's go ahead and go
inside the car. Let's see if the image
quality is as good as the actual quality
of the dash cam and the packaging.
Because if it is, this honestly might
mark one of the best dash cams I've ever
had. So, I got some good news. That was
really easy. So, to kind of show you
guys how I got this all wired up, I
didn't end up doing the hard wire like I
told you guys cuz this is a McLaren. I
don't want any battery drain issues. So,
pretty much I mounted the dash camera
right up there. I routed the rear dash
camera from the from the driver's side
just so there's not too much wiring on
one side and then I mounted it up right
there. I just did it straight through
the headliner so it's an easy tuck. That
took me maybe like 5 10 minutes. And
then this camera right here, I just
tucked the wire over uh the rearview
camera. So that was easy there. And then
the power wire, I routed it through here
down the A-pillar. Every car is going to
be a little bit different, but um this
kind of format's kind of the same. So,
uh, from the main camera over the
headliner, down the A-pillar. Actually,
not all the way down the A-pillar. I
think I pretty much just routed over the
A-pillar again through the headliner,
and then brought it down here. As you
guys can see, the wire is right back
over here, and then routed it through
here. And if I go ahead and release the
seat, you guys can see the wire pretty
much right down there. And it just plugs
straight into the cigarette lighter. Um,
obviously, if you hardwired it, it' be a
lot cleaner, but nobody's going back
there anyway, so that wire is not
getting in the way of anybody. Here is
the dash camera on. You guys can see the
interior view with the fisheye. Here's
the rear view. Not much to see because I
have the carbon fiber uh how do you
explain it? The uh the air scoops. You
can't really see too much going on back
there, but eventually I'm going to
remove that air scoop with the 600LT
kit. And then you got the front dash
camera in there as well. What I like
about this is also has the voice
feature. So when you click it, it turns
off audio and it tells you audio is off.
I can't really see exactly what's going
on on dash cameras. So when you click
it, it actually tells you what exactly
you clicked. And if you didn't like what
you clicked, you just click it again. It
turns it off. So, it's very easy to use.
Um, right now I have it on all three
dash cams recording. I believe the two
smaller cameras records in 2K and the
dash the main dash camera records in 4K.
And as soon as you turn on the car, the
camera says, "Hey, we are recording.
Ready to go." So, that being said, I
might as well get a little bit of
footage for you guys. So, I'm going to
go ahead and take this down to the shop,
a good 30-minut drive, get some footage
for you guys, and I'll throw it in right
now. Looks like the dash camera is doing
its magic. Oh, this is pretty sick,
guys. Let's head down to the shop.
30-minute drive.
Can't believe the music's working.
See that? That's I like that. That's
pretty.
I want to be with a big
Yeah, those ships are like crisp. Yeah,
actually. I think you can almost fit a
full size controller.
See, that that I like that.
Yeah, that's pretty.
I want to be vegan.
And we officially made it to Natty Auto
Parts. So, we got the car chilling right
over here. We installed all three dash
cams. All three of them working great. I
absolutely love the camera stuff, how
easy it was to install, especially if
you just connected to a cigarette
lighter. I think it took me in total
probably 30 minutes because I just
routed everything through the headliner
section um and just made it super quick
and easy like that. So, now that the car
is here, we have the front shocks
refurbished from Fast MX. These
literally look brand new. Let me show
you guys. Let me let me let me take them
back out. Let me show you guys a little
cinematic. And let's go ahead and try to
replace one of them ourselves and hope
to God we can do it ourselves. Cuz if we
can't, we'll get this thing toast to a
shop. But everything on a McLaren cost a
lot of money to get done at a shop. So,
we're going to hope that we can do it
ourselves.
[Music]
[Music]
For those you guys ever wondered what it
looks like inside of a wheel well of a
McLaren, there you go. Unpainted.
That looks kind of crazy. But anyways,
now we have full access to the shock top
to bottom. You do have to move this
control arm to get this shock out. And
then I think it should be good to go.
Hopefully it's not going to be too
difficult with that hydraulic line. It's
the only thing that's kind of scaring me
that controls the thing to go up and
down. Um, but I guess we will have to
find out.
So, the first couple of steps that I
pretty much took to start getting the
shock out, um, is that I got this front
fender liner out and this rear this
upper fender liner kind of tucked out of
the way. And as you guys can see right
now, um, I'm pretty much starting to get
the shock apart. So, I disconnected both
sensors that go on both sides. Uh, that
was very easy. The two bolts up there
got unbolted. And uh yeah, there's
nothing that needs to get done up here
thankfully. Everything is literally down
here. Um now we do have a hydraulic line
which we'll be getting to in the end. I
feel like I'm going to go ahead and take
that off as soon as we have the other
shock ready to go and mounted. Um so we
lose as minimal fluid as possible. So
what I'm doing to actually get the shock
out, this control arm is definitely
going to be in the way. So I'm going to
go ahead and start unbolting that. As
you guys can see, I already took a few
bolts out of it. I have one more behind
the shock over there. I'm probably just
going to use some kind of wrench to get
that last bolt out. I already took the
bolt out right over here that connects
it to the knuckle. And then the last
bolt down there that connects the shock
to the control arm that's been unbolted.
So, I'm going to go ahead and just start
working on getting this thing out of
here. Um, so this shock can come towards
me and I can probably pull it up or out
or see what we're going to do exactly to
get that shock out.
So, just like that, we got the old shock
out. You guys can see the difference
between the old shock right here and the
new shock right here. The boot actually
popped off of the metal portion right
over here. as you guys can see right
there. And all this is just grimy and
caked up. This one right here from Fast
MX, it looks absolutely beautiful. So, I
cannot wait to get that installed.
Honestly, when I took off the cap right
here, when I actually took off the line,
nothing really came out of it. So, um I
think there's obviously going to have to
be some hydraulic fluid in here, which
will obviously prime through the car,
but I don't think you need any special
computers. Um stay tuned to the end of
the video to really find out. But in the
meantime, let's just go ahead and get
the new one installed from Fast MX. I
don't know if I mentioned, but these
shocks are OEM shocks, but just rebuilt.
So, so technically these are going to be
a lot better than just some new ones
that have been sitting up on a shelf for
the last eight years in my opinion. So,
again, super pleased with these. I
cannot wait to get them installed, and I
can't wait to feel the difference when
driving.
[Music]
And just like that, guys, you have the
hydraulic line hooked up, both
connectors on there, the two bolts up
there. So, the way I did it, guys, and
the way you guys should do it to avoid
the way that I did it, um, the only
thing you have to pretty much undo from
the beginning is the tie rod. You don't
want to do that in the end because this
whole control arm and then basically
this scuffs up your frame right up here
as you guys can see that I did. So, long
story short, to avoid the headache and
avoid what I did, take the tie rod out
first. It literally makes your life a
whole lot easier. The shocks able to
easily come out. Um, and then long story
short, the only other thing you have to
loosen other than that, I believe, is
honestly just these four bolts and then
you pull the whole shock towards you.
Uh, take out the last bolt for the shock
on the bottom. And that's what I'm going
to try to do on the other side and let
you guys know if that's the plan. I
ended up taking out the two the four
bolts down there for the control arm.
Took out the one that's underneath this.
Uh, I took out the the tie rod right
here. Um, again, everything. So, I'm
going to confirm my hypothesis on the
other side and let you guys know that's
how easy it is. But honestly guys, if
you guys have ever done a shock before,
it's literally just this easy. This
hydraulic line is not scary whatsoever.
Um, nothing really comes out of it. When
I took it out, literally not even a drip
fell on the ground. That's all WD40. So,
uh, yeah, I won't even really stress
about that. Just make sure to top off
your hydraulic fluid, which I believe is
right up there on the uh the front clip
of the car, which we'll be doing in this
video as well. But yeah, guys, honestly,
so far, first part swap on the McLaren,
not too shabby. Not too shabby. Let's
just go ahead and assemble all this real
quick. And real quick before I actually
put on the rest of the assembly, check
out that beautiful shock. I'm actually
going to go ahead and try to clean off
this caliper as well. Um, this is like
really I think this is like burn damage
um from like the heat, I'm assuming. Uh,
and it looks like somebody's already
kind of uh put two logos on here for
some reason. So, I'm going to try to
peel off one of the logos and I'm going
to try to go ahead and acetone the rest
of this so this can come out a whole lot
better. I've already tried on the front
face. You guys can see how good it
looks. It used to look like that. So,
see if we can do as much as we can to
it. And just like that, guys, everything
is fully assembled. The new shock is in
and the caliper. We went ahead and got
all the grime off the I don't know why
there's a double logo. I tried taking
some of it off of there, but it's
actually taken off both of them,
unfortunately. So, I might have to get
into some new stickers there, but not a
big deal. This is looking a whole lot
better than it did. Let's just go ahead
and get the wheel on on this side and go
ahead and work on the other side. I
almost made a $5,000 mistake. I hit the
hammer against my carbon carbon ceramic
rotor.
[Music]
What do you think, John? Was that
quicker? Yeah.
So, guys, we got the shock out.
Literally, the only thing I actually did
on this side was take out the four
control, I mean, the four bolts on this,
take out that sway bar. Uh, once I got
all that stuff disconnected, the whole
thing dropped. Took out the two bolts up
there, and I didn't even take out the
fender liner, as you guys can see. So,
this side literally only took me
probably 25 minutes to do. Now, we're
going to slap in the new shock. And
then, uh, yeah, we're going to go ahead
and try to do the whole bleeding
procedure for the hydraulic system. But,
so far so good. Um, now I don't know if
my clunking sound's going to go away.
It's definitely going to ride a lot
better with these new shocks, but as you
guys can see, I didn't even loosen the
bolts on this.
I don't think that's supposed to do
that. So, um, here's a part number in
case any of you guys need to order it
before actually starting this job. If
you guys are doing the shocks, I
recommend replacing this. Everything
else seems pretty tight, but this upper
control arm, uh, it looks like it wore
out pretty quickly. So, you guys can
thank me later on that because I'm going
to have to basically do this job again
because the only way to pretty much get
this control arm out is by getting it
out of the way of the shock. So, yeah,
I'll have to do the shock situation
again to replace these. You're welcome,
guys. You're welcome. I'm doing it so
you guys don't have to make the same
mistakes I am. But, long story short, I
think one of the clunking sounds is
definitely that control arm. But,
anyways, well, anyways, let's go ahead
and just replace the new shock cuz I
feel like it's going to make the car
still ride a whole lot better.
So, we got the shocks installed right
now. Uh, pretty much also clean up the
calipers, but it's not part of this
video. So, we got the shock installed.
Like I told you guys, just a few things
you have to do. It's honestly a very
easy install. And when I take off the
hydraulic line, nothing really came out.
So, if you guys look over here as well,
um, this should be our hydraulic fluid,
and it's right to the top. So, I'm going
to go and run the car a little bit, see
if that goes down, uh, by turning the
steering wheel left, right, left, right,
left, right, and then just top it off
gradually. All right, so let's go ahead
and turn on the car, move the car to the
front of the shop, and again, just turn
the steering wheel, raise the lift,
lower the lift, raise the lift, lower
the lift, just so all the fluids kind of
go into the shocks. And then we just got
to go ahead and just top them off. I
think that's all you really have to do.
So, basically, I'm going to do this a
few more times until I feel pretty much
that the the raising and the lowering is
very smooth. I did hear a few pops on
the first time that I did it. The second
time I did it, I heard no pops. And
we're just going to keep doing it up and
down, up and down. And then we're going
to check off our fluids and make sure
it's popped off in the end. So, we just
went ahead and popped off the cap. Uh
the fluids look honestly pretty good,
guys. So, I'm not really tripping in
terms of getting uh the levels. I mean,
the level's good, so I'm assuming it's
good. I'm not a professional. I don't
really do this all the time, but it
looks good. So, I think that's the
second thing we went ahead and done. I'm
going to go ahead and do a little bit of
test driving today and I'll let you guys
know how they feel tomorrow before I
actually install the Apple CarPlay. And
about a week later, guys, we are back
with the McLaren and today we're finally
getting some things sorted on this
thing. So, before we actually install
the Apple CarPlay, which is the final
thing I want to get installed onto this
car, we're pretty much stripping the
whole interior to diagnose our audio
issues. So, we have my boy Nick back
from Denver. He's always here to help me
with anything electrical, wiring, coding
when it comes to my cars. This one
though is a McLaren. So, it's a little
out of his element and my element. And
we're going to go ahead and try to
figure out whether or not. And we're
going to figure out today if the issue
with our audio is electrical or
something actually with one of the parts
of the car. We're going to hopefully try
to figure that out today. McLaren's
diagnostic guide for this car is really
funny. It literally tells you to check
for shorts. It tells you to check
wiring. It tells you to check grounds on
the A-pillar B-pillar. So, long story
short, a lot of things can fail and it
looks like it's pretty common. And
hopefully we can find that issue today.
And again, after that, we mean
installing Apple CarPlay, which I'm
super stoked about. So, we got the
McLaren right here. For the 10th time,
we're going to start taking a bunch of
things apart. It's funny how I got a
clean title to avoid taking anything
apart on this car, but end of the day,
guys, we're taking everything apart.
We're going to fix it ourselves and
hopefully get our audio back. So, Nick
went ahead and popped down this cover,
tested all the fuses down there, and
everything came good. Last week, I
actually found a bad fuse, but
unfortunately, it didn't really change
anything in terms of this. So now we're
going to go ahead pop this rear fuse
panel behind the driver's seat and check
all those fuses. So we went ahead
disconnected the screen, disconnected
that module that's right down there
because it's part of the steps that are
actually from McLaren. We got to
basically what do you call this
basically? So this is like a a service
instruction. So um one of your friends
was gracious enough to pull this from
us. It had the same current, no fault
codes in the car cuz we have the
original tool now to check that and
there's no audio. So, we're going
through the steps. Apply tape around the
speakers so the speakers are not
grounding out against the chassis of the
car. Yeah, guys, we can't make this
stuff up. This is an actual McLaren guy.
This is uh this is McLaren quality for
y'all. So, just in case y'all are
wondering why we're having issues, it's
just the way this car is built. So guys,
looks like somebody's already been here.
They already put the tape that can
actually what is it called? Like ground
out on the frame. Yeah, somebody already
did this. So somebody already tried
diagnosing. Hopefully they just didn't
go through all the steps that we're
about to go through. Man, guys, this
just a buddy. All right, so we have that
disconnected. We have that disconnected.
The next step is saying to access the
amplifier, which is right back here,
which we already I kind of access that
cuz I already replaced that. I said kind
of. I've already replaced the amplifier
on this car. Put it back to the original
because it didn't do anything when I
replaced it. So, let's go and access the
amplifier behind me right now and uh see
if we can make anything up. All right,
so we're having a little bit of trouble
actually getting this center console
out. We'll show you guys what we had to
remove um once we have to get this whole
center console out. But it's officially
out. Let's go ahead and get this thing
out of the car. Now that that's out,
which we have to get out because we're
going to be doing the proper wiring,
full access to the module right over
there. Um and we can actually do all the
plugging that is necessary. So, fun
fact, guys, there was a cable right back
over here in blue that was disconnected.
Uh there was two cables in the center
console that were disconnected. Like
they're not connected to anything. We
don't even know where it connects to.
Same goes with that one back there. And
there is one behind uh the uh head unit
that is unplugged as well. So we're not
sure those I don't know if those are
just meant for extra options. I mean on
BMWs there's supposed to be nothing
unplugged, but this is a McLaren, so we
have no idea if things are just not
unplugged because there's an option
that's not installed in this car or as
an aftermarket thing or it's literally
not supposed to be unplugged. So, we're
going to keep diving more into this.
Figured out that 5 hours later. So,
guys, we went ahead and figured out most
likely what our issue is. So, this cable
right here is a pretty common thing that
fails on McLaren that have to deal with
the audio. I notice a lot of people on
the forums have issues with this. They
found a lot of janky stuff that's going
on over here as well. Plus, it also blew
our fuse. So, we're leading to believe
that this cable is bad. So, that being
said, finding this cable is almost
impossible. We went online, search
absolutely everywhere. There's only one
in Alberta, Canada that's currently
damaged and they're still selling it
damaged because maybe these are kind of
fixable because I guess people are still
buying these things damaged because from
the dealer after calling them Beverly
Hills McLaren, they wanted how much? 20
2600
2600 guys for a cable.
No ETA.
No ETA too. Back ordered. So I just
decided to call up on my buddies to see
if they have the cable. And thankfully,
my boy Nick that owns his own
dismantling business actually has this
cable literally stored in the back. Not
listed on eBay, just literally had it
stored in the back because he ended up,
I believe, ordering it or needing it for
one of his other cars and ended up being
the wrong cable for his car. But now it
turned out to be the right cable for our
car. If this ain't fake, guys, I don't
know what is. Let's go ahead and go get
that cable.
[Music]
All
right, guys. So, we just got out of BMA.
We got the cable that we needed, which
I'm super stoked about. Gave him a
little bit of a tip just because he went
out of his way, not only sold us the
cable, but he also came down to his shop
on a weekend uh to show us a donor car
that potentially had the wiring. And
long story short, it did confirm that a
few of our wirings that are unplugged is
okay to be unplugged, which is a huge
good sign. So, shout out to Nick again.
Huge shout out to him. Um, at this
point, let's head back to the house,
plug in this new cable, and hope to God,
guys, we have audio. He has the exact
same issue on his car, and that's why it
turns out that he pulled out that cable,
and he pulled it out yesterday. Just his
luck, it was the wrong cable. Our luck,
it was the right one. Fingers crossed,
guys. It's all we need. So, we just got
back, and uh yeah, so we got a cable
from Nick. We have this Nick that's
going to help us install the cable and
hope to God our audio starts playing.
I've never heard the audio. Are you
ready for this?
I think he thinks I'm a little too
optimistic, but I'm just praying, guys.
I haven't had music in this car since I
got the car, guys. So, most expensive
car I ever own. I don't have music
playing. That's crazy. All right, guys.
We just connected power to the car.
Bunch of things are unplugged. So, maybe
if it doesn't work the first time, it
could be because something's unplugged.
But, moment of truth, guys. Disconnected
the battery. Let's see if we got audio.
Moment of truth, guys. We're clicking on
the radio.
Do we have audio?
[Music]
No way. There's no way, dude.
Oh my god.
With the non-copyright music.
No way, guys. I'm actually speechless
right now, bro. Thank god we got audio
in the McLaren. In the McNugget, guys.
Oh my god. Okay, now we got to figure
out some copyright music. Oh my god.
Connect your How do we
Just like that, guys, we got audio. So,
I guess at this point, we can go ahead
and install the Apple CarPlay because it
should be easy. We got everything taken
apart. Let's just go install the
CarPlay, get everything reassembled, and
not only we have audio now, but we have
CarPlay audio. Amazing. I'm so stoked
for this video. So, now that we have
everything out of the box, guys, let me
show you guys how to install the Apple
CarPlay on your 570S. So, this is
literally everything that comes in the
packaging, obviously, other than
instructions and a few other things. So,
that being said, we have the main wiring
harness, which we'll show you guys how
to install that. This can honestly get
put anywhere you guys want to. It's not
it doesn't have to be anywhere specific.
Just the closer to the driver, the
better, I'd say. This over here, again,
we'll show you guys and just the box. We
going to show you guys where we're where
we're going to go ahead and tuck it in.
Again, it's mostly up to preference
where you guys want to tuck it. There's
no exact right way to do it, but
obviously in cars like this, it's going
to be a tight fit. So, try to find a
good spot to go ahead and install this
in. So, after the We already have the
car fully disassembled. We removed the
center console already. We already
removed a bunch of other things. We're
going to show you guys where to plug
everything in. Um, but in regards to
removing your center console, I'll show
you guys how to do that exactly. So, we
have the center console out of the car.
So, right over here, uh, what you guys
have to know is that there's a USB port
section over here. You have to pry on
that forward. There's two clips on each
side. When you pry that forward, you
unplug everything there, and that pretty
much gets the uh USB port out. You have
to get that out to get the center
console out. There's also four screws in
the inside of the center console. You
have to pretty much take off things like
this to expose the screws. I went ahead
and got them cleaned out while I have
them out, but basically, there's one in
there. Reveals four screws. There's two
here, uh, one more over here, and it
removes all the screws to actually hold
this thing on. There's also one screw on
the side right there on both sides. And
then on the uh armrest, there's two
screws right there and one on each side
right there. And then long story short,
you guys are probably wondering, well,
what about the buttons? How do you
remove that? Uh when you actually remove
this piece that sits right back over
here, it exposes the two screws for
this. You pull up on it, pull it out, uh
and you unplug the connectors. Easy
peasy, lemon breezy. So, the first thing
we're going to go ahead and install is
this one right here. There's a bunch of
piggybacks. They're pretty much going to
be unplugging the factory harnesses,
plugging the factory ones onto this
side, and then plugging this into where
it needs to go. So, that being said,
we're going to give this bad boy to Nick
and he's going to go ahead and help us
install it.
That's, I believe, the display cable to
the screen. This is a cable for things.
And then this is also a cable for
things. But basically, what this kit
does, you got these like tap harnesses.
So, it's tapping whatever wires or power
it needs from these two connectors, and
then it goes into the main connector for
the CarPlay box. So, we're unplugging
both of these basically from the uh what
box would that be called?
This is the actual head unit.
Okay. So, we're just unplugging the head
unit and then plugging the head wiring
into the harness and the harness into
the head unit.
It's actually this kit's really nice.
They got all this foam on the connector
so it'll help rattling and stuff. No
rattling. Yeah.
Good quality. Good quality. So, we have
a USB port left and then we have the
audio port. And I'm assuming that's
going to go all the way up here as well.
So, we're going to run it neatly.
If you want, we can even drill a hole.
Yeah, I don't know about that.
But, uh, it'll be basically plugged into
the aux port. And then I'll run the USB
port. It'll be like in here.
Yeah, we'll figure that out. We'll show
you guys how we do that. But, other than
that, it looks like everything else is
That's actually really easy. Just two
connectors for now. I'll make sure this
works before we do that. So, we're going
to plug that in. So, we're going to
reconnect the battery, guys. And then,
um, I do believe there's something we
have to play with over here. It says
click this down twice or this one down
twice to activate it. So, not only do we
have to make sure that the CarPlay
actually shows up on the screen, but we
have to make sure we can connect our
phone and we can actually hear audio
from it at the same time. So, everything
we connected so far is just literally a
mockup setup right now. We should be
able to get all that feedback back. And
if it is, and if it does work out
perfectly, then we're going to go and
reassemble everything and show you guys
how we did it and the cleanest way we
did it possible. So to then enter the
CarPlay system, we're going to hold okay
for two seconds. Pairing over here. So
so far things are connecting. CarPlay
connect. Just like that. We're already
fully connected.
Connected my phone. Everything's great
in the Navy. Looks great. So at this
point, guys, just go ahead and
reassemble everything. But CarPlay is
working. Honestly, guys, I think that's
one of the fastest and easiest CarPlay
uh installs we've ever done is literally
just a few connectors here and that's
it. I mean, honestly, even without
removing, you have to move the center
console, right? I think there's no other
way around that.
Probably. I mean the problem is that we
had all this removed to diagnose the
audio issue which was involved. Um
but the connectors are on the top of the
uh module now.
Correct.
Yeah. So I think the best way to do it
guys remove the center console. That's
something you have to do. But honestly
if you guys are scared or look if you
guys look online it looks like a scary
job to remove the center console. It's
actually very easy and that's the only
thing you have to do. We had to strip
this entire rear section of the car
again for the audio issue. Turns out you
don't have to do that. Turns out you
don't have to remove the screen. So it's
literally just the center console.
connect everything, route everything
back here to the back of the center
console, reinstall it, and you're done.
So, without further ado, let's go and
reinstall it to show you guys the
finished product. So, we fully buttoned
up everything. The antenna cable is down
there. Everything is fully buttoned up.
We tested out the radio. We tested out
everything. Apple CarPlay. Now, I would
conclude the video right there, but now
we ran into a whole separate issue. As
we were driving the car to go celebrate,
you guys can see we have another issue,
which is the coolant expansion tank. The
overflow tank literally just bursted and
dumped a bunch of coolant everywhere.
So, uh, yeah, long story short, the
McNugget is always going to have issues.
It's just life. Once we address
everything on this car, hopefully we'll
be graving the Navy. This car has 45,000
mi. for a McLaren that is crazy high.
But we pretty much already replaced the
flywheel, all but every single gasket
and underc carriage of the car. We
replaced the coolant, the oil, the trans
fluid, the brake fluid, everything else
could possibly think of. So that being
said, we are getting this car buttoned
up, but it looks like we still have to
repair some more things to make sure
this thing is perfect. So, I have no
problem buying another coolant
reservoir. There's hopefully that will
be the last coolant reservoir I'll be
buying for this car. This thing again
has 45,000 mi. I'm trying to find a
coolant reservoir that's under 5,000 mi,
if not new. Um, but just everything
McLaren that's new has been crazy lately
cuz that cable after calling them for
$2,600. Yeah, it just makes no sense.
So, yeah, guys, this is the end of the
video. We installed two new front
shocks, which make this car drive a
whole lot better. We installed our dash
cameras. We installed CarPlay, and we
also ended up fixing our audio issue,
which is a huge, huge, huge plus.
Honestly guys, the fact that we got that
audio cable um that was bad on this car
locally was insane because that was
there wasn't a single one in the country
and ended up finding out also that the
cable that was on eBay from Alberta was
the wrong cable. So, I literally can't
express to you guys how lucky we got on
getting this audio thing sorted ASAP cuz
it's literally people been waiting
months to get that cable to get their
audio back on their McLaren. So, I know
if I ever get my hands on another one of
those cables, I'm keeping it in the back
pocket in case my audio ever goes back
out again because apparently it's just a
common failure thing. Now, the topic of
the video was the three things we added
to our McLaren to make it a whole lot
better. The front suspension is a known
issue on McLaren's. We knocked that out.
The dash camera is for our safety, and
this is one of the best dash cams I've
ever seen on any of my cars. I highly
recommend it, guys. And the Apple
CarPlay is just a must for the interior
of any exotic and higherend car.
Honestly guys, even even on any BMW,
I've literally installed Apple CarPlay
on almost every single one of my cars is
because it's something I can't really
live without. So, without further ado,
if you guys want any of those products,
going to be linked down below. I love
you guys so much. Remember to stay
humble. I'll see you on the next one.
Peace out. Yeah, let's see how you do
under pressure.
Yeah, I've been wanting this forever.
I've been in the field with whatever
they throw at me. Brush it off. Pick
myself up. Moving on.
Hey.