
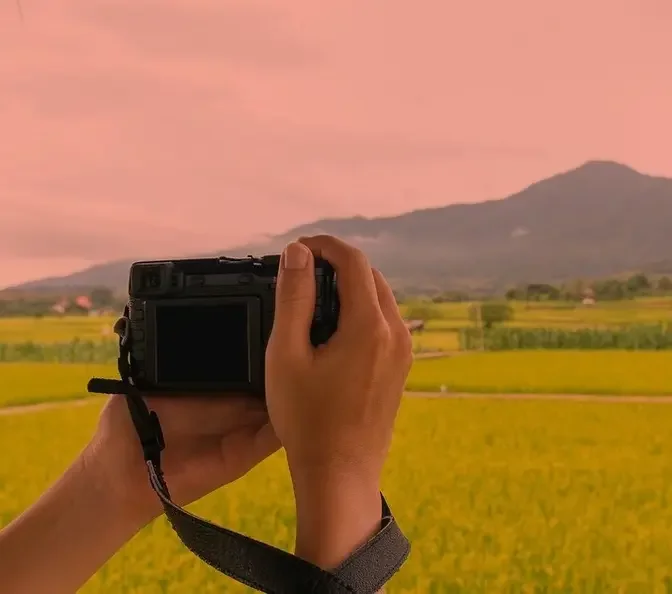
Canon 6d Mark 1 THIS is how I set up and USE it in 2026
Nov 16, 2026
►Online workshops: https://www.martincastein.com/workshops
►Free Lighting and Composition Ebooks: https://www.martincastein.com/free-th...
►Website: https://www.martincastein.com/
►Your support makes a big difference to me, consider buying me a coffee here:
► https://ko-fi.com/martincastein
Newsletter, thoughts on photography and mini tutorials:
https://www.martincastein.com/newsletter
Follow me on instagram: / martincastein
If you only watch ONE MORE video of mine, make it this one:
• ISO and Sharpness are overrated
AI GeneratedMay contain errors
So today I'm going to show you how I set up the Canon 6D Mark I.
And I'm not going to go through every single menu item.
It's just the stuff that I use and the settings that I change.
I'm also going to talk to you about how I handle the autofocus
and the way that I use live view as well.
And the other thing I'm going to do, which I think is really useful,
I'm going to cover some of the lenses
that I think work particularly well
with the Canon 6D, especially with its focus system.
And I'm also going to do the setup choices that make
the Canon 6D feel more simple and a little bit more predictable to use.
Because if you can use a 6D well, you can use any camera well.
If you set it up around what it actually does well,
it becomes one of the most enjoyable Canon cameras
that I think that they've made.
Comment below if you use a Canon 6D,
everyone will be really interested to know
what lenses you think are good with the Canon 6D.
And if you've got any setup tips for the Canon 6D
or the way that you use it,
let people know down below.
This is your chance to talk to the Canon 6D community
and let people know your tips as well.
I found its files.
Basically the nicest for studio work on any,
compared to any camera that I've ever used really.
So if you want the lighting setups behind
the work that I'm showing you,
I've got a free studio lighting guide, it's linked below.
It's an e-book, it walks you
through some of my favourite portrait lighting setups
and what each one is doing. So if you
want to check that out the links
are in the description down below, like I said it's free.
And if you want to see how I edit these kinds
of files I have a studio portrait editing workshop
and some of the pictures you're seeing in this video
are actually in that workshop but I'll
show you how I edit these.
I'll teach you from start to finish because for a lot of people
editing is the thing that they're actually missing
and I don't realize it for years.
So I'm going to take you through the menu system.
Don't worry, this isn't going to take a long time or be complicated.
I'm going to teach you
and show you how to use the live view modes in here.
I'm going to teach you about safety shift as well
and how to program move the ISO button and that kind of thing
to make the camera a lot easier to use.
So first of all, I do shoot in raw
And I shoot RAW most of the time with this camera,
although it does produce nice JPEGs.
So that would be the setting that I would have for shooting in RAW.
Now, I disabled the beep
because I don't want that going off all the time.
Release with card I switched off
because I don't want it to take pictures without the card in there
and make me think I've got one in there.
Image review I set to 2 seconds and I think that's enough.
So with the lens corrections what I do is I have them enable
the peripheral and chromatic aberration.
That means it's going to brighten up
the sort of like the vignetting that you get
and also the chromatic aberration
is going to reduce that too which I find
useful. You don't have to use this if you don't want to.
And going on to the next page now what
I'll show you in here is that I do something
with the white balance. So with white balance
Generally, you can use auto white balance,
but I will often shoot in daylight.
Or in cloudy and I'll switch white balance if I'm in a situation.
Where maybe it's low lighting conditions, you can even try
this at night time, the white fluorescent light that works,
which gives you ISO Kelvin of 4000, which is really nice
for night time photos and gives it a cooler look if you don't want
that warm glow and you want to get that sort of modern cooler look.
It looks pretty decent as well.
But one of the other things that I do with this camera,
and I tend to do this on most of my Canon cameras
because I feel like the Canon cameras just benefit from this slightly.
And I move them to A1, M1 in the white balance shift.
So you can obviously do this in post,
but I think just seeing a nicer start point
is just always useful,
and you can sort of set it and forget it in the camera.
So why not just do it quickly?
The color space doesn't actually matter
if you're shooting in RAW.
So the picture style.
So this is one of the things I change.
I move from standard down to neutral.
And you can see the settings I have here.
So if I go into the settings, I take the sharpness down to about one
and I take the contrast all the way down to the lowest it will go.
And the reason I do that is because I want to see the full,
well, closest to the full dynamic range in the raw file.
So I'll show you on the screen the difference between
the same camera settings but what the
histogram looks like if I shoot the contrast at minimum,
standard and maximum. So you can
see the difference that it has because
when the camera's taking pictures, what it's doing...
is it's basing the picture you see on the back
and the histogram that you see is based on the JPEG
even though you're shooting in RAW it has
a little sort of sidecar JPEG and that's what
you're seeing so in order to judge your exposures i want
to have a flatter rendering you'll be okay
so i turn things like
these uh exposure reduction noise reductions and things off
Because they increased the processing time of the camera.
Again, they're for the JPEGs,
but it will still do the processing.
Highlight tone priority, I leave that switched off as well.
And we're coming to here now, this is for live view.
So I enable live view, that allows me to access
the live view function on the back of the camera.
Obviously the focus stuff is limited with this.
What you can do with the focus here is,
if you use back button focus,
which I'll show you how to set up.
In a little bit, you can get the camera away from your face
and achieve these different kind of low angles and high angles.
And you can use the center focus point in live view.
So what it will do when you enable live view and the AF method,
you switch it to this quick mode.
It will pop the mirror down, use the center focus point
as long as you've got that selected, focus like normal.
And then pop the mirror back up again
and then it's focused and you can take the picture.
Now that's not going to work for moving subjects,
but for everything static it's great and it works
extremely well indeed. And you'll be able to see
your exposure on the back of the camera as well
before you take the picture,
which is really quite nice and it's a very nice way to shoot.
Now when you've seen me using this camera in videos,
I'm almost always shooting with the back screen
but that's not the case of how I shoot.
A lot of the time, it just depends on what I'm doing.
So if I'm doing portraits and I'm in a studio
or just general portraiture,
I'm always looking through the viewfinder.
But for anything that's static for like architecture or urban stuff
where there aren't people moving
or I'm not worried about the people moving,
I'm then always using the live view screen on the back because why not?
It's nice to use it. They've given you this function.
Deliberately, so you can do this kind of thing.
It's not like some sort of trick or gimmick or something.
They've literally built this into the camera for this kind of thing.
You just need to also make sure here that your exposure
simulation is enabled as well.
So I'll just let you see some of the other settings as we go through.
Now, nothing to change here.
One of these settings I do change as well as image jump.
This is when you're looking at images.
You can select how many you're scrolling through.
I want to just see one at a time.
And the highlight alert, I enable this.
I'll show you the difference this makes.
So when the highlight alert is enabled,
what happens is that when you take a picture again,
this is working off the JPEG preview preview,
but it's extremely useful.
The picture will show you then
when you see the review of it if any of the highlights have blown
they will blink and that that's a fantastic feature
because if you want to work quickly
and just glance and see is this overexposed
or not it's going to tell you which is great.
I'll let you see some of the other settings here.
So I tend to turn the LCD brightness all the way to maximum.
The only time I'll change that is for nighttime photography
and then I'll drop it down pretty low.
But don't mess around with this too much.
But I like to have the screen nice and bright.
There's nothing special about doing that.
So you just set it to whatever you want
and get used to it being in that setting.
So
You see some of the other settings here.
I'm not going to go into the things
that don't make a lot of difference.
I'll go through some of these with you, the ones that matter.
So the one that you need to pay attention to here is safety shift.
So what safety shift will do.
is if you're using aperture priority for instance
and let's say you're a f1.8 and you have maxed out
your ISO to ISO 100 in bright conditions
and the shutter speed is 1/4000th, the camera then is stuck
if you're in an overexposed situation
the camera can't do anything because it can't
change the aperture because aperture priority locks the aperture.
But what this allows us to do is say to the camera
in that situation where the exposure is so bright
that you can't do anything more with the shutter speed
and you can't do anything more with the ISO,
then do force change the aperture so I don't get a bad exposure.
So it might then go to f4
but at least the picture isn't blown.
This is, I think, unique to Canon.
And it's a really fantastic system,
so you can choose whether it uses ISO speed to do this,
or if it uses shutter speed and aperture,
and I leave it on shutter speed and aperture.
And if you use aperture priority a lot, try it out, it's really good.
So I'll let you just see some of my settings for focus,
but there's nothing special about any of the settings here.
You can play around with these and see how they work for you
and see what you get.
This one I think is important that it's set to release because
The camera will be overly fussy
when you're tracking about making sure it's nailed focus
and it'll probably just not quite get there.
So when you set these you're saying
Prioritise me pressing the shutter button over what
the camera thinks is perfect focus.
And if the focus is a few millimetres out,
I'd rather take the picture because with depth of
field it's going to actually be in focus.
I'll just show you some of the other settings. Most
of these are not particularly important.
And we come down into these other operations here.
I reversed the directions.
It's just the way I like the dials to be.
You can try these settings out and see what they do.
There's nothing particularly special about any of these here.
And this is the other one, the custom functions.
There's a couple of things that I want to show you in here
which are kind of interesting.
The first one is this is how you do back button focus.
So this is shutter button focus.
And this is back button focus.
That's it.
It's as simple as that.
So when I'm doing portrait shoots in a studio,
I use shutter button focus.
When I'm doing like urban stuff
and I want to use live view,
I use back button focus.
That's the way I do it
because back button focus works better for that.
And when I'm in the studio,
I like just having the focus on the shutter button.
Do whatever you like.
It really doesn't matter,
but just know that that is possible.
The other thing that I think is worth pointing out
in here is that I changed the set button to
change the ISO. So that means
when you hold this button down you can change the ISO and I like that
way of working because it just feels intuitive
to put your thumb onto here, press and then turn the dial
And then you get to change the ISO like
that so it effectively becomes an ISO button.
And I think that's a pretty nice way of working.
And the other thing that I do is in my menu,
I put the ISO speed settings for aperture priority
so I can come in and change my minimum shutter speed nice and quickly.
I don't have to dig around in the menu trying to find it.
I know exactly where it is.
So the big section though, the one that probably matters most,
is the Canon 6D autofocus.
So my general approach with the Canon 6D is simple.
And a lot of people that get this camera write to me
and they are a bit frustrated
with the focus system.
So I use the center focus point and I focus and recompose.
That is how I mostly use it.
I will sometimes with certain lenses use outer focus points,
but I mostly use the center focus point
because it works really well and it's reliable.
The outer focus points, as most of you will discover,
do not work particularly well.
So with portraits, what I'll do is I'll
Try to put that center focus point over an eye
and then I'll re-compose but if focus is difficult
maybe because of the lighting
or maybe the camera for whatever reason is struggling
I will go for a clear contrast point and then re-compose
and this is really important you've got
to give the autofocus something that it can grab onto
so you know don't focus on the cheek or
Or something.
you can focus on a contrast area like you see how skin
and clothing where they cross and you
can look at things like my eye for example
and then the neck of my jumper here they're
not that far out of focal plane you see what i'm saying
so if you focus like here
You still get the eye in focus
if you're using wider aperture lenses and you want to put
the box like over the crossing point of a lighter and darker area.
So if someone's wearing like a
black suit jacket and a white shirt you can
do that there on the chest as well.
So you can pick different contrast points
and that will make your focusing system
have a much easier time because you've
got something to actually grab onto.
Once you understand that the focusing system
is looking for contrast like that
It becomes much easier to get focus much faster.
So let's talk about lenses.
I think this is one of those things.
The Canon 6D because of its focus system
is really picky with the lenses that it works with.
So if someone was just saying,
look, I just want to get a Canon 6D and one lens
just to do general photography.
What do you recommend?
Go for the 40mm f2.8 STM.
It is a small lens and it's cheap
and it's sharp and it just works very well.
So I think for portraits,
the 85mm f1.8 is still one of the best lenses that you can use.
It's the lens that I used as an 85mm. I took this picture with it.
This is a 6D with an 85mm f1.8.
An 85mm f1.8, I even shot the Chainsmokers cover for closer.
I'll put the picture on the screen.
Although that was with a 5DS, not a Canon 6D,
but it was with an 85mm f1.8.
So then there is the 135mm f2,
that lens is excellent and it has that classic kind of Canon
rendering, focuses extremely fast and easily.
The 70-200mm lenses, the f4s and the 2.8s work
very very well on the Canon 6D,
so if you want something lighter go for the f4 IS and
only go for the 2.8 if you're genuinely going to use 2.8. So
You're not getting anything else for your money
other than the aperture with that lens.
It's not optically better, the 2.8, than the f4,
but I would go for IS versions
because that bit of image stabilization
at those longer focal lengths genuinely helps.
Like, it's really useful.
So if you want to do landscapes and architecture,
I recommend the 16-35mm f4 IS.
Excellent lens, the stability's really nice,
but if you don't want to spend that much money on it,
And if you, if it's something you do less often,
the 17-40mm is an extremely good lens as well,
and I highly recommend that too.
That focuses really well. The 24-70mm f2.8,
both the Mark I and the Mark II work very well on the 6D as well.
So it's not an exciting lens
like the prime lenses are,
but the 24-70mm is such a versatile and useful focal range.
I highly recommend getting that,
so most of the time I've owned both the Mark I and the Mark II.
Thank
The Mark II probably is better,
but I kind of somehow really like the Mark I
because it's a bit softer and it gives it a more sort of dreamy look,
but both of them are excellent.
A few lenses that you need to be cautious about. The 24-105mm
It's mostly good, but some copies of it,
you.
I've had a few of them, can be a little bit iffy at times.
But it's a good lens, it just needs a little bit of sharpening in post,
that's just true across the board,
but it does work well on the Canon 6D.
When it comes to the 50mm,
that's where it starts to get a little bit tricky.
I think the 1.8 lenses are probably the best value for money there.
Because they focus well.
The 1.4 is, to me, it's just a full stop, not a particularly good lens.
The 1.2 is beautiful, but it's extremely hit and miss and unreliable.
The 50mm EF 1.2, if you can get a good copy of it,
that happens to focus well on your 6D, then you're lucky.
And the Sigma lenses, because people always ask about the Sigma lenses.
I had one, the 85mm 1.4, that was extremely reliable and worked well.
And it was the older HSM model before they did the Art Range.
But the other ones are just, it's hit and miss.
So if you've got a return policy on the place
that you're buying from, then try it.
But if you haven't got that, then it's such a gamble.
So the Canon 6D produces really nice raw files.
When you get those raw files home, you will look at them.
And if you're paying attention to your lighting and your composition,
but you still feel that your pictures
are not 100% the way you want them to look,
the problem is probably your editing.
Most people don't realise editing
is the issue until many years down the line.
But editing can take your raw file and turn it into something
that is full of the mood
and atmosphere that the camera did actually capture,
but is not going to be present until you edit that file.
And the thing is, editing is something that you can learn.
Much like you learn composition and you understand lighting,
you can learn to edit as well.
So there aren't any hidden tools,
but there are techniques and artistic ways
of thinking about how you use those tools that you can learn.
And practice and get better at.
And I teach these in my workshops.
I have workshops for landscape photography,
studio portrait photography,
and outdoor portrait photography.
And some of the pictures that you've seen in this video
are edited in those workshops from start to finish.
And if you know me and the way I explain things,
I explain to you what I'm doing and why I'm doing it.
In detail, so you actually understand what's happening,
and then you can start applying that to your own work.
So it does take practice and time, just as photography does.
But once you know what you're supposed to do,
then doing it is just a matter of practice.
Everything that you see in photography is learnable and doable.
It's just about knowing how.
So check them out.
The links are in the description down below.
I hope you enjoyed today's video
and I'll see you guys again in the next one.
Take care. Bye bye.