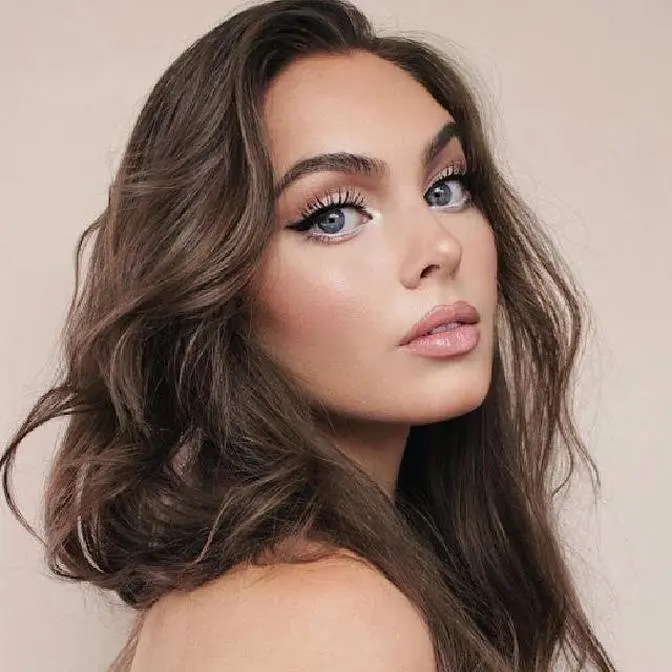
Hey, it's Jackie Wyers & welcome back for How To Do Monica Bellucci inspired '90s Makeup🤎 Thank you to Kosas for sponsoring a portion of today's video! Shop Revealer Extra Bright and Revealer Concealer now and save 15% by heading to https://kosas.yt.link/ZumAaUM or use code JACKIE15. Let me know in the comments what other Kosas products I need to add to my routine! Join me as I attempt to recreate Monica’s bold, sultry smokey eyes and pouty, ‘90s lips. The look itself is super easy to achieve and neutral enough to look great on everyone!
Thumbs up if you enjoy another Time Travel Tutorial and if you’d like to see another Monica Bellucci’s step-by-step tutorial, like the viral photo of her with bangs, smokey eyes & a matte mauve lip combo.
Testing Monica Bellucci's Makeup Hacks / how to get a ‘90s fine vibe timestamps💋 0:00
🔗 All products are linked below!
On my channel find iconic POP CULTURE beauty moments and how to re-create the look on yourself! The goal of my tutorials is to teach practical makeup & hair tips and tricks so you can Switch Up Your Style With Confidence while celebrating what you love.
For new 🍿POP CULTURE🍿 & 🎀VINTAGE VIBES🎀 tutorials - subscribe so you don’t miss an upload every week & tag me if you try out a look so I can feature you in my next upload! xo Jackie
Disclaimer: A portion of today's video is sponsored by KOSAS! I do make a small commission if you shop some of the links I've listed for easy shopping at no extra cost to you. Some products were gifted through PR and but all opinions are my own and I always try to use the best products to get the look I’m going for :)
Hey it's Jackie and welcome back to my channel for a very requested
makeup tutorial! Today I'm attempting to break down Monica Bellucci's '90s makeup
look. She's a stunning Italian actress — and sorry I have this little towel,
but I am wearing a strapless white dress! My camera just doesn’t back up enough.
Monica has worn so many gorgeous makeup looks, so there's tons to choose from, but I was really
drawn to this image — probably because of the Brigitte Bardot updo. I’m loving it! The most
viral photo of Monica is so edited it barely looks like her anymore, but this is the look that a lot
of people have been recreating. Honestly, I love the makeup, but I thought I’d do a look
inspired by her using a real image that genuinely captures her beauty — and we're going very '90s.
If you want to see the look with bangs, let me know and I can attempt that as well! I think it
goes without saying, but I look very different naturally to Monica — my style of tutorial is
a little bit of a transformation. So I’ve added a wig, styled it myself,
and will be adding contacts too. I really like to lean into the
inspiration — I’ll literally try anybody! It's just a fun challenge I like to do,
and you can take the base steps of this look and completely make it your own.
Whenever I have a dark wig on, I need to darken up my brows. This is my most rebought eyebrow
pencil from the drugstore — it’s the Brow Stylist Definer Ultra Fine Tip in the shade Soft Black.
For the Monica-inspired shape, her brows are a little further apart than what I normally do.
They're fairly bold, especially in this photoshoot that I’m taking the most inspiration from.
Before I got on camera, I added a little bit of my favorite moisturizer — the Charlotte
Tilbury Magic Cream. It’s my favorite base. If you can see, my skin looks
glowy — and that’s thanks to a Sheglam product, the Sunburst Glow Mixer in 3.5 Medium Warm Golden.
While Monica’s skin tone varies between different photoshoots — depending on whether she has a
tan — she’s typically a light-to-medium olive skin tone. I love this foundation
and it is my usual shade, and then I did a dot of MAC foundation to deepen it up.
I chose an inspiration photo that leans more warm because when I have a tan, my skin pulls warmer.
If you’re looking for an overall cool tone look, you might really like my Espresso Makeup Tutorial.
I’ve skipped foundation underneath my eyes because I’ve partnered with Kosas,
and I’m showing you their latest Revealer Extra Bright concealer.
The OG Revealer Concealer is so widely beloved — but I’ll show you how these
two go together to neutralize and then conceal dark circles. It’s also great for puffiness.
Now that I’m not a teen anymore, I really like lighter coverage on my skin,
because anything too heavy can settle into fine
lines. And dark circles don’t need higher coverage — they need a color corrector.
The Extra Bright has caffeine, hyaluronic acid,
and peptides to tighten up the skin for an awake effect. It uses color theory to
cancel out blues and purple tones under the eyes. It’s a little more peachy — the shade
I chose is called Illusion, and it's best for light to medium skin tones.
Now adding my concealer — the 3W Warm Revealer Concealer under the eyes and
on the high points of my face. These concealers were made to be
paired together — you can layer them and still get a skin-like, non-cakey finish.
Here’s the before and after — and I’m obsessed with this base together.
Brown contacts are in. If you struggle with dark circles,
definitely check out these amazing Kosas concealers. I’ll have them linked down below,
and you can use my discount code for 15% off on screen.
Before I powder, I’m using another cream product for contour. I just got these in PR — the Make
Up For Ever Multisticks — and this is Creamy Cacao, which I usually use in pencil form for
nose contour. I love this as a shadow shade, applying it underneath my cheekbones. Monica
has very high cheekbones, tapering down the cheek. These blend beautifully — kind of a balmy texture.
I’ll add a deeper blush through the area where I’ve contoured
to give that hollowed-out cheek look — similar to Keira Knightley and Monica.
Here are some other reference photos of Monica’s real features — it’s hard to find unedited
references on Pinterest right now! A lot of fan accounts have heavily retouched images,
but I think we should appreciate what she actually looks like — she’s a literal icon.
Across Monica’s many beautiful makeup looks,
I saw a lot of matte blushes. This one is Java by Benefit, a rosy mocha shade with a deep,
natural matte finish. These are some of my favorite blushes ever.
I’m dusting just a bit over the cheeks — you could also go with terracotta or burnt rose.
For the eyes, I’m using the Makeup by Mario Master Mattes palette. I didn’t
want to go too warm or too cool — so we’re keeping it neutral. For this photoshoot,
she had bold cat eyes, but they were mostly hidden when her eyes were
open. I love the smokier eye Monica often wears too, so I’m blending the two styles.
I’m starting with a slightly warm brown and tapering it upwards because her eyes
are upturned. Then I’m taking a matte kohl pencil and lining my tightline. To make this foolproof,
I’m still using the same palette and working with the black shade to start building eyeliner.
Sadly, my camera deleted one eye, but I just lightly lined the lash line and kept blending.
If your eye shape is more like Monica’s, you could go with a thinner smoky liner. Make
sure the inner corner is pointed — since you can still see a lot of my lid when my eyes are open,
I’m smoking it out more. I’m mixing the deepest brown and black back and forth to
keep it soft. Then I’m accenting the black on the outer corner of the lower lash line.
To deepen right at the lash line, I’m using my favorite liquid liner by Lilybyred — it’s
K-beauty and one I always repurchase. I create a little point in the inner corner and soften it
with more black shadow.
Something I noticed in her look — a hint of copper under the eyes — so I’m
using one of the new Make Up For Ever products to sweep underneath there.
So pretty.
For mascara, I love both the MAC Elevated MAC Stack and L’Oreal Voluminous Original.
I’ll go with L’Oreal today. These are so wispy and pretty — I’m using the Half Naked Lash by Ardell.
The only way I can kind of get that sultry Monica vibe is if I squint a bit — the smize!
I’m loving these smoky eyes. I don’t think I’ve done a tutorial quite like this before.
For the lips, I have three more Kosas products — I blind bought them and hoped
the shades would work. I’m using two lip liners for dimension and then a nude lip.
Even Monica’s red lip looks often have a plum-mauve undertone. I’m
mapping out my lip line with the Kosas Hotliner in Beyond,
a cool rosy mauve. These twist up and have a built-in brush and sharpener.
Next is Supreme, a rich neutral brown on the corners to add depth. Through the
center of the lips, I’m patting Benefit Java blush for added texture and dimension. This
trick can be drying, so only do it on moisturized lips.
Finally, I’m using the Kosas lipstick in Vegas,
a gorgeous nude. I’d wear this alone too — just adding some light to the center of the
lips. I also powdered through the brows and love how the lips look textured instead of glossy.
If you missed it, I have a “Low, Medium,
or High Contrast” video you should check out to figure out what makeup intensity suits you best.
If you want to keep watching and love Italian beauty icons, try my Sophia Loren tutorial for
snatched liner, or check out Britney Spears’ Slave 4 U Glam, a very 2000s smoky eye. You might also
love my Cindy Crawford makeup tutorial, which features a warmer brown smoky eye.