
Green Beret's 2022 Wilderness Survival Gear Dump _ Gray Bearded Green Beret.
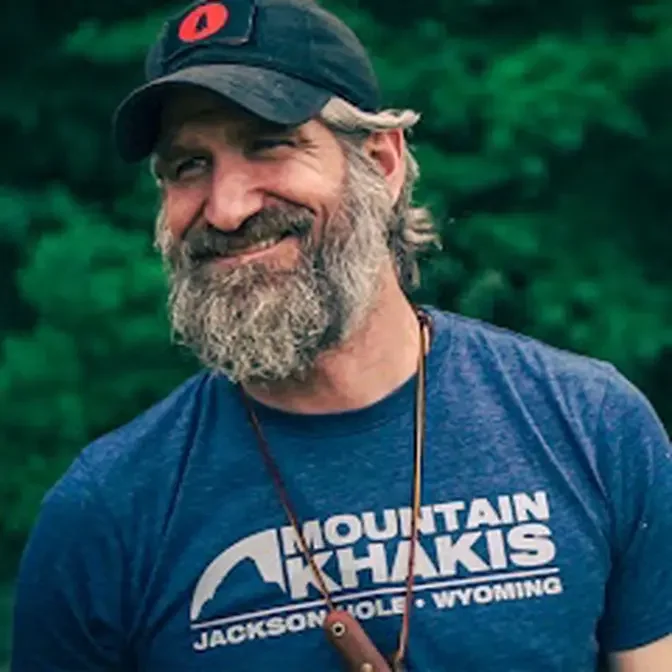
2 Video Views·Nov 20, 2022
Hey everybody, this is Josh here,
the Great Bearded Green Beret.
Wanted to talk to you really quick
about gearing up to head out into the woods.
If you wanna get a copy of this packing list in PDF form,
make sure you click the link down in the description
and I'll get that out to you.
No matter what type of wilderness
you take yourself out into,
your needs are the same.
You have to have first aid
for any life-threatening injuries,
you have to take care of that.
You also need to maintain your core body temperature
and that's a result of your clothing choices,
your fire, and your ability to make shelter.
You also need to hydrate,
you need to consume calories,
and you need to rest.
All of those are your immediate human needs.
You also need to think about some things
that are kind of preventative needs
that prevent you from becoming lost,
prevent you from ending up in some sort of emergency.
That's where your ability to navigate comes in
and your ability to signal
if you can't navigate and find your way out.
Then of course, supplemental needs that you have are tools.
Tools facilitate all the other necessities that you have.
So with that in mind,
anytime I'm going out into the field,
that's what I'm thinking of
when I'm trying to put my kits together.
I put kits, resources together to provide for those needs
and that's how I pack every bag
regardless of where I'm going.
If I'm going to the forest,
if I'm going to the desert,
in the wintertime, in the summertime,
doesn't matter.
The same way I pack my go bags,
everything is just the eight essential kits.
I've got a fire kit,
I've got a shelter kit,
I've got a water kit, a food kit.
I've also got a navigation kit,
a signal kit, a first aid kit
and of course I've got some tools
and a way to maintain those tools.
So that's how I pick every single bag.
So I want to show you what I pack for a trip
heading out into the woods.
Now when I'm thinking about a fire kit,
what I'm thinking about is four different things.
So I'm thinking about ignition sources,
I'm thinking about emergency tinder resources,
I'm thinking about a way to collect natural tinder
as soon as I hit the wood line
and I'm also thinking about a way
to set myself up for success
for every follow on fire after my first one.
So let's start with those ignition sources.
What I like to think of are emergency ignition sources
which in this case is the normal big lighter
and some windproof, stormproof matches.
I call this an emergency ignition source
or a convenience really
if you want to think of it that way.
These are the most limited
out of all the resources that I'm carrying
as far as ignition sources.
I'm also carrying a ferrocerium rod
and a magnifying lens.
So why carry all four?
Well, like I said, these are emergency ignition sources.
They're sure flame.
I like to carry at least one open flame ignition source
for those emergencies
and I like to carry a different type
of open flame ignition source
that performs differently than this one does.
It would also perform better in certain conditions
that this one's not going to do all that well in
because this is my emergency and my emergency backup.
These are the life saving items that I'm carrying
or I might just use those out of convenience if I want to
but they are the most limited that I have.
The next two ignition sources are a ferrocerium rod
and a magnifying lens, okay?
How do I decide which one of those I'm going to use?
Well, one, it needs to not be an emergency.
I'm not going to use either of these in an emergency.
When I have that open flame emergency
plus a backup open flame emergency,
I'm going to use these for my everyday fires,
non-emergent, not a big deal.
If the sun is out, I'm going to use this magnifying lens.
It's a pretty big one.
Let me show you this one real quick.
Pretty good size magnifying lens,
gathers a lot of light, focus it really well
and you can get a fire going with minimal effort
if the sun is shining,
with minimal effort in as little as 30 seconds.
If the sun is not shining,
I'm going to use the ferrocerium rod
because this isn't susceptible to rain.
This isn't susceptible to wind.
Doesn't matter if it's wet.
It's just a really, really durable ignition source
that I can count on rain or shine.
Now, as far as emergency tinder resources,
those are something I want to have.
Like as soon as I hit the wood line,
of course, I'm going to start gathering natural tinder,
but sometimes something happens
and I'm limited to what I have in my pockets
and my backpack on my persons.
If I had to just choose one,
GB2 tinder tabs for sure would be my favorite one.
They've been my favorite forever.
You've seen them in all my videos in the past,
but these are essentially what we use in the military.
It's just a compressed cotton braid that's been treated.
So you just pull that apart,
fluff it up like so,
and you're ready to go.
You can hit that with pretty much
any one of your ignition sources except for solar.
You could even use a lighter that's out of fuel
to get this going really quick.
So really good resource to have.
So I like to have a tin full of those.
And of course I can use that tin
for charring material for my follow-on fire.
So it's kind of a backup to that.
So I'm not leaving home without these.
Small, compact, fits in your belt pouch,
fits in your pocket.
Definitely recommend these.
If I'm going to an area that doesn't have fatwood,
which is a natural resource that I can use,
then I'm gonna do one of two things.
I'm either gonna carry some fatwood sticks,
and this is the loaded fatwood pouch.
It's got large sticks of fatwood and plenty of them.
And then if I don't feel like messing with that,
this is a little more convenient.
This is actually fatwood shavings
where it's already shaved down.
I like these for kids most of all
because that's one less thing
that they gotta get their knife out to use
if they should find theirself in some sort of emergency
and relying on this tinder.
And this does work when it's wet.
So I do consider this an emergency tinder resource,
but it's also a natural tinder resource.
So you probably don't need to carry it with you
if you're in an area where this is really abundant,
like the Southeast.
But up here in the Northeast, it's not very abundant.
A lot of places out West, it's not very abundant.
So those are the times
that I'm gonna be carrying that resource with me
so I can pull it out and use it when I need it.
And of course, as soon as I get to the wood line,
I'm gonna pull out my tinder pouch
and I'm gonna start collecting natural tinder as I see it.
That's one resource I will never pass up.
Never pass up a natural tinder resource
because you could use that
to get the fire whenever you need it.
You don't know what you're gonna have
when you get to your campsite.
You don't know what you're gonna have
when you run into some type of emergency.
You only know what's in front of you.
When it comes to tinder, that's gonna be something
that's a little more challenging to find
than your other types of fuel,
like your kindling or your sustaining fuel.
So you never pass that resource.
Recommend a good tinder pouch.
This is the GB2 waxed canvas tinder pouch,
and this is just a roll top.
You can fill it up, roll it down, tie it secure.
Keeps everything nice and dry
and ready for when you need it.
And of course, with that first fire,
I wanna set myself up for every following fire after that.
All my follow-on fires are gonna come
from charred natural material.
So I carry a charring and storage tin
so that I can make that happen with that first fire.
So always have a charring and storage tin in your kit.
Highly recommend.
When I'm putting together my shelter kit,
I'm thinking about three things.
I need something to sleep under,
something to sleep on, and something to sleep in.
When it comes to something to sleep under,
what I like to use personally
is my Tinsmith's oil skin tarp.
This is an eight foot by eight foot tarp.
A lot of different tarp configurations
that I can put this in
because there's a plethora of grommets.
A lot of different ways you can set this up.
So this is my favorite tarp for sure.
Something to sleep on.
I like to use the GB2 bed sleeve.
This is a really versatile piece of kit.
You can use it as a browse bed.
You can also make a raised bed out of this,
and you can also improvise a hammock out of this.
So no matter what the conditions are,
where I get to where I wanna set up camp,
I can set this up in a variety of different ways
to make sure I get a good night's sleep.
As far as something to sleep in,
I personally like to use a wool blanket
because there's a lot of different ways
that I can get in this and get warm.
So that's my personal preference.
They're a little bit heavier
than a lot of the other options.
They are bulky, but so are sleeping bags in my opinion.
And I'm not a small guy,
so crawling into a little tiny sleeping bag
and being confined is not my idea of comfort.
I like to have the wool blanket.
I just think it's a lot more versatile.
That might not be the way you like to go.
What I will say is oil skin, wool blankets,
that's all traditional gear.
That may not be the way you like to do things.
There are a number of lighter options that you could use.
Instead of an oil skin tarp,
you could choose to take a poncho.
This gives you the versatility
of being used as your rain gear.
You can also set this up in a shelter.
I've got plenty of videos on that.
So that may be a lightweight alternative
to that oil skin tarp.
Maybe you don't want to use a wool blanket,
so I recommend a whoopee.
You know, this is a military poncho liner.
I've slept under these in some really cold nights.
So also an option, a lot more packable
and a lot lighter than a wool blanket.
So that may be something that you're interested in.
Now when I'm thinking about water,
I'm thinking about one, where to find it.
But when I do find it,
I need to have some sort of container to put it in
and I also need to make it safe to drink.
So that's what I'm thinking about
when I'm putting this kit together.
So what I like to have is a way to carry that bottle
on the outside.
I can quickly take a drink without taking it out
if I need to.
I have a single walled stainless steel container
on the inside and this is the toggle
to pull it out of the fire.
But this is by Clean Canteen, this is a 40 ounce.
I prefer that capacity
because I don't use water purification tabs.
I'm either disinfecting this thermally,
which this gives me the ability to do,
or I'm using a grail.
The grail is great, it's got its own container.
I can use this to filter until this is full
and then I can leave this container full
after it's filtered as well.
Now I've got two water bottles.
This is just the way I like to roll.
What I also like to have in my water kit is a GP cloth.
And I'm saying that it's in my water kit
because that's the first thing I think of using it as
is a pre-filter for that water
to get kind of the big stuff out of it
so it doesn't clog my filter as quickly.
But this has got a number of uses.
I usually get my whole fire lay with this.
I can use it for a shade.
It's got a ton of different uses,
just a five foot by five foot cotton cloth.
This one's really dirty,
you can tell I use this one every day.
But anyway, GP cloth along with my water bottle
and the carrier and a grail,
and I'm all set for water.
As far as food goes, as far as my food kit goes,
what I like to have is some sort of bush pot with the lid.
I like to have some sort of small stove
and of course a spoon so that I can eat.
I just use this to cook in and I eat right out of it,
cook it over the campfire.
That's the way to go.
My particular one that I usually carry
is a stainless steel model bush pot.
I could also use this to make my coffee in the morning.
There's a lot of things I could do.
It's a very versatile pot, it's really well made.
So this is a Kessil pot, mine's in stainless.
They also come in titanium, which this one is,
but you can see this one's still in the case.
It's got a really nice waxed canvas case.
So a lot of times you'll get a bush pot
or you'll get a water bottle
and it just has a cheap carrier.
And I just think that's just, come on man,
like I need a good way to carry it,
not something that's gonna fall apart
and leave the important part out in the forest somewhere.
So waxed canvas, really nice,
really durable containers.
This one's titanium inside here.
This is waxed canvas with titanium pot inside it.
This is the stainless pot that I've got out
just to show you.
They're both the same, just one's lighter than the other.
So whatever one you wanna go,
depending on how weight conscious you are really.
Then as far as the stove, this one's put together.
This is a titanium version, super lightweight.
And then I've also got a stainless steel version
that's in here.
I just wanna show you how small that packs.
And it's also got a nice waxed canvas pouch
that it fits in.
So can't go wrong with either.
One weighs more than the other.
It's your choice, whichever one you wanna carry.
Don't forget your spoon,
otherwise you're gonna make chopsticks,
which is also fun to do,
but sometimes you just need a spoon.
All right, now let's talk about those preventative needs
that you have to take care of.
You need to pack resources for those things as well.
First aid for life threats is the most important thing
you gotta handle if you have one.
If you don't, first aid for routine injuries,
still nice to be able to handle.
So for my first aid kit, at a minimum,
I'm always gonna be carrying something for a bleeder kit
because that's the most dangerous thing
I'm gonna run into in the back country most of the time
is a bleed, the life-threatening bleed.
That's the most time-sensitive.
That's the one I gotta take care of, right?
So I'm always gonna carry a cat tourniquet.
I've also got some wound-packing gauze.
And I've got a trauma dressing.
That's my bare minimum bleeder kit
that I always have with me all the time.
When you're going out into the woods,
you're either hunting or trapping,
doing something with firearms,
running around with sharp,
well, you shouldn't be running,
walking around with sharp objects like knives and axes.
A lot of things can happen, so it's best to be prepared.
Don't improvise when it comes to something
like a life-threatening bleed.
Have the resources you need to take care of that.
Get yourself back to safety
and live to go out into the woods another day.
In addition, hypothermia management.
I'll also keep an emergency blanket.
I can supplement my shelter kit with this emergency blanket
and get some of that reflection down when it's really cold
and just make my shelter kit that much better.
So good resource to have.
As far as navigating goes,
I like to have a means of navigating
from point A to point B really, really efficiently.
If you never get lost, you're never in an emergency,
you can always find your way back out.
So I like to facilitate that by having a compass.
I like this particular compass.
It's a SunTube MC2, and I've also got some pace beads
to keep track of how far I've walked.
So definitely essential in the nav kit.
Also need a way, I don't know if you guys can even see that.
There's a military square protractor that I use,
or coordinate scale, you could call it.
It's basically used to plot coordinates
and plot your azimuths, plot your routes.
It's used for nav.
You need it for your nav kit.
As far as my route planning and keeping a good log
of everything that I see out there,
waterproof notebook for sure.
And this is the best pencil for that notebook.
Super thick lid, doesn't break as often,
and it's perfect for these.
They're both made by Right in the Range.
So these are the ones that I like.
That's what I'd have in my nav kit,
along with a map of the particular area
that I'm gonna be in.
I get all my maps from mytopo.com.
And of course, we always need to think about emergencies.
We need to think about getting hurt
to where we can't fix it in self-rescue.
We need to think about getting lost
and not be able to find our way out.
So we need to think about making ourselves
extremely visible for rescuers so that they can find us.
My search and rescue team is like looking
for a needle in a haystack.
So make your needle that much bigger, all right?
So you need to think about active and passive signals.
And what I like to start with is a large passive signal,
which is this.
This is the GB2 Signal Jelly.
It's actually a pouch that you can use
for all your other signals.
You can strap it or tie it to the outside of your rucksack,
flip it around in an emergency.
Then you have a passive panel like on your backpack
as you're walking your way out,
or if you're sitting stationary,
you can hang this up and it becomes a flag.
So really love this thing.
It's a heavy-duty canvas with a zipper on top.
Really versatile piece of kit.
Then, of course, for active daytime signaling,
always have a mirror.
If you don't have one on your compass, that is.
If you do have one on your compass,
there's nothing wrong with having a backup mirror
in your signal kit.
For your passive nighttime, a headlamp.
This is not just used for signal.
Of course, you can use this.
This one has a strobe function.
This is the Princeton Tech that I like and recommend.
Has a strobe function on it.
Right now it has a strobe function
because I'm pushing the button.
Look, hands-free.
Strobe function.
So that could be a good passive signal,
but this also allows you to handle tasks at night
when the sun goes down,
because just because the sun went down
doesn't always necessarily mean all the work's done.
So this is a good hands-free way
to be able to do things at night,
finish setting your shelter up
and get a good night's sleep, what have you.
And also, a very large, very loud safety whistle
is important in your signal kit.
So those are kind of the minimum things that I recommend,
is you have active and passive signals
for both day and night.
Another thing you could do is a BOSS,
which is a Bug-Out Survival Supplement.
These are the BOSS kits that I carry on the website.
This is a large signal BOSS,
and this is a signal mini-BOSS.
So both of them are chock-full of active and passive signals.
This is kind of more of a minimalist kit
that's a lot more smaller, a lot lighter weight.
This is a much more robust kit.
So a couple of those would cover you
for anything that I showed you for signal as well.
Take one of these, throw it in your signal joey,
and then you've got everything you need in that.
Now, as far as tools, tools facilitate everything else
that we need to do when we're out in the forest
or in the wilderness.
You might not be going to the forest,
you might be going to the desert, I don't know.
So what I like to have at a minimum
is a good belt knife and some sort of folding saw.
So this is the GB2 Metza Pucco, which is Forest Pucco.
It's made by Hobo Forge.
This is my absolute favorite knife.
This is a knife that I designed
and it's made by my buddy Jason over at Hobo Forge.
Jason and I were in Ranger Battalion together.
We were also on the same ODA NSF.
So he makes an excellent knife.
The grind on this is perfection.
It's razor sharp.
It's got a lot of character with the bird's eye maple
and the hammer marks.
It's got both his stamp and my stamp on it.
Exposed tang, like I like.
Really nice contoured handle.
Fits my hand really well and I've got large hands.
GB2 Metza Pucco, it's my choice,
but of course it's my design.
So I'm a little biased on that.
So, you know.
And then for a folding saw at a minimum,
this is a Silky Pocket Boy 130.
This little guy can do some work, right?
The Silky's cut faster than anything out there
as far as folding saws that I'm aware of,
but I've ever used anyway.
The Pocket Boy 130 is as you would expect a pocket boy.
It's pocket sized, so it doesn't take up a lot of room,
but man, does it do a lot of work.
So highly recommend at a minimum having a Pocket Boy 130.
And then of course a way to maintain that knife
is to have a paddle strop with some compound.
And this particular compound is just a green
micro-fine honing compound that I rub on the leather.
And then one side of the leather is bare.
But talking about stropping,
whenever you do damage to your knife in the field,
that's when you really need a stone.
But can it wait until you get back?
Do you have to carry a stone with you to the field?
Me personally, I don't have to.
I'm really careful with my knives.
At worst, I've kind of misaligned the edge over use
and I'm going to be able to strop that
with a leather strop right back
to where that comes back to that perfect angle
and makes it razor sharp again.
You can do everything you need to do
with a leather paddle strop,
a little bit of compound to polish it as well.
As long as you don't damage your knife,
this is all you'll ever need.
Now let's talk about gear repair.
At a minimum, I recommend, you know,
kind of to couple with your cordage, your bank line,
some sort of large needle and some duct tape.
You can do a lot of things.
You can patch a lot of things with duct tape
and you can get through some heavier duty material
like your canvases with a large needle.
So one solution to that that I like
because it's so compact is the Exotac Ripzful.
This has some braided fishing line around the outside
that you can use for thread.
You could also break down that number 36 bank line
into the smaller strands and use that to sew something up
if you really need to.
But on the inside of this machined aluminum tube,
on the inside, you've got a needle, right?
Very large needle that you can use.
So you can take that off, use it by hand,
or you can leave it inside and use that as an awl
to kind of be able to push it through that harder material.
Really high-speed piece of equipment right here.
It's basically like a Sammy repair kit
where they made it in the bone
with the needles and thread inside it,
but this is machined aluminum.
And then the outside has got duct tape wrapped around that.
So really versatile, really small, compact repair kit
that you can get a lot of things done with
in a really tiny package.
So really like that.
Now, as far as carrying your gear,
most of the time what you'll see me using
is this Valravn, this is a stubbing pack.
I've got the two external pockets on it.
Really like this, it's a wax canvas with some leather,
and it also has a built-in frame that you can sit on.
So best seat in the woods, plus I can put my stuff in it.
This is kind of the instructor pack.
You know, I definitely highly recommend this
if you can find them.
They're kind of scarce these days,
but if you can get them, get the side pockets,
gives you that extra capacity.
This is what you'll see me using most often.
And then of course, when I've got camp set up
and I'm just kind of out on a scout,
I've always got a wax canvas haversack with me
along with my water bottle and carrier.
This is kind of my scout kit.
Just put minimum things for fire, shelter, water, food,
first aid, nav, signal, and tools in here,
and go on about your merry scouting.
Go about your scouting.
Do your things out in the forest without your big backpack.
Always have some resources available to provide for needs.
Take care of any emergency you might run into
when you're away from camp.
So that's it.
That's what I'm thinking about
when I'm putting together any kit
to go out into the wilderness.
I'm thinking about what my needs are,
and I'm thinking about what resources I need
to put together to provide for those needs
while I'm out there.
Fire kit, shelter kit, water kit, food kit,
first aid kit, nav kit, signal kit,
some tools, a way to maintain tools,
and a way to repair some gear.
I'm all set.
I can go out into the wilderness indefinitely with that.
And for everyone that's gonna ask,
yes, I do take hygiene items.
Take a toothbrush with you.
Take some toothpaste.
Take a little bit of soap.
Take a way to dry yourself off.
Use the GP cloth for that.
But yes, I do take that.
Also, if you don't know what mowing is,
take toilet paper, take some dude wipes,
take all the stuff, everything you need, all right?
If you wanna get a copy of this packing list in PDF form,
make sure you click the link down in the description,
and I'll get that out to you.
So remember what your needs are,
and remember to pack resources to provide for those needs.
Hope to see you in the woods.