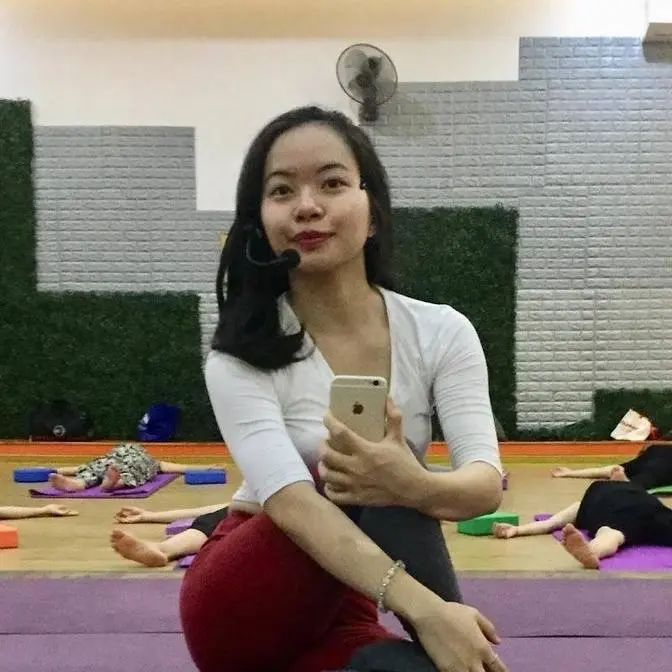
SUỐI NGUỒN TƯƠI TRẺ |HƯỚNG DẪN CHI TIẾT 5 THỨC YOGA TÂY TẠNG
Bài tập Suối nguồn tươi trẻ hay còn gọi là 5 thức yoga Tây Tạng được lưu truyền từ các Lạt ma Tây tạng ngày xưa như một phương thức giữ gìn sức khỏe để tu tập. Qua thời gian, bài tập suối nguồn tươi trẻ cho thấy tác dụng kì diệu trong việc duy trì tuổi thanh xuân nên đã được nhiều người đặc biệt là chị em phụ nữ chọn lựa làm bài tập trọn đời. Bài tập này không những điều hòa khí huyết, vận hành xoay chuyển hệ thống các luân xa trong cơ thể mà còn giúp ngăn ngừa lão hóa, giảm cân và giữ vóc dáng thon gọn. Đây là bí kíp trẻ lâu không tốn kém xu nào mà cổ nhân truyền lại. Thật tuyệt vời phải không?
Bài tập này gồm 5 tư thế yoga cổ điển được tập lặp lại 21 vòng.
Thứ thứ nhất trong suối nguồn tươi trẻ: Xoay vòng. Đầu tiên, bạn đứng ở tư thế thắng người, tìm một điểm để mắt nhìn cố định vào. Sau đó, sải hai cánh tay ra theo chiều vuông góc với thân mình, rồi từ từ xoay tròn từ trái sang phải theo chiều kim đồng hồ. Khi mới tập, bạn chỉ nên tập khoảng 7 vòng quay, nếu cảm thấy chóng mặt thì nên ngồi hoặc nằm xuống nghỉ ngơi khoảng 30 giây. Sau này đã quen dần, bạn tăng số vòng lên nhiều hơn.
Thức thứ hai trong yoga suối nguồn tươi trẻ: Nâng chân lên cao: Bạn nằm ngửa thẳng người, hai cánh tay để xuôi theo hông, úp tay xuống sàn, giữ cho các ngón tay sát vào nhau. Hít vào, bạn nhấc đầu lên và hướng cằm về ngực, đồng thời đưa hai cẳng chân lên trong thế thẳng đứng. Tiếp theo, thở ra, bạn từ từ thả đầu và hạ cẳng chân xuống sàn.
Thức thứ ba trong yoga suối nguồn tươi trẻ : Con lạc đà: Bạn quỳ gối lên thảm và giữ thẳng lưng, hai bàn tay áp sát vào hông rồi hạ cằm xuống về ngực . Tiếp theo, bạn ấn tay đẩy hông về phía trước rồi ngả đầu và cổ ra phía sau sao cho cột sống uốn cong ra sau. Sau đó bạn lặp lại.
Thức thứ tư trong yoga suối nguồn tươi trẻ : Tư thế cái bàn Bạn ngồi và duỗi thẳng hai chân về trước, mở rộng bằng hông, giữ cho lưng thẳng. Hít vào nhấn bàn tay bàn chân xuống sàn nâng người lên ngả đầu ra sau. Giữ cho thân mình trở thành song song với sàn nhà và thẳng góc với hai cánh tay và hai cẳng chân. Sau đó bạn thở ra, nhấn gót chân và đẩy về tư thế ngồi ban đầu sao cho mông ngồi giữa hai tay.
Thức thứ năm trong suối nguồn tươi trẻ : Tư thế chó úp mặt, chó ngửa mặt Bắt đầu ở tư thế chữ V ngược, với hai tay thẳng hàng với lưng, duỗi căng cột sống. Hít vào đẩy người về phía trước hạ hông xuống nhưng không để hông chạm sàn, tay thẳng, ngực ưỡn. Thở ra lại đẩy mông lên về lại tư thế chữ V ngược hay còn gọi là chó úp mặt. Tiếp tục lặp lại.
2. Tập 5 thức yoga tây tạng có tác dụng gì? Bài tập này không những điều hòa khí huyết, vận hành xoay chuyển hệ thống các luân xa trong cơ thể mà còn giúp giữ vóc dáng thon gọn. 5 thức yoga tây tạng này được thiết kế để giúp làm xoay các luân xa trong cơ thể. Khi đó luồng năng lượng được lưu thông và đánh thức. Tập luyện suối nguồn tươi trẻ mỗi ngày giúp cho cơ thể tràn trề năng lượng, thải độc và giúp giữ gìn tuổi thanh xuân.
3. Nên tập 5 thức yoga tây tạng vào lúc nào ? Bài tập suối nguồn tươi trẻ nên tập luyện hàng ngày vào buổi sáng hoặc chiều tối. Bạn nên tập ít nhất 3 buổi / tuần để thấy được kết quả rõ rệt.
Khi mới bắt đầu, bạn chỉ nên tập 7 vòng cho mỗi thức yoga suổi nguồn tươi trẻ. Sau đó tăng dần lên 14 vòng, rồi 21 vòng. Các bạn chú ý xem kỹ video để hiểu được kỹ thuật và cách thở để tập luyện suối nguồn tươi trẻ đúng cách. Với 5 thức tập Yoga Tây tạng tuyệt vời này, bạn có thể sử dụng như một bài tập thể dục dưỡng sinh buổi sáng và duy trì lâu dài theo năm tháng để cảm nhận được sự kì diệu của tri thức cổ xưa.
Nội dung chính: 0:00 Bí quyết duy trì sự tươi trẻ 0:40 Tư thế đứng 3:55 Tư thế nằm 5:40 Tư thế quỳ 7:15 Tư thế duỗi thẳng chân 8:50 Tư thế chó úp mặt 11:00 Thư giãn bả vai
Hi, welcome to Trang Thuy Quang Net's YouTube channel.
This channel will guide you about yoga,
qigong and common knowledge of health.
Today we will practice the exercise
for the youth.
This is one of the tips to maintain health
and youth from the ancient Tibetan demons.
And today we will practice the exercise
for beginners.
We will only practice 7 rounds in each exercise.
I will guide you in detail
so that everyone can follow along.
Let's get started.
In the first exercise, we start standing.
We separate the two legs by shoulder
and straighten the body.
In this first exercise,
we will rotate the body clockwise
to activate the lunges in the body.
So for beginners,
they will feel difficult
and may be afraid of being hit in the face.
So we have some tips
to make the exercise easier.
The first thing is that
we need to determine
what the clockwise direction is.
The clockwise direction is when we raise our arms like this.
The clockwise direction is the direction
that will hit the right arm and right leg
to the back.
We will rotate in this direction.
That is the clockwise direction.
The second thing is to reduce the face.
We need to pay attention
to our point of view.
When we rotate,
we will take a point in front of our eyes
to make the starting point.
Then when we rotate,
we will turn our eyes in this direction.
Our point of view is right in front of our eyes.
We don't look down,
we don't look up.
That's the second thing.
The third point is that
we will focus on this foot.
We will divide the circle below
into 4 legs.
It will help our mind to focus more.
These 4 legs will look like this.
One is the zero hour point.
Then 2 is the 3 o'clock point.
3 is the 6 o'clock point.
Then we move this leg along.
3 is the 9 o'clock point.
And 4 is the last point.
That's it.
Let's get started.
The feet are slightly apart.
The hands are perpendicular.
The fingers are close together.
Keep breathing normally.
Then start pushing.
We will rotate from the right hand to the back first.
Let's count the steps.
Right foot, one step,
and the left foot follows.
Right foot, second step,
the left foot follows.
Right foot, third step,
the left foot follows.
Right foot, last step,
the left foot follows.
Round 2.
1
2
3
4
Round 3.
1
2
3
4
Round 4.
Round 5.
Round 6.
Round 7.
The last round.
And that's it.
We have finished the first exercise.
In the second exercise,
we will slowly sit down
and put our hands behind our head.
Put your hands next to your hips.
Relax your body.
This is the detailed instruction as follows.
Slowly bend your knees.
Then lift your head up.
Straighten your arms and raise your toes to your head.
Feel the muscles behind your legs.
Raise your head a little bit more.
And breathe.
Put your head down, put your arms down,
and then put your feet down.
If you are in good health,
you can raise your head and feet at the same time.
Second round.
Inhale.
Exhale.
Third round.
Inhale.
Exhale.
Fourth round.
Inhale.
Exhale.
Fifth round.
Inhale.
Exhale.
Sixth round.
Inhale.
Exhale.
Last round.
Inhale.
Exhale.
Relax a little bit.
Inhale.
Bend your knees.
Put your hands on your knees.
Shake your back a little bit.
From here,
put your right hand over your head,
like a person on the right side.
Put your hands together.
Get up and get ready for the third exercise.
Stand with your knees facing the ceiling.
Look at your feet.
Then,
put your hands behind your back
and your fingers facing forward.
Pay attention to your stomach muscles.
Shake it.
It helps to relax your back.
Inhale deeply.
Roll your shoulders back.
Push your hips forward and bend your elbows.
Exhale.
Let's do it again.
Inhale.
Exhale.
Inhale.
Exhale.
Inhale.
Exhale.
Inhale.
Exhale.
Inhale.
Exhale.
Inhale.
Exhale.
From here,
bend your knees
and rotate your arms a little bit.
Exercise number 4.
Put your feet forward.
Put your hands behind your back.
Shake your fingers.
Bend your knees.
Separate your feet with your shoulders.
Keep your back straight.
Inhale deeply.
Hold your fingers together.
Push your hips up.
Bend your elbows.
Keep your head straight.
Keep your back straight.
Exhale.
Slowly,
push your hips back.
Sit between your hands and lift your feet up.
Let's do it 6 more times.
Inhale.
Exhale.
Lift your feet up.
Inhale 5 times.
Exhale.
Inhale 4 times.
Exhale.
Inhale 3 times.
Exhale.
Inhale 2 times.
Exhale.
Inhale 1 time.
Exhale.
Keep rotating your arms.
Exercise number 5.
Put your feet forward.
Put your hands behind your back.
Slowly,
push your hips up.
Bend your elbows.
This is the pose
for modern yoga.
When you do this pose,
you can feel your body
become a V-shape.
If you feel tight,
you can bend your knees a little bit.
But always keep your arms
and your body straight.
Is it okay?
If you feel tight,
you can put your feet down.
This is the pose for Australian.
Slowly, push your shoulders forward.
Slowly,
don't put your feet down,
but keep your hips straight.
Lift your hips up and pull your shoulders back.
This is the pose for modern yoga.
Let's do it 6 more times.
Exhale, lift your hips up.
Exhale, put your body forward.
Don't put your feet down,
but pull your shoulders back.
Exhale, lift your hips up.
Inhale 5 times.
Exhale.
Inhale 4 times.
Exhale.
Inhale 3 times.
Exhale.
Inhale 2 times.
Exhale.
Let's do it one last time.
Inhale.
Exhale.
Put your knees down.
Put your hips down,
and put your arms forward.
Relax your arms.
Shake your arms.
Focus on breathing.
Relax your shoulders.
Inhale.
Exhale.
Inhale.
Exhale.
Inhale.
Feel the relaxation of your body.
Slowly swing your arms along your body,
and pull your hips up.
We have just finished the exercise
for modern yoga.
How do you feel?
It's great, isn't it?
If you want to receive more videos like this,
please click the subscribe button
and the notification bell
at the right corner of the screen,
right below this video.
I wish you a great day!
Stay healthy and happy!