
New Tesla Model Y Smart Glass Electric Sun Shade Upgrade! #tesla
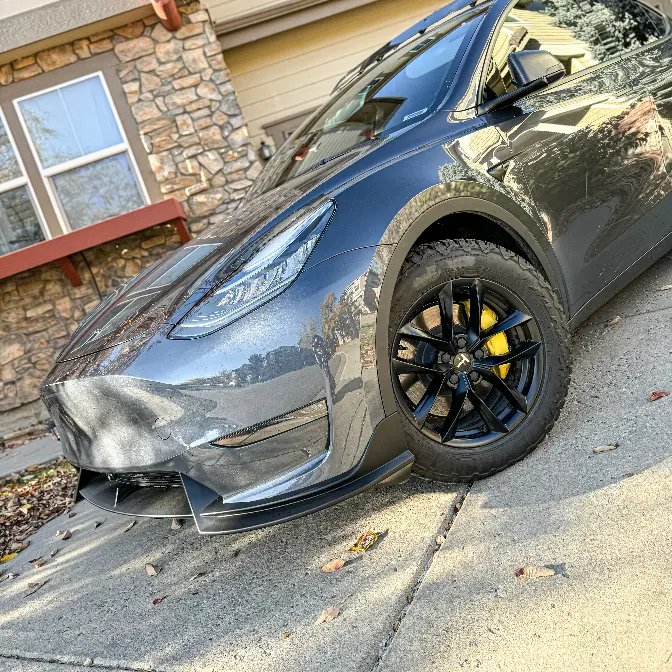
Tesla Referral Program is back!
Use referral link here: http://ts.la/paul79872
and get $2,000 off on your new Tesla.
With New Tesla Model Y Smart Glass Electric Sun Shade Upgrade.
You can change sunshade from opaque to clear with a touch of the button!
Here is the link for Model Y Smart Glass Sunshade / Use Code: DTC for 22% Off!
https://hansshow.biz/4cyUVbd
Enjoy the Video?
Support the channel by buying me a COFFEE to fuel my creativity ☕️https://www.buymeacoffee.com/dadstoyscars
Thank you for your awesome support! ❤️
#thenewaero #tesla #teslamodel3 #model3accessories #modelyaccessories #teslamodely
Thank you for watching!
Facebook: Dad's Toys & Cars
Follow me on Instagram: dadstoys_cars
Please LIKE, SUBSCRIBE & SHARE :)
Now change back to OPEC. Again, press the button. Clear.
Hey guys, Paul here. Welcome back to the channel.
Today I have something really exciting to share with you.
This is something really new to me and I believe new to most people too.
This is something I have seen in Porsche Taycan before.
And also recently, Rivian just released the new R1S and R1T.
And they added this same technology in their car which is the dynamic sunshade for your roof or for your sunroof.
As you can see here, it's all clear. The sun is coming in from the top of the grass roof in my Tesla Model Y.
But with the touch of the button, I can change from clear to opaque as you can see there.
And this should have the UV coating to help reduce the heat in the interior of your Model Y too.
So I got this from Henshaw. This is probably one of the first one that being tested in the Tesla.
So in today's video, I'll show you what comes in the box and then step by step installation.
And then we'll test it out and see how it works in my Tesla Model Y. Now let's go.
Let's see what comes in the box of this new electric dynamic sunshade that changes from clear to opaque just the touch of the button.
So this is the box that came with it. And here's the package inside.
So it's came wrapped and protected. In this box right here has all the wiring components and also all the clips needed.
All the hardware that you need to install the sunshade and this is the whole sunshade itself.
Just want to let you know this sunshade is actually has a bigger opening than the previous, you know, close and open electric sunshade.
Let me show you the comparisons.
We took this one out of the plastic bag so we can compare right here.
So as you can see, this is the electric sunshade with the roll-up sheet over a fabric that close and open.
So you will lose this rear end area where all the fabrics grow.
You can see right here. So there's a lot more components to this one than this sunshade.
So the opening is much bigger and this sunshade came in default as an opaque.
So when electricity sent to the sheet, as you can see, it's covered with plastic still.
It will be clear. We'll test it out later in the video.
And the controller box of the sunshade is in the back end because you have to connect that cable onto this cable right here.
And then connect to the 12V socket in the rear of Tesla Model Y.
Alright, now we saw everything that came in the box.
Let me show you a quick installation.
Pre-installation, you have to install these little clips onto the sunshade before we actually move the sunshade or install the sunshade in my Tesla Model Y.
Let's start the pre-installation before we actually put this sunshade in my Model Y.
And I forgot to mention, I found this in the box.
So this will help fix the wire on the headliner.
So we get the wire across from the headliner to the trunk area of the Model Y.
First, we have to flip it this direction.
So this is where this is facing the inside of the car.
And then just remove this button part right here.
Because it came attaching with the bar on the back.
Let me show you.
There is the bar right here.
This bar.
So we have to remove this bar because this will be reattached when we install in the car.
And one thing to mention, this one is a lot lighter than that first version electric sunshade that you can close and open.
And just use the included tool to unscrew this.
After removing the screw, this cap will come out with it.
So save this when you install back in the car on both sides.
So when you remove the screw, the bar on the bottom will release.
Which is this one right here.
And it has, as you can see, two holes for the screw to screw back in when we install it.
I will show you later how to install this part with the tab.
Which is this plastic tab right here.
And in the back, these two plastic tabs.
So this will go in between your headliner and motorized glass roof.
Let's install this on the bar first.
To install this plastic tab, make sure you see the screw hole.
This one right here.
Facing this way.
And the tab facing just like this.
And just insert the tab in.
Like so.
So make sure this pointy part is facing up.
And this direction from the screw hole right here.
Same thing on this side here.
And make sure you push it all the way in.
And you can see the pointy part facing this.
So make sure you follow this direction.
Otherwise, you will eventually install it incorrectly.
And won't be able to install the sunshade.
Before we go to the next step.
I want to mention to you one thing.
This is a pre-production.
This is totally new in the market.
I have not seen anything like this before.
So this is their first pre-production piece.
And they already warned me that this one has a little damage on the product.
While they were testing.
And I told them I don't mind at all.
To have the first production one.
Because I want to test it in my car.
It's just a damage on here.
Hopefully, it's not the damage on the electrical part.
So it will still be function.
So there's a little damage on the headliner material right here.
Just want to let you know.
And after I'm done with this.
And they told me they will send me the brand new one.
Of course, without damage.
And should be a final production version.
Now let's go to the next step here.
Next step here.
We will install another 2 plastic tabs.
For the front area.
This is the front part which is wider.
And the rear part is more narrow.
And you just have to flip the sunshade.
After you flip the sunshade.
You will see more screw holes in the front.
2 right here.
So there are 2 holes on the tabs too.
So just match it.
And then screw it in.
Same thing on this side.
Just going to match it right here.
And then screw it in.
So these tabs will do the same thing.
You have to insert this in between your headliner.
And the Model Y glass roof.
Basically do the same thing on both sides.
Now we are done with the pre-installation part.
So install the 2 tabs.
Plastic tab in the front area.
And I'm going to uninstall this aluminum bar.
From here.
And then install the plastic tab for the back.
Make sure you install it correctly.
Exactly this way.
And then we are done here.
Make sure you do not take off the plastic protective cover.
Both on the inside and the outside.
We will remove the inside one before we install.
But make sure you put this in the car first.
So it protects from you accidentally scratching the surface of this.
Let me show you where you can get this new dynamic electric sunshade.
That can change from clear to opaque for your Tesla Model Y.
You can get this dynamic electric sunshade for Model Y glass roof.
From handshow or etchotherpart.com as you can see here.
This is for all Model Y models.
And it comes with the same color as the original headliner color.
And if you are interested.
You can use my special discount code DATTC for extra 22% discount.
And this is the price after the discount.
Alright now let's go and install it in my Tesla Model Y.
Alright let's start the installation.
First you have to move the front seat.
Front driver and passenger seat as you can see.
Forward.
So this will help hold the sunshade in place.
Up here.
And you have more room in the back here.
And then clean your glass roof surface.
Just use the window cleaning spray and clean towel to clean the surface first.
Now the surface is clean.
Let's install the metal bar first.
Make sure the screw holes are facing down the interior of the car.
And then you see the pointy parts.
The pointy parts facing the front of the car.
Facing the front and then flat facing the rear.
And just insert it and then just keep moving until it stops.
Make sure you move all the way back equally on both sides.
Until you cannot push it back anymore all the way in to the round edges.
So that's when it stops.
Right there.
Alright before we actually move the electric sunshade in the car.
Let's test it out first.
Basically just connect the cable right here.
And then just plug into the 12 volt socket in the back of your Model Y.
Like so.
Now let's see if it works.
So there's a button right here.
I think it's touch sensitive so you have to press.
You can see it changes.
Plus again you can't really see right now because of this protective plastic.
Let me open one section so you can see.
You can see right there it's opaque.
Now I press and it's clear.
As you can see opaque and then clear.
It's pretty cool.
Alright now we know it works.
And let's put the sunshade in my Model Y from the back trunk.
Actually before we move the sunshade inside my car.
Let's install the wiring first.
Because we have to run the wiring from there around here.
Here and then it goes down to this little triangle cut right there.
I'm not sure you can see it.
Right there.
So that's the hole that we will thread the wire up here.
So this is the cut out for emergency trunk pop.
So you just pull.
There's like a strap inside.
Pull and then the trunk will just pop open.
Or oh I think it's for the charge port.
I think that's the emergency for the charge port.
I never actually use it.
So we'll get through that.
The wire will go up here.
We just have to remove the rubber seal right here.
So first remove the rubber seal first.
Just from here to here.
That's where we are going to run the wire.
Just underneath the rubber seal here.
This one.
So until like somewhere in the middle.
That's where we are going to fish the wire from this side into the interior of the car.
So you basically just thread this wire through the cut out that I showed you earlier.
And then pop open this part a little bit.
And just reach your hand in there.
And then here comes the wiring.
Really really simple.
It's nothing blocking this path between that cut out and then up here.
Then you just run the wiring up until this point right here.
So somewhere in the middle of the car from the rear.
And then you will need this plastic stick that came with it.
So this will help fish from here to the inside of the car.
And you also need the electrical tape.
So just tape this point onto the strip.
As you can see here.
I just tape it up on the tip.
And then now we can just fish through this to the inside of the car.
Just lower it a little bit.
Right there.
And then now we go on the inside.
Now we just have to pull it out from the other side.
As you can see I think we missed one step.
I rather put the metal bar after fishing the wiring.
So just take the metal bar out first.
And then we just pull the wiring from the other side.
That's it.
Now we just take the tape off.
And then just clean up the back.
You don't have to leave the wire that long.
Because the Sunshade also has a little bit of the length between the wire that connects to the control box to this point.
So just leave a little bit.
Now on the back here just put the wire through this part.
And then make sure you have enough length for this one to plug into the 12V socket in the back here.
After that we just have to put the rubber seal back in place.
Make sure it covers everything so the water doesn't get in between here.
Before we put the Sunshade in.
Make sure you put the rear seat down.
All flat.
And the front seat.
Remember put the front seat to the front.
I think you have to put all the way to the front here.
Not to help holding.
It prevents from the seat actually poking the material.
The clear part or the glass part in the middle.
So prevent it from breaking it.
So it doesn't poke as you can see.
Make sure it's all the way to the front.
And now we just have to put the Sunshade in.
When you put the Sunshade in make sure you angle it either direction.
So like mine you see I angle it in.
Slowly make sure this side facing up.
Because this is where we are going to face the glass roof.
And then just push it all the way in.
Now your Sunshade is on the inside.
Now you can remove this protective plastic cover.
Just slowly remove it.
Little by little.
I angle it probably 30 degree ish.
Don't pull it hard.
Don't pull it all the way.
That one just slowly remove.
So first we have to install the front part first.
These two will be going through here between the headliner and the glass roof.
So it has a little thickness to it as you can see.
So you will need this tool right here.
Something like this to help open up.
It's going to be really hard for me to show and insert at the same time.
But let me show you right now.
So when you try to insert this in.
Use this tool right here.
And then put it in.
And then turn.
As you can see.
Turn the tool.
It will help open up the headliner.
And create more space for this to go in.
Okay this process you probably need two people at least.
So one holding this up.
And then insert it into the front area.
And one person will help open up that space.
Same thing on this side right here.
In.
Now we have to connect this cable to the one we fished out which is right there.
As you can see here.
The cable is connected.
Now we can push this up.
And align with the bar.
And then put in the screw on both sides.
Okay last process here.
You just have to screw in.
As you can see right there.
Make sure you aim it.
It's going to be a little tough to adjust between the holes.
Just aim it into the hole on both sides.
Same thing on this side.
The last step here.
Just put back that button to cover the screw.
Same thing on this side as you can see.
Now we covered that screw.
We are pretty much done with the installation.
Now we just have to remove this plastic cover again.
We will remove it from front to the back.
Slowly angle it about 30 degrees.
And that's it.
Our installation is pretty much done.
The hardest part would be these two screws in the back.
Otherwise it seems really simple.
The rear part is the hardest.
The front part is pretty easy to get in.
Now let's test it out.
Before I test it out.
Let me show you the overall look of this Dynamic Electric Sunshade.
For Tesla Model Y first.
Okay let me show you the overall fitment.
And the color of this headliner material.
It's really close to my Model Y headliner as you can see.
And the fitment so far.
It's pretty good.
I only see sunlight from this side I think.
The front is fine.
The front is pretty good as you can see.
Just ignore this part as I mentioned before.
This is the first pre-production.
I can see only tiny bit right there as you can see.
Right here.
But otherwise everywhere else looks really good.
Only the sunlight came in on the right hand side.
The panel is active right now.
We can see the house through the panel.
But when I turn it off.
It's on as you can see.
With the green light when I turn it off.
Boom.
It becomes opaque.
You cannot see the top of the house anymore.
You cannot see the sun anymore.
Really really cool.
And with one touch.
Let me show you this angle.
Boom.
It becomes clear again.
We can see the sun again.
Let me show you this angle exactly here.
You can see the sun right now.
Turn it off.
Opaque.
The sun is pretty much gone.
Only one pointy little sun.
Very really cool technology.
Let me show you another angle.
But I can feel right away.
It's somewhat reduced the heat in the car too.
Let me show you another angle.
So you can see the whole picture.
How it disappears and it changes from clear to opaque.
Here's a much better angle to see the whole panels working.
You can see the whole panel here.
So I'm going to press the button right now.
It's off.
So every time you send the power in.
It will be clear.
So it's off.
It's opaque.
Let me change to.
Let me put the power in or turn it on.
Then it becomes clear.
Very cool.
Now change back to opaque.
Again.
Press the button.
Clear.
It looks dark because of the tint in the car.
And the lighting on the camera.
Let me show you a better angle here.
Alright now it's all clear as you can see.
You can see everything outside.
And turn off.
Then it's opaque.
Now you can see much better.
Turn on.
It's clear.
Or you can easily see from here.
Right.
That angle you can see the sun.
And my roof rack.
Press again to turn off.
Then it's opaque.
Very cool.
I love the cool new technology like this.
And I'm glad I can share with you guys.
This new technology.
I'm not sure.
If the panel itself protects the sun.
Either clear or opaque.
You know what.
Let's test it out.
I'll wait until.
Right now it's 10.52.
I'll wait until probably noon or 12.30.
When it's like you know really really hot.
The sun just on top of us.
And then we'll test it out maybe 15 minutes with opaque.
And 15 minutes with clear.
We'll see the temperature difference in the car.
All right.
Now let's test it out between opaque.
And clear.
And see the difference between opaque and clear.
If it's making a difference.
You know protecting the heat.
From this dynamic sunshade.
I just took the car outside for a five minutes right now.
It's five ten minutes.
And it's 89 degree on the inside of the car.
On the interior of the car.
And it's actually 91 outside.
It's a really hot day.
It's probably the hottest day of the week.
And I blocked out the windshield.
So it's less effect on the windshield.
But more result on the glass roof.
And we'll set the time for 15 minutes.
Here.
There you go.
We'll set the time for 15 minutes.
We'll come back.
And do another 15 minutes with the clear.
Okay.
The time is up.
It's 15 minutes.
Let's check it out.
All right.
As you can see.
It's 15 minutes.
And it's 97 degree.
On the interior of my Tesla Model Y.
And it's opaque.
Now let's do another 15 minutes right away.
With clear.
So let me change this one.
To clear as you can see.
It's clear now.
You can see the outside.
So leave it clear.
For another 15 minutes here.
Let me put the time again.
15 minutes.
All right.
And we'll come back.
It should still be operated.
Since we plugged it in the back on the 12 volt socket.
But I'll make sure to leave the car unlocked.
We'll come back.
All right.
15 minutes is up.
As you can see.
The outside still 91 degrees.
Let's check on the inside of the car.
I left the car unlocked.
Let's check it out inside.
How much different.
It's hot in here.
Okay.
As you can see there.
Wow.
It's 101.1 after 15 minutes.
And the exterior is still the same.
The outside it's 91 as we started it.
So when we did the first test.
It was all opaque.
As you can see.
Still clear outside.
It was opaque for 15 minutes.
It was 3.
And it's right now.
It's 101.
So that's about 4 degrees different between clear.
As you can see.
It's still clear right now.
And opaque.
So it's not a huge difference.
But it's somehow helped filter the UV or the heat from the sun.
You know.
Compare between clear and opaque.
But now we know that it's working.
It's pretty cool technology for Tesla Model Y.
As you can see in the video.
This awesome dynamic electric sunshade is really, really cool.
Now I can just press the button.
And then change from opaque to clear.
To get more sun in my car.
Or if I want less sun.
Just one press.
And the change to opaque.
And it helps out with the heat in my Tesla Model Y interior too.
This is really, really awesome technology.
I hope one day Tesla will add this technology in the car from the factory.
Like Rivian just recently did.
Of course with the new product.
There are room for improvement for this sunshade.
A little bit of the fitment that they can improve.
Also the installation in the back of the sunshade.
Those two screws are really tricky to aim correctly.
And then screw it into the aluminum bar.
If you have a few or a couple of friends to help out with your installation.
This would be a lot smoother.
It's hard for me because I have to film and do the installation at the same time.
So it usually takes a lot longer.
But you're probably going to take about half an hour to 45 minutes to install this sunshade.
Let me know in the comment down below.
What you think about this awesome dynamic electric sunshade for Tesla Model Y.
And I'll make sure to put the link of this sunshade from Henshaw.
In the description down below.
And special discount code for you too.
Thank you so much guys for watching today's video.
Don't forget to click like if you like the video.
Don't forget to subscribe for more awesome content like this.
And see you on the next video. Peace.