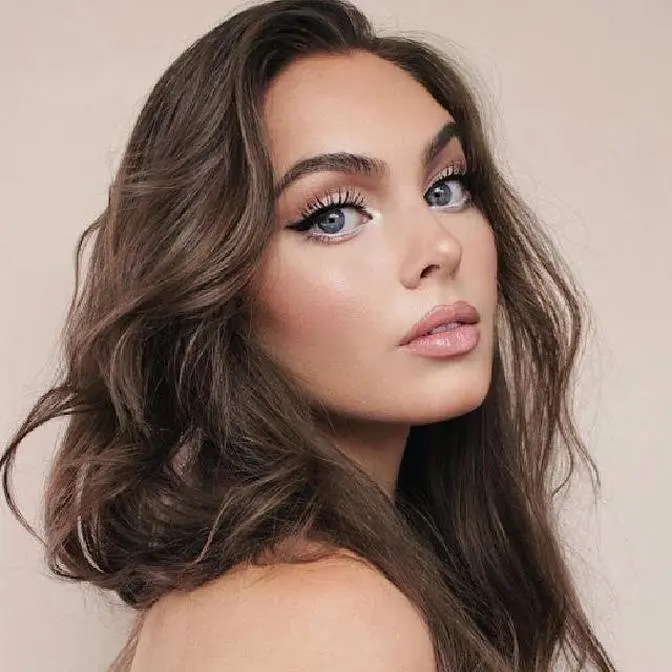
Hey it's jackie wyers & here is "EMILY IN PARIS" hairstyles (season 2) with Lily Collins Curls, Ponytail & Updo Tutorial! These would be super cute for Valentine's Day❤️ Can't forget the black and white checkered bucket hat, bow-dress and party ponytail Emily Cooper wears and the finale decorated fashion show updo inspired by the Renaissance! See how I transform into the beautiful Lily Collins and re-create Emily’s French Girl makeup look, perfect waves and all outfits are thrifted though I have links to similar items below.
❤️timestamps❤️ 0:00 3 Emily In Paris Looks 0:23 Best Berets 0:43 Emily In Paris Waves 3:47 Emily's Party Pony 5:38 My Vlog Channel! 5:48 The Fashion Show Updo 11:08 Watch More
The real makeup artist from Emily in Paris here! https://www.instagram.com/aureliepayenmakeup/ Aurelie has posts with exact products used - I just used what I had in my kit to get the look and matched the scenes!
On my channel find iconic POP CULTURE beauty moments and how to re-create the look on yourself! The goal of my tutorials is to teach practical makeup & hair tips and tricks so you can Switch Up Your Style With Confidence while celebrating what you love.
For new 🍿POP CULTURE🍿 & 🎀VINTAGE VIBES🎀 tutorials - subscribe so you don’t miss an upload every week & tag me if you try out a look so I can feature you in my next upload! xo Jackie
If you are reading this... comment the 🗝POP CULTURE PASSWORD🗝 “I think butter is where Chicago and Paris meet🧈” + comment if you have a fav look from the show!
M a k e u p P r o d u c t s U s e d Emily In Paris Lancome collection! I love the lipsticks and perfume https://shop-links.co/cgB0xz2LL6V
EMILY’S PERFECT WAVES 1-1/4" Flipperless Tapered Curling Wand https://shop-links.co/cgB0yO1Vcku (mine is the same size, just sold in a set so this is one on it's own)
Disclaimer: Not sponsored. Links to the products are affiliated! Sales from these links go towards new props for videos.
Hey it's Jackie and welcome back to my channel for Emily in Paris season two hairstyles. There is
something for everybody in here whether you loved her polished curls, her party ready pony,
or if you want to challenge yourself you can try to recreate this fishtail braided updo. Also shout
out to Brothers and Sisters, they are a small business who sent me these beautiful berets so
I wanted to feature them in this video because I thought it was very fitting and I just love the
big bow. So if you're not into bucket hats definitely check these out and I will be trying
them on with the Emily in Paris inspired curls. So thumbs up if you enjoy, subscribe, and let's get
into it. Emily's curls in season two are even more perfect than season one. I'm brushing out my length
and the makeup look I was inspired by is when Emily is wearing that checkered bucket hat with a deeper
lip. This tapered wand is from Bellamy and I've had it for almost a decade now. It has never failed
me. If your hair doesn't hold curl very well you can add a bit of hairspray first and then create
a curl going away from your face with a one inch section. And catch the curl coming off of the iron
into your hand and pin in place. We're not going to do this with the entire head because that would
take quite a while but it's important for the front strands to be extra perfect for this look
and really hold their curl. And let's go to the other side again curling away from the face.
Instead of sectioning my hair into perfect sections I really like to work around my head
to speed it up for an everyday type of look. But we're working on the under section. Hold in place
instead of pin curling and just scrunch in your hand. It'll be pretty hot on your hand but this
will make sure that the curl is cooling in the shape and it also softens up the curl to be more
like a wave without losing that bend. Also let me know if you guys mind when I do the curling steps
where I flip the camera kind of TikTok style otherwise you just can't see the hair length.
Do you prefer when you see one image or when I just triple it? Because I've never asked and
I'd love to know what you guys think looks better. And then with a smoothing brush I added a tiny bit
more hairspray and I'm going to gently brush through do a little scrunch with the wave and
a bit more spray. On the top layer letting them down giving a spray and how I personally like to
do this with my own curls is I'll lift a piece of the curl upwards and spray also upwards to get as
much volume as I can. My hair is quite a bit longer than Emily's and I like to have more body through
the top so this is how I would personally go with it. I might even tease the top layer a bit for
longevity. But final touch is adding a bobby pin in the first bend of the curl around your face and
tucking that under the hair for more of a defined bang like section. If you have a bucket hat though
none of that matters up top and to tone down the kind of fluffy curls I have going on and make them
more Emily I'm taking a hair oil. This one is OGX Coconut Milk and I'll bring this through the curls
grouping them together making them a little less poofy and more sleek. These will fall out throughout
the day a bit so I feel like Emily has a lot of different variations of these curls but this is
what I came up with and I love the long comb fragrance. This one is the Emily in Paris packaging
which is so cute and if bucket hats are not your thing but you love a Parisian look try a beret
with a bow. These are from Brothers and Sisters Biz. I will tag them down below and I love this
white one. I also have this navy blue hat. Very posh I wore it with this striped sweater that is also
very Emily in Paris. If you love these as much as I do be sure to check them out and now for Emily's
birthday ponytail. Oh the drama that happened at her party and if you like to see the real behind
the scenes I'll have the artists that I follow who actually work on set because they share behind
the scenes photos and we can really get a better look at the styles. Brush your hair out and make
sure you have a side part with a slight diagonal closer to the crown of your head. Again with the
smoothing brush comb this up on one side into your hand while keeping that part. If you find this hard
to have your hair cooperate you could use some gel or hairspray. My hair is dirty here so it made it
easier and I'm brushing the other sections tying off with an elastic. Make sure you don't have any
hair holes you could touch up with a matte eyeshadow and for the top section it had a bit
of a lift to it so I'm taking the end of a comb and dragging this upwards to the top layer to get
a bit of volume. It wasn't an intense poof or anything otherwise we would want to do that
beforehand but I did notice it had a tiny bit of height and texture while the rest of the pony was
very sleek. I almost always go with a really high pony but I like this mid-high pony. I think it's
really cute and we're using the same curling iron to finish it off but like I said instead
of wrapping it quickly around the barrel keep the hair flat so you can see here with my fingers and
making sure that the hair has the same curl pattern throughout. We're going to pin it as it cools.
I'm curling towards me throughout the pony all on one side that way we get a ringlet
and take a small section of hair and wrap around the elastic and pin in place with bobby pins
and I didn't have a lot of time here because the light was going down so hopefully the footage is
okay but the longer you can have those curls in place the better. Add a bit of hairspray or shine
serum and there is the Emily ponytail. Her hair is quite a bit shorter but this is a very similar
look and I just did a DIY top with a Victoria's Secret robe but I'll have similar outfits also
linked in the down bar. Oh and I wore this look when I was cooking on my vlog channel Jackie Vlogs.
I have a series I'm doing called Jackie's Clueless Kitchen over there because I want to learn how to
cook. I'm really bad at it so check it out it's a lot of fun. And moving on to look number three
which is the finale fashion show look. For the last updo the hairstylist probably did not do it
this way but this is how I've recreated the style so that it's doable on yourself and I have some
options to simplify the more time-consuming steps. Create a center part again and before we pin the
two sections backwards I'm going to do the extra step of having a bit of teasing around the crown
and then I'm pinning that in place. I'll take this out in a second I just am training the hair to fall
backwards. And pick up a section from about where your eyebrow is upwards, create a small twist
and pin right at the top of the free-flowing hair. Also take a side section from above your ear and
I'm going to pin this for later. Pick up the remaining piece from the pin back section. I'm
taking out the bobby pins at the back there and I'm going to use some of that hair to create a
fishtail braid. And only with this top section I'm going to add a bit of a french fishtail on the side
nearest to my hairline to add more hair in. For a fishtail braid you want to work with two strands,
take a small section from the outermost side and bring it over to the innermost side of the
opposite strand. You could do a full french fishtail on both sides but I'm just doing the
one side to make it easier and the only difference here is you add a small section from your hairline
and also still a small section from the outermost piece and then cross over.
You could also do a lace touch braid here and you only have to do this for a couple stitches so it's
not too time consuming and add a small elastic and let's create volume by pinching and pulling
the sides of the fishtail braid. And that step was the hardest part of it all because it is kind of
behind your head and it's a bit awkward to do on yourself and we're going to do the same thing on
the other side as well but I'm going to show how we complete the rest of the look on one side.
There will be three fishtail braids in this look moving forward so I sectioned off a bottom half
and pushed it over to my shoulder before braiding the two sections together.
So after that french fishtail we're going to create a regular fishtail braid.
Because we already have one section in an elastic it makes it a lot easier
so take two sections in your hand again and start to create that crisscross back and forth.
I find it easiest to have the fishtail over my shoulder once I've done a couple strands through
the back and you can zone out and create that fishtail braid. Leave some room when you add the
elastic and start to tug on the sides so it begins to look a lot fuller. And to get a similar
look to the inspiration photo I folded that fishtail braid so it connects closer to the
first fishtail. I'm sure the artist did it all in one go but this is how I made it easier on myself
and we're going to create an s-like shape adding in bobby pins secure to the head. This part is so
fun you don't have to try to do the exact design no matter what you do the fishtail braid will
look super cool when it starts to bend. Taking that bottom section I tossed over my shoulder
creating another fishtail braid. For this one I could have added an extension so that it was the
exact same fullness as the other two but once again we're gonna fan it out and this will be
the bottom fishtail braid design. Let's repité on the other side same steps where we began with
that fishtail braid with a couple stitches of french fishtail on the side closest to the hairline
create a basic fishtail braid all the way down the length.
Create another s-like shape along the bottom neckline
and finally the top again another s-like shape to fill up the entire updo. Use bobby pins that
match your hair. I used gold ones here because I can see them. I'm a bit far from the mirror so I
can't tell if a bobby pin is sticking out when I use brown or black so that's why I did that.
And then the side pieces giving a bit of a curl to add some texture adding a twist and pinning up
into the top of the updo and then hiding the ends. It's pretty easy to hide your ends because there
are a lot of loops under the fishtail design and I think having these side pieces going slightly over
gives a bit of texture and really ties it all together. I used a bubble wand if you already
have some texture to your hair then you can just go with a twist and pinch and pull some pieces
adding into the updo. And hopefully the way I broke this down was easy to understand
and my favorite decoration in the hair was a beaded piece that went through the bottom section
and peeked out from under the fishtail. As for the rest of the clips I just winged it with a variety
of silver combs and gold and pearl berets. Add them in between the fishtail braids to
showcase the intricacy there and I love this braided style super fun with all the shine.
Promise we're almost done. I noticed there was a mini rhinestone so I added those in there.
That's my take on the fishtail braid. Be sure to tag me if you try out any of these looks.
I would love to see how you recreated them as well. You will need the help of a second mirror
to be able to position the fishtails how you want them. If you want to see an Emily in Paris
makeup transformation I did that in the first Emily Cooper tutorial on my channel.
Or if you're loving a vintage look check out the Sophia Loren tutorial
and I will see you guys in my next video.