
EXTREME LIVING ROOM MAKEOVER || LIVING ROOM DECORATING IDEAS || DECORATING ON A BUDGET
72 Video Views·Oct 29, 2022
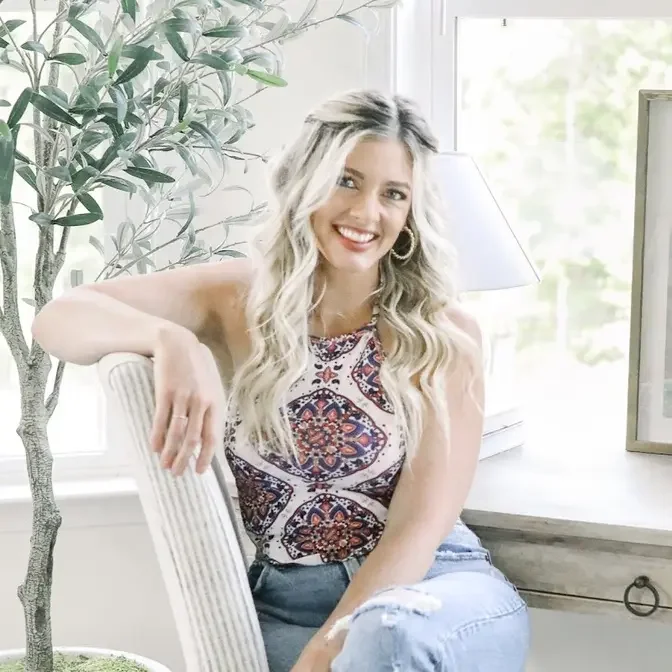
Hey everyone, it's Jenna. Welcome or welcome back to my channel. In today's video, I'm finally going
to be revealing our upstairs living space. This is a room that we've been working on for the past
six months. So I'm so excited to finally be sharing it with you all. And I wanted this
space to be very multifunctional. I wanted it to be a great place to gather and play games.
I wanted a designated work area, and I just wanted it to be a comfortable place to crash if we needed
to have an overflow guest room if we had multiple guests. So the overall inspiration for this room
was just a very rustic, organic, down to earth space with lots of neutrals and very muted pops
of color. So I wanted it to have that overall very earthy feel with just little touches of
coastal for that casual relaxed vibe. I think we really achieved that. And I'm so excited to share
the final result with you all and how we got there step-by-step. Before we get started, make sure that
you like this video and subscribe because I put out new home decor content every single week. So
make sure you don't miss any more of that. And without further ado, let's get into the makeover.
All right. So this is our upstairs loft area and what we're starting with. And this is just really
all of our old furniture from our first apartment shoved in a room. And over here, I wanted this to
be the designated active game space. We're going to be getting rid of this ping pong table because
it's way too big for the space. And I want to replace it with a shuffleboard table along this
wall. This space over here is going to be the cozy lounge area where people can hang and watch TV.
And I want to make sure the two spaces feel separate, but also talk to each other at the
same time. And over here on this wall is where I want to integrate our designated work area with
a built-in that has a desk shelves and storage. So we first started by clearing out the space
and donating our sofas to our local thrift store. It was weirdly sad to see them go since they were
so comfy and it was the first piece of furniture that we ever owned together, but it was definitely
time for a change. So the first thing I wanted to do was add curtains to this window. Since this is
our only window and natural light source in this space, I wanted to make it appear much larger than
it actually is. And using curtains is a great way to do that. So we hung the curtain rod as high as
we possibly could. And we framed the window with curtains on both sides. And this just creates the
illusion of taller ceilings as well as a wider window. So the curtains that I ended up choosing
were the Matilda curtains from Ikea, who has some of the most affordable curtains around.
And I loved the light organic feel and texture that they had. I figured that these were perfect
for dressing up the wall, but still keeping the overall feel very light and casual. Okay, so we
have the curtains hung. As you guys can see, it just really frames the window better and kind of
makes the window appear larger versus just having these two little smaller windows on this wall.
It kind of makes it, you know, more of an anchor. I think this looks really good.
In our next matter of business, we are going to put together part of our couch. We don't have our
rug yet. That's coming in later. But I figured I just could put one part of the sectional together
so we could kind of see how it looks. It came in a bunch of boxes. It's from Target. It's super
affordable. So we're kind of excited to see it. Right, Mike? You actually are excited. You sound
right. Yeah, I honestly didn't listen to what you said. Oh, I said we're putting together the sofa.
Aren't you excited to see what it's like? Oh, that goes without saying, yeah. I'm excited
because a little popcorn kernel in the microwave. Okay, so this is just one corner. So you order
this couch in pieces. So we ordered five pieces total. I'm just curious to see what the fabric
looks like and how big it is and how comfy it is. I definitely took a risk buying it online.
You know, hopefully it's comfy. The reviews were good and it looked really nice. So we will see.
So let's get to setting this baby up.
I feel like I would come over here and be like, oh, like it's very uncomfortable.
I think if this was just a little longer, it would be okay.
But it's like this is like kind of like a springboard.
When you look at it, it looks really nice and comfy, but then you sit on it and it's kind of
you want a nice sofa, you got to invest in it. So luckily Target had a great return policy
and we returned that sofa and we decided to try our luck at the outlets, which was where we got
our downstairs living room sofa for an amazing deal. So we checked out the pottery barn outlet,
which is where you're able to get a great deal if you buy one of the mismatched sofa pieces.
And these are always super discounted and only a couple hundred dollars when they would usually be
thousands. And the only downside to this is you have to order the other section full price and
then wait for it to come in. We did this with our Navy sofa downstairs and ended up paying $2,500
for a $6,000 sofa, but we did have to wait six months for the other piece to come in. And we
didn't really have the time for that this time. So we didn't see much we liked either and everything
was really light and bright or not the right configuration. So we decided to wander on over
to the Crate and Barrel outlet and see if we could find anything that worked over there.
We originally set out looking for a sectional, but it kind of became clear that a sectional
wasn't going to be very budget friendly. And at this point it was slim picking. So with the sofa,
I decided to be like Ross Geller with a sofa and pivot my perspective and to be, you know,
open-minded to the thought of one smaller sofa, just accented with some comfy lounge chairs.
So then I saw this Magritte sofa and it was only a thousand dollars. And it really reminded me of
the Portola sofa from Lulu in Georgia, which is almost $4,000. So this did have a little stain
on the side of the arm, which kind of scared me, but I figured I could get it out when we got home.
So I just decided to go for it and see how it looked in the space, which was a little risky
since this was final sale, but I just really loved the couch and I figured we could make it work.
So I just went over the stain with our vacuum and was able to get it out. No problem. It was
probably just a scuff mark from the warehouse or transporting it or whatever. And I ended up
loving this sofa in the space. It's still really spacious and deep, so it could serve as an
overflow guest sleeping area if need be. And I just love the overall look of it.
Okay. So I really like the rug. I think it's the perfect amount of detail. It's got kind of that
like slate gray in there, which I really like. And I really love the pattern. Oh my gosh. I'm
breathless from putting it out, but I just want to put a couple of pieces of furniture on it to
see what everything looks like. So I'm going to take you guys through that. And I think this is
a really good size. When in doubt over a rug size, I always, always size up just because I feel like
you can always hide it under more furniture, but you can never make the rug bigger. So
yeah, I really love this. I love the pattern. I cannot believe how cheap it was. It's very soft.
I think it's going to hide dirt really well. It's a hundred percent propylene and it was made
in Turkey. So I think it's going to be a good one. Um, so I will have it linked for you guys,
but yeah, we are going to put some furniture on here and see how everything looks.
So I just decided to reuse our coffee table for now because I really just liked the look of it.
And when I was at home goods one day, I found these faux leather swivel chairs for only $250
each, which was a steal. So I scooped them up and I love how the cognac color contrast against the
blue gray tone of our rug and how they swivel. So they allow people to be part of the living space,
or you can kind of turn around to be part of the game space behind it. So not only are they pretty,
but I love that they bring function to this space as well. And I just love decorating with leather
or faux leather accents because it really helps to create a warm and inviting atmosphere.
So on the other side of the swivel chairs, Mike started assembling our shuffleboard,
which was our Christmas present to each other. We loved playing this game at bars and thought
it'd be so cool to have one of our own. And the two of us do really play it all the time. So
we bought this on Amazon. It was not cheap and it also was not light. It was such a task getting
this thing up the stairs. And we actually had to call Mike's dad over to help us get it into place
just because it was that heavy, but we really enjoyed this thing. And I love the aesthetic of
it. I think it was one of the prettiest shuffleboards I had seen, at least in the price
range we were looking at. So we're very happy with it. And the next thing on the agenda was
tackling our built-in and this wall was just really looking bare. We had our old TV just
propped up on an old coffee table and this wall just really needed some height and visual interest.
So I figured it was time for a facelift. So the first thing I did was Mark out the space where I
wanted the built-in to be with a level. And we didn't have a ton of space for the built-in just
because our little attic access door down on the right-hand side took up a good portion of the
wall, but I was still able to make it work. So I just gave the wall a coat of primer because
we are actually going to be lime washing this wall. Since I was planning on making the built-in
a classic white, I wanted to add some visual interest and earthy texture to the back wall
so that it stood out a little bit. So I just got this lime wash from the Home Depot and diluted
it with water. I used a brush specifically meant for applying lime wash paint and I just started
applying it to the wall. So with lime wash, you want to work in sections or clouds as they are
more commonly referred to. You just apply the lime wash on the wall and then spread it as far
as it will naturally go. I also crisscrossed my strokes for an added textural look and I just
went about working in small sections and connecting all of the clouds together. I also have a more
in-depth tutorial that I can link below for you all on the lime wash technique. We actually did
it on our fireplace as well and I just love how it's a simple and easy way to add some texture
to a wall, but it's also just as easy to paint over if in the future you get tired of it or you
just want to change it up. So next it was time to stop by Lowe's to get the base cabinets for our
built-in and we just needed to keep the whole thing pretty narrow. So we just went with these
single drawer cabinets that were 130 bucks each and like I said earlier, we just decided to go with
a crisp classic white. So I had a can already of the Valspar cabinet and furniture paint in shade
Swiss coffee already on hand, so I just decided to use that to save some money. This shade of white
was also a really close match to our existing doors and trim in that room, so it just kind of
worked out well. So one day when my dad was in town to visit, he was kind enough to help Mike and I
build the shelves that were going to sit on top of the cabinets and we just used three quarter inch
plywood for the frame and then some MDF that was ripped into one and a quarter inch strips for the
decorative faces so that the shelves had an overall thicker appearance. And because this is a smaller
room with lower ceilings, I like how this built-in design doesn't feel too blocky or heavy. It's still
very functional but just feels very light and decorative. So then I just gave it a coat of that
same Swiss coffee cabinet paint while Mike attached the cabinets to the walls. We hoisted it
up and into place and then we just added a decorative trim piece up along the top and installed
a desk surface in between the two cabinets. The desk was constructed out of two sheets of three
quarter inch plywood with a one and three quarter inch decorative trim piece along the edge that we
just brad nailed into place. Me and my pink leggings gave it a coat of paint and then we made sure to
cut a half circle near our outlet for all of our cords. So for hardware, I found these gorgeous
honey bronze poles on Wayfair. I love the traditional look of them and how they almost
resembled a foot rail in an old pub or bar or something. They were reasonably priced considering
what other similar vintage inspired poles can cost. So we just installed them and I love the
subtle traditional touch that they give to our built-in. So once that was done, it was time to
style this thing and make it all pretty. I wanted something to hide our cords in the corner so I just
popped this antique vase with some faux greenery from Hobby Lobby in the corner and then I coupled
it with an antique brass standing magnifying glass that would add some height and tie in with our
vintage brass poles. So styling these shelves was really an opportunity to make an aesthetic
statement and I wanted to keep the feeling very earthy and organic. So when styling the shelves,
I just stuck to light taupe colors with dark brown accents and then mixed up lots of different
natural textures. Things like seagrass, wood, stone, and I'm planning on doing a more in-depth tutorial
on shelf styling so definitely make sure you're subscribed so you don't miss that upcoming video.
So you can see how keeping a cohesive theme throughout the shelves just really helps give
off a visually pleasing organic calming feel. And just to tie in with some of the seagrass
details I used on the shelves, I added these woven chairs that I had bought years ago at HomeGoods.
I scored them for only $25 each and I figured this was a perfect place to use them just to tie in
that casual relaxed vibe. Alright so this is one of the pieces that I was the most excited to add
to this space. This is just a simple digital download that I bought off of Etsy for a couple
of dollars. If it is still available, I will link it below. I'm not sure if it is but if it's not,
I'll link similar ones. I'll also link everything in this room that is linkable so definitely check
the description if you have questions about something. But I love the calming look of this
image. I love that it has a little bit of a coastal feel while still feeling very muted, very earthy,
and almost vintage-y. I love the dark browns and greens and clay colors in the earth here. I feel
like that's really going to help pull some of the colors that I'm planning to use in this space and
just keep an overall very organic tone while still adding a little pop of color. So I just cropped
the digital download into three separate sections and then I got each one printed on small woods.
This is the 22 by 44 size I believe and I got it in the dark wood to match our shuffleboard and
some of the darker wood tones that we have in this space to provide a little bit of contrast
and visual interest while still keeping things very neutral and earthy. So we're going to hang
these over the sofa and watch them really tie the room together. So next it was time to tackle this
empty corner and the plus side of not getting a sectional sofa is that I can kind of zhuzh this
corner up a bit and just add some functional and aesthetic pieces to help enhance the overall
design of the room. So I found this cute little side table at a Target salvage warehouse and I
loved the rustic look that it had. And then next I just layered in this statement table lamp and I
really liked the vintage aged look of it with the little handle detail and how it just picked up the
clay and earthy beige tones in the painting. And this is just super practical to have right next
to the sofa for a convenient light source within arm's reach. Next I wanted to add some height to
this corner and I wanted to incorporate some greenery so I just decided to prop this faux
tree from Target up on a little vintage stool that I had bought from an antique shop and I love how
this almost takes it to the ceiling which really gives it that added height that I was looking for.
I liked that this tree already came in a decorative pot and that it gave off an overall
rustic feel. I've been looking for trees that have a rustic vibe but aren't olive trees since I already
have so many of those in my home but I was really happy with this one and how realistic it looked.
And then just to finish off this corner I popped our wedding album on the table for an aesthetic
and sentimental decor piece. So one day while out thrifting I spotted this accent table for only
$50 and this thing was solid wood and was super heavy. I thought it would be a really unique
piece and I figured it would be a great way to incorporate some darker accents throughout this
space so I brought it home with me and used it to anchor the area underneath the window.
Next it was time to find some cozy accent chairs so I just kept my eye out for a while at Home
Goods and then one day I came across these chairs that were actually dupes for the poly accent chair
for Crate and Barrel but these were almost half of the price so I really liked the look of them
and how comfy they were. I also figured the gray color of the fabric would tie in perfectly with
our rug and then the dark wood would match the stain on the artwork frames and our shuffleboard
so I just figured I'd go for it and even though it was a little bit more money than I wanted to
spend I think they really round out the room nicely and the cost of these two chairs along
with the sofa was roughly the same price as the original sectional that we returned.
So next it was time to add some accent pillows and I wanted something muted and natural looking
but I also wanted a pop of contrast something a bit more vibrant to pull those orangey tones out
of the painting and I found these really pretty genuine leather pillows from Home Goods. They were
$40 each and then I just added this orange vase that I had thrifted to help accentuate that sandy
burnt orange accent color. I really love the subtle texture that these pillows give off.
They smell amazing and I like how they coordinate with the vase to help create a statement with our
accent color. So for the bigger sofa I just added this fringe checkered throw blanket that I found
at Home Goods. It was under $20. I also added a square size leather pillow also from Home Goods.
This is the same as the ones on the accent chairs just a different size and I love all the warmth
and texture that these bring to the sofa styling and then I accented that with a lineny black and
white ticking stripe pillow that I found at Hobby Lobby. I love that these simple textiles help warm
up the space and also keep it feeling really earthy and casual at the same time. And just to
add some softness to the coffee table I used this black tray that I got from TJ Maxx to tie in some
more black accents just to relate back to that black side table that I got and then I topped that
with some aesthetic practical pieces. Next I wanted to tackle this little awkward space right near
the stairway and I figured this would be a great opportunity to add in some extra storage and have
another surface that I could serve food or drinks on. So after carefully measuring the spot I found
the perfect piece that I love the overall design of and it was a great price. This is the Palmdale
woven console from Target and my husband was super awesome and put the whole thing together himself.
We moved it into place and it was perfect because we still had a little bit of space on the left-hand
side to use our outlet but it perfectly took up the rest of the space while still giving enough
room for an easy traffic flow around it. I love the woven detail of the doors and this is a perfect
spot to store all of our games. I also really like that the cabinet doors are cushion clothes which
just makes it feel a little bit more fancy and high-end. And as far as styling goes I just wanted
to keep it pretty simple because I wanted to have majority of the surface available to set drinks
and entertaining platters on things like that but I just popped this vase on there that I found at
HomeGoods and a candle next to it for some height variation and I just love this vase because it
ties in those black accents but also has touches of those clay and terracotta tones that we have
going on throughout the room now. I also wanted to layer in a floor lamp to this corner for some
height and I found this lamp at Ross for $40. I also have a very similar one downstairs and I just
love the look of them. And lastly I added a little rustic stool as an accent and popped a vase with
some greenery on top just to complete the styling in here for an added homey feel with a functional
spot to set a book or a drink. And that is really it. That is how we took this room from being
another boring living space and added some much needed versatility and functionality and just
created an earthy organic and homey atmosphere. I love how the use of earthy materials and rustic
accents gave the space a casual lived-in feel and how the colors all related back to one another
but still contrasted against each other. And I love the functionality of the swivel chairs and
that they provided a seating area for both the living space and the game space and I also loved
that so much inspiration was taken from our statement artwork and then related back to the
rest of the design. All together we have a cozy functional and inviting space perfect for
entertaining or just kicking back and relaxing in. All right everyone that about wraps up this video.
I hope that you enjoyed it. I know for me personally this has been one of my favorite
transformations of our entire home so I hope you all enjoyed it as well and I just want to say a
big thank you to all of you who show me kindness and support on a daily basis. I truly would not
be here without you all and I just want you to know that I am so grateful for each and every
one of you and I want to thank you all for watching this video and I will see you in my next one. Bye!