------------------------------------------------------------------------------------------------------------------------------------------------------------------------------------------------------------- Thanks for watching! x
Hi everyone, welcome back to my channel.
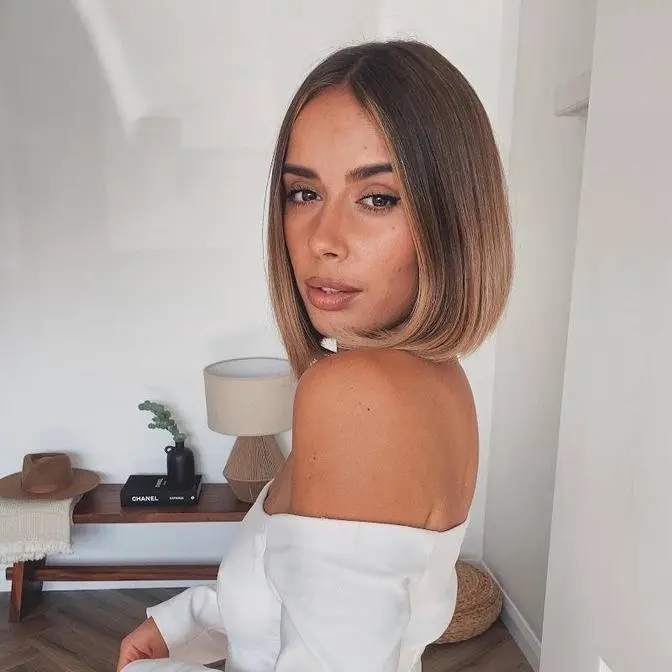
So today I have an everyday winter makeup routine
and this is one of my videos in collaboration with Ecotools.
Some of you might have seen in my video last month,
but they have a few new releases that are coming in 2017.
So I thought that I would do a video today
where I show you basically the makeup look
that I've been wearing every single day recently.
I've kind of, for an everyday basis,
been skipping eyeliner and stuff like that.
So it's just a really nice, simple makeup look.
And I thought that whilst I was at that,
I would show you some of my favourite brushes
from the Ecotools 2017 collection
and just some of my favourite brushes from them in general.
If you want to know how I got this look,
then please keep watching.
So I'm currently starting off my everyday makeup look
by using the Bare Minerals Prime Time BB Primer
Cream Daily Defense SPF 30 plus, plus, plus.
This has such a long name, it's ridiculous,
but it's a really lovely primer
and it also just makes a nice base
if you don't actually want to wear a base,
but you do want something that is going to
make your skin look a little bit more even and has SPF.
I just love using this on its own.
And then I also mix it with a bit of
the Tanya Burr Face Illuminator,
which just gives the most incredible glow,
but it's not shimmery or disco bally at all.
It's just a really lovely, natural glow to the skin.
And these two together are just like the dream team.
So I popped a pump of each onto my fingers
and then I just mix them together
and then smooth them over my skin.
So that is kind of primer and highlighter done in one go.
And I love using this every day,
basically because it has SPF in it.
Next, I'm going to be using my YSL Cushion Foundation
in the shade 40, and I'm going to be applying this
using an EcoTool Skin Perfecting Brush.
And this brush is amazing.
It's one of their new brushes for 2017.
I am just in love with this.
It's best used for BB creams and kind of lightweight bases
that are a bit more creamy and things like that.
And I just find it works really well
with my cushion foundation as well.
And the combination of these two together are amazing.
They just work really well to make my skin
look really lovely and flawless,
but in a really natural way.
And I've talked about this foundation
a little bit in recent videos,
but I haven't really showed you guys it in a video,
like in action, so I'm really happy
that I get to do that today.
So it just gives the most beautiful glow to your skin,
and it has a really good coverage as well,
but without being heavy at all.
Like it is so light.
So now that my foundation is done,
I'm going to move on to concealer,
and I'm going to start off by using
the Estee Lauder Double Wear Brush & Glow BB Highlighter.
And I'm only applying that under my eye
and then blending it in with the smaller
of the EcoTool's Perfecting Blender Duo.
This is another new release,
and I'll pop all of the release dates
in the info box below for you guys.
So these are great blending sponges,
and I've been really impressed with them.
I've been trying all of the new 2017 EcoTool's brushes
recently, and these are some of my favourites.
So continuing with concealer,
I'm now using my MAC Pro Correcting Conceal Palette,
and this I basically use for spots
or areas of my face where there are redness
or anything like that.
And today I'm going to be using these two
more yellowy shades at the top and bottom here.
And I love the fact that these are very yellow toned
because they really help to cancel out
the redness of some of my spots.
So I'm going to be using the very, very yellow shade
just on my finger to dab the product on,
and then I'm going to be using my EcoTool's
Perfecting Blending Duo to blend it out.
And then going in with the concealer
that is more yellow toned on top.
So once I'm done with my base,
I then move on to my eyes and the rest of my face makeup.
And the reason that I lump those together
is that I've actually been working from one palette
basically since the start of November,
and I have been obsessed with this.
This is the Charlotte Tilbury,
I think it's called the Look Palette.
All of the tones work perfectly for my skin tone.
I do think there's a bit of an issue with
if you're anything over like a matte NC40,
they need to have more of these palettes
because one palette doesn't suit everyone.
But for me, this does work really well.
But anyway, I'm going to get on with my eyes.
I'm going to be using these two shades here.
So number two and three.
And I'm going to be applying that
using an angled crease brush from EcoTools.
And this is one of the brushes
from their 10 year anniversary collection set,
which is such a cool set.
Like the packaging for it is adorable.
It comes with like a brush holder,
like a rose gold brush holder.
It's awesome.
And this eye look is really simple.
I basically take shade two,
which is a beautiful rosy champagne colour,
and sweep it all over my lid using the angled crease brush.
And some days I will literally use that one brush
and dip it back into shade three,
which is the darker matte brown crease colour.
And I'll just run that through my crease
in a kind of messy-ish way.
But other days I use a proper crease brush
and I will take that matte shade through the crease,
but also a little bit under my eye.
And that's what I'm going to be doing today.
So I'm going to be using the blend side
of the blend and smudge brush
from the Enhancing Eye set to do this.
And like I said before, this is such an easy eye look.
I just use the brush to blend through my crease
and then a tiny bit under my eye.
And I don't go for anything crazy.
It is literally just a very light application
of a matte brown and it's so super easy.
And it's just perfect for an everyday makeup look.
To finish off my eyeshadow,
I'm just taking a tiny bit of the highlighter
onto the smudge end of the blend and smudge brush as well.
And I'm just dotting that into my inner corner of my eye.
So to apply the bronzer from this palette,
I'm going to be using the define brush
from the define and highlight duo.
And this brush is one that I have a lot of love for.
I basically use this every day at the moment
because it's the perfect size
to sweep through the bronzer in this palette.
It applies it really well.
It's just a really great little blending brush,
which is perfect for the contours of your face.
But it's also great for blush as well
and also for highlight.
So if I'm being really lazy some days
and I can't be bothered to reach for a load of brushes,
I will literally use this one brush
for all of the kind of face parts of this palette.
So as you can see, I just sweep this
through my cheekbones, through my temple,
and I don't go too far in on my temple.
I try to keep it to the hairline
and then onto the of my forehead.
And then I come back down and do my neck.
And I don't know how well it shows on camera,
but this bronzer is just the most gorgeous colour.
And I've gone a little bit overboard on my nose bronzing.
So I'm just gonna use the perfecting blender duo,
the smaller one, blend that out.
After bronzer, I move on to the blush in this palette.
And to apply this today,
I'm going to be using the powder blush brush
from the EcoTools six-piece starter collection.
And I basically start off by applying
the darker of the cheek colours in the palette.
And I just pop that over my cheek.
So I apply that almost right the way up
to the back of my cheekbone.
And then I'm taking the lighter shade,
which is the shade that you're meant to onto your cheeks.
And you literally just apply that
to the inner part of your cheekbone, if that makes sense.
So I don't take it right the way up
to the back of my cheekbone.
And then finally, I apply the highlighter from this palette,
which is such a gorgeous highlighter.
I cannot wait to show you guys how this looks.
Like when I apply it to my nose, I'm just like, yes.
And to apply this, I'm going to be using
the controlled setting brush.
And this is another one from the limited edition
anniversary set that EcoTools did.
So I just run that through the highlighter.
And then I kind of sweep it in circular motions
over the top of my cheekbones.
And I find this gives like a lighter application
of highlighter, so it doesn't look too stark.
And I work up onto my temples and bring it back down.
And I do the same on the other side.
And then I apply a very generous dusting
to my nose as well.
But that is me finally done with this palette.
This has just made my life so much easier at the moment.
And when I just use the define brush
from the EcoTools define and highlight duo as well,
like I just find it's like the quickest
makeup application ever.
And some days I even get to this stage
and I feel like I don't need to put on any more makeup.
Like this is just it for me.
And I feel really comfortable like this,
which is a really nice feeling
because I don't always do that.
I normally go through my whole makeup bag.
So next in my makeup routine,
I've actually been using a setting spray
like religiously every day for like the past week, I'd say.
So I basically just spray a very generous amount
of sprays of this all over my face.
I know you're meant to use one or two,
but I love a glow.
And this just makes my skin look incredible.
So I just go to town with this.
So now I'm going to finish off my eyes
and I'm going to be using my Tarte
Lights Camera Lashes Mascara
followed by my Charlotte Tilbury Legendary Lashes Mascara.
I find that mascara name so hard to say.
And these make a really lovely combination.
I find that the Tarte mascara is a really nice everyday
kind of fluttery lash look.
It really separates, adds volume.
It doesn't lengthen too much,
but this one really does help to lengthen
and fill out the lashes.
And my lashes just look incredible when I use this.
I'm just starting off by wiggling
the Tarte Lights Camera Lashes Mascara
through the roots and lengths of my lashes.
And I've already got a bit on the inner corner of my eye.
So clumsy.
And some days I will just apply this mascara and leave it
because it just gives such a lovely natural flutter.
And I apply this Tarte mascara
to both my top and bottom lashes.
And then I literally just apply one coat
of the Legendary Lashes Mascara.
And the reason I apply one coat
is because one coat is really like all you need
if you've used another mascara underneath.
Otherwise your lashes can look a little bit crazy.
But I just love the way it looks.
It makes me feel like I have false lashes on when I don't.
Next, I'm just going to fill in my brows a tiny weenie bit.
I just want to make them look really neat,
but not beef them out too much.
So I'm going to be using my trusty Benefit Cabrao
brow gel in the shade six.
This is like the perfect colour match for my eyebrows.
So I just basically don't use anything else anymore.
And then I'm going to be using
the EcoTools Angled Liner Brush.
And this brush is from the Brow Shaping Duo set.
And I literally just dab it into the product.
And everyone says that their brow gel is really dry
and that they can't use it.
Mine is incredibly dry, but that is the way I like it.
I find that it applies so much better when it's dry.
So as always, I start by neatening up
the underside of my brow, and then I move into the tail,
and then I do the top side of my brow as well.
And at the moment, I'm literally just following
my natural brows shape, not over lining them at all
or anything like that.
And I'm actually quickly just taking the spoolie
from the Brow Shaping Duo set
and just running that through my brows
just to get rid of any excess.
I find that when I'm not wearing any eyeliner,
it's so important to make sure there's not too much
going on in my brows and they're not looking too heavy.
So it's good to use a spoolie.
But now I'm going to use the L'Oreal Brow Artist Plumper
just to set everything in place.
So now we're moving on to lip products.
And I have three that I really want to talk about,
but I'm only going to be applying one.
And I'm applying the one that I've just been wearing
the majority of the time.
And I feel like this is the one
I've been asked so many questions about.
So I'm going to be applying Tom Ford's Nude Vanille,
which is like a newer lipstick from Tom Ford
that I picked up.
I really love this.
I saw my friend Tanya wearing it.
I was like, I need that.
That is gorgeous.
So I've been wearing this all the time at the moment,
but then I've also been loving Tanya Burr's Birthday Cake
because it's basically the same colour,
but a bit more pink.
I've swatched these on my hands actually.
I was basically trying to decide
which one to show you guys.
And I was swatching them all.
Tanya Burr's is like the one on the end.
Then you have Nude Vanille.
And then you have a new one from Zoeva.
They basically launched a load of kind of like
liquid lipsticks and this is in the shade.
All is Calm.
And it's basically a gorgeous,
reddy, pericottery, orangey colour.
It's really, really beautiful.
It's very autumnal and wintry.
And I think that's gorgeous.
And I've been wearing that a little bit recently.
I really wanted to tell you guys about it
because I think that it is beautiful.
I've been wearing Nude Vanille all the time.
And I'm just going to apply Huda Beauty's Bombshell
before I put Nude Vanille on.
And then I'm just applying Nude Vanille over the top.
So that is my finished everyday winter makeup routine.
I really hope you guys have enjoyed this.
Hope you're all having the best day.
And I will see you guys again in my next video.
Bye.