
Repairing The Power Supply In A Rock Ola 490 Jukebox For A Customer
844 Video Views·Jan 7, 2025
ladies and gentlemen this is Joe's
classic video games back with another
cool jukebox repair video for you today
there is a gentleman that lives right
down the road from us here that uh comes
by every once in a while and he let us
know that he was moving but he had a
juke box two of them actually that he
wanted us to repair and we agreed to
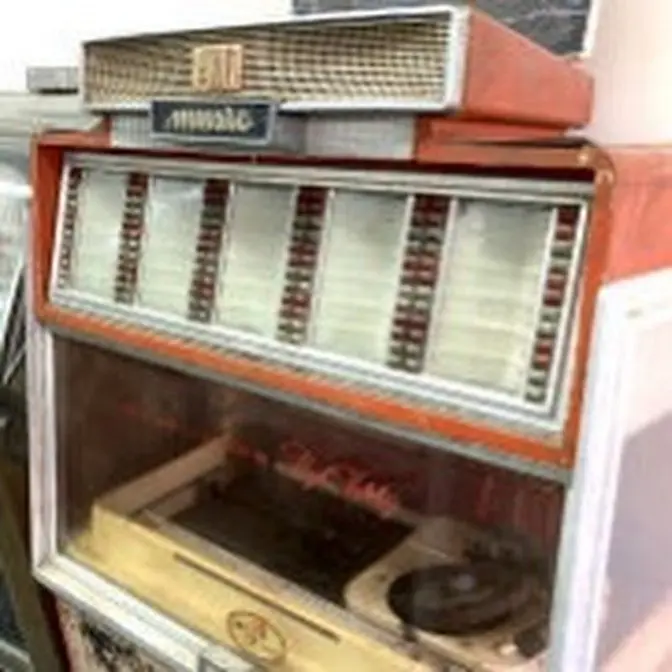
repair it for him so this is a rockola
Super Sound I think that's the
490 rockola 490 I have to look at the
back to make sure but is ack call a
Super Sound CPU control jukebox and uh
we're going to fix it for him in this
video or set of videos I don't even know
what's wrong with
it he's had it for quite a while and the
thing is in very clean Nice condition so
we've had it here in one of our back
rooms for a little while and uh we're
going to fix it and we're going to film
it and the reason that we're going to
film it is because we're hoping that if
somebody has a similar box uh that
they'll uh watch this video and maybe
it'll help them fix theirs
because a lot of these things are being
thrown away taken to the landfill
because once they stop playing they're
no fun anymore and they're big and heavy
but I would love to see more people save
them because they are something special
whenever they're working so hopefully
this will help you if you've got one
that isn't working um now keep in mind
uh on Juke boxes most of the boxes if
they're by the same manufacturer are
very similar so this one has a CPU in it
that that controls everything that part
is different but the things like the
mechanism is very similar the power
supply is different but it's a similar
idea behind it so I'll just I'm going to
go through some generic troubleshooting
just to help you determine what's wrong
with yours and then you can focus on
that area and try to fix it so first
thing I'm going to do is I'm going to
slide it out of here where we can look
at it a little bit better and uh we'll
see what model it is on the back look at
the other side of it and then we'll uh
um we'll try try it out and see what's
going on and we're we're doing it here
in our one of our little storage rooms
we got some cool stuff in here right now
that's a tempest we're working on for
our buddy uh down at the beach Adam uh
we've got a balet Night
Rider electromechanical pinball machine
and we've got a gotlib swing Along old
school pinball machine that we're going
to be working on we've got a Namco Ridge
Racer arcade game and there is a crane
machine a stuffed an an plush machine
hiding back there in the back so we got
stuff like this hid all over the place
right but uh this juke box is next so
we're going to we're going to work on it
a little bit so I hope you'll enjoy this
video series let me slide it out and
then let's look inside it
too so here's the back that we're
looking at this thing is in very nice
shape really this is a you know you know
I I wouldn't hesitate to call this like
collector's quality yeah there's a
little bit of issues like these it's got
a couple holes drilled in it for
something um but in general this thing
is much nicer than they usually are and
yes it is a rock ho of 490 I think the
490 and 494 were very similar I never
remember which is
which got her all opened
up
still has the original key it looks like
um for the front at
least very clean inside everything
looking decent I say
clean compared to other ones this is
very clean right you'll know if you get
one there haven't been there's only been
10 beers spilled in this one instead of
the normal
100 uh so over here is the power supply
that's usually having problems so we'll
see uh this is the the CPU up here it
has a battery mounted on it often gives
problems um and then here's the
mechanism this is the amp over
here you have your coin Mech down there
and you have the uh I think this is
called the mechanism board mechanism PCB
basically it runs the um electrical but
well it runs the mech we'll just keep it
like that okay so what the reason I'm
showing this is because I I like to open
them up whenever they've been moved just
to make sure there's nothing crazy going
on sometimes there'll be something
hanging down the amplifier fell off the
back and is laying on this on this light
bulb or there's there's broken pieces of
light bulb all down in through here just
want to check make sure everything looks
like it's in its right place so now that
we've done that we can plug it up and
see what it does um and uh see what we
can do to fix
it all right so I've never turned it on
but but I plugged it up let's see what
happens not
much okay
so I'll show you what you're looking for
I know I'm going to turn the brightness
down so that that light
doesn't blind
us revved up like a
deuce okay so um here's here what you
want to look for so when we plugged it
in it didn't do anything so a lot of
people think that uh whenever like a
light like this is on that that's
something significant all that means is
that the AC power uh is connected to the
wall and we already know that right uh
but the power supply actually creates a
bunch of DC voltages that the mech needs
the CPU needs and all of that right so
if you look on here let me see if I
can we do have a light on that says
default default
pricing a little hard to see but if you
look down here on this power spot
board see those LEDs on the side on a
rock Ola those should be lit
up so there's one there that says
-28 and I think one says positive 25 and
neither one of those are are are are U
lit
up the motor light is lit up I don't
know if that means power to the motor I
would assume it does and then the one on
the bottom is lit up now it could be
that those two LEDs that aren't lit up
are just burn out but since nothing's
working there's probably a problem there
so uh first thing I'm going to go do is
see if I've got the schematics where I
can look that up and then we'll be able
to uh to see how those two get their
power it could just be a fuse or
something but usually if you have a
blown fuse it's because something blew
it so let's check out the
schematics okay folks I'm running into a
problem that I've ran into before um I I
have the schematics for the rockola
49-1 but I do not have the schematics
for the rockola
490 um they're out there somewhere but
you can't even buy them the if you if
you get in touch with the uh manual
places that do reprint manuals and stuff
none of them have the the wiring diagram
for the original rockola 490 which is
what this one is as you saw on the name
plate on back they also made a 49-1 and
a 49-2 so those schematics you can find
that's what this is right here and it's
similar but it's a little bit different
so the power block on the 490 D1 was
a can we read that
54920 I think I've got hold on a second
let me change
this let's have it automatically
Focus
and automatically do white balance
okay that's better so this one is a
54920 but the one in the
machine is a 5
4525 so these schematics don't mean
anything um so we're going to have to do
it the old fashioned way I'm going to
have to take the power supply out and
we're just going to have to look at it
that it's a similar setup it's just you
can't go by the wire wiring diagram or
anything so I'll pull it out on the
machine let's put it on the bench and we
can check it
out all right folks I have pulled the
thing out of
the
box and this says rockola power
distribution 545
25A and it has different little things
to say if it's being used in England or
United States it says domestic because
this made in the
US um so it's just like when we're
working on arcade games you just start
at the wall and you follow the power
into the machine or if you're working on
a on a uh pinball
machine so this is the first place that
power comes to and
uh it's not working
right
so let's see
why now it's unplugged of
course and you do want to be
careful because
there's a big old Transformer in here
which means it's got
some some some
power let's see what the inside looks
like I wish I had a schematic that would
make things a hell of a lot
easier I've worked on these before but
little secret about me me I have a
pretty bad memory like I don't I
remember messing with it but I don't
remember how I fixed the last
one okay so the whole front plate comes
off and you can
see
um the
the 12vt we had and the motor DS4 we had
not really sure what that is but the -28
and the plus 25 we did not
have so these caps by the way it looks
like my brother Joe's been messing with
it trying to fix
it so he attempted
it
um yeah I see some stuff down in
there okay so I guess we're going to
check out some fuses again everything's
unplugged we're not
uh we're in no danger of getting Z
Zapped a lot of times people on things
like these they think oh my
Transformer's bad BL it's usually not
that it's usually something
simple like a cap burnt up or a resistor
burnt up or a transistor or something
the Transformer would
be a big deal so I don't even know what
these fuses go to you know I'm just
checking
them it's
good it's
good it's
good it's good all right so all those
are good oh here's another
one
also good all fuses are cool
people all right so um
H you would
think with a voltage gone you'd have a
fuse
blown but you'd be thinking wrong let's
see if I can get any kind of
a measure on this transistor mounted to
the
side
556
0551 all right
[Music]
so that is
a
7805 okay so that seems to be decent all
right
so I'm going to take this off so we can
see down in
there if I had the schematics that'd be
much
better
but hey you win some you lose some it
could it could be a scenario where it's
working and the um
um the LEDs are burn out or
something these caps look like
crap see what I can do here let's pull
some more crap out of here what do you
think let's dig deeper Dig Dug deeper
there was was a sequel to Dig Dug in the
I think in the 80s called dig Doug
deeper what do you think about
that so how is that mounted just little
those
standoffs no there's something holding
it what have we got
here
it's
moving I hate to
pry this is
black B for
black help me help you Mr
jukebox
help me help
you have I told you in any of my videos
about my theory of inanimate
object so here's my theory okay this
juke box only has one
purpose yes I was just trying to put
that in there to pry on the other end of
that
board the only purpose of this Juke box
is to play records right and the only
purpose of this is to play is the it's a
power supply to create power and it's
not doing that right
now so my theory is is that it wants to
work towards its purpose you know like
it was made its only purpose is to make
power so it wants to do that but it's
just got a few little problems so
usually if you'll mess with them a
little bit they'll do their part and
help you out too so we're going to see
if we can get this thing
to
do its thing okay so these are labeled
and I don't want to take those off of
there if I can help it that looks like a
nightmare waiting to
happen but I believe I'm going
to so this is eight and it's black all
right we're going have to write it down
people we're also going to take a
picture
matter of fact we're going to take
several
pictures just to make
sure so eight is
black seven is blue and
red six is
blue and yellow
five is
red just
red four is
red just
red surely that won't get screwed
up three is red and
yellow
two two is green and white
and one is I'm going to put fuse because
it goes it's green and white as well but
it goes to a fuse so the what we're
going to do just to be super
safe because you know you can't ever be
too
safe we are going to put some black
electrical tape on number
five so five is
red and
tape
okay
Tada now what are the
odds that
maybe maybe this rectifier board is on
the schematics maybe they use the same
board
inside
542 I
wonder maybe we'll check
later okay so I've got my multimeter
here what am I going to check what am I
going to check
people I have my handy Little Resistance
values chart from twisty wrist arcade
now I bet most of y'all watching have
all of this memorized so you don't need
one of these but I got this from my
buddy riper at Twisty wrist
arcade
helps me
cheat know what else I need it's kind of
the reason these videos in the back room
look kind of dingy sometimes it's
because it's darker back
here so about a year or two ago I found
this flashlight in a pinball machine and
I've been using it to help me see ever
since yellow purple rib
so that's four
[Music]
S
4700
4.7k ah good enough so it was it was
counting up and it got up to like 2,000
ohms the reason is because it's charging
one of these caps probably this one so
that's not going to work too great in
circuit let's try the dodes
please let me have a diode burn
up that one's
not that one's
not both of those seem to be
fine when there's four it's usually like
they're turning AC into
DC so I bet they're fine
too
they all seem fine although they could
be replaced I guess here I'll put it
like that maybe you can see it
better H those seem fine those seem
fine Q2 and Q
one without the schematics I can't even
really
tell I guess I could track it down and
everything it's probably
right
that's probably
right I see two more
dodes it's probably
right
okay then I got two little transistors
here oh that's that CR one what in the
world is
that that's a bridge little tiny
Bridge not seeing much wrong people
unless they're bad
connections
[Music]
H I don't see any more resistors smoked
I guess I I can check these two little
transistors
here sometimes they'll you know it
shouldn't really give us you reading
both ways but I don't even know what
they are and sometimes the way it's
being used you get stuff like that both
of them are doing that
so maybe all
right I don't see anything definitive
except for this big huge cat here that's
screwed up so I
wonder if I have one of those 2200
UF oh I'm not supposed to say UF oh I'm
so sorry I
apologize
2200
microfarad I forgot y'all don't like it
when I have too much
so let me see I thought I had one of
those
somewhere
that's
um that's
not still looking still
looking
boy I hope I got one that would be
really cool to have the correct
part that would be just
swell what is in
here what in the world is
this
what is
that is that the absolute correct part
and it's even axial ter termin got axial
terminals on it oh my
Lord this is
amazing all
right so I'm going against my better
judgment here and I'm actually going to
let people see me solder
something um because this is like a
troll bait so whenever people start
complaining and telling me I'm doing it
wrong I can just block their ass and
then I don't have to worry about them
down the
road I'm sure most of you are going to
be just fine all right so 2200 look this
one
says am I too
high there's no you what the world so I
wish I could explain to you what that
says but I'm apparently if I did that I
would I would pronounce those letters
wrong so I can't tell you what it says
but it's 2200 and then there are three
letters and then it says 63 volts
DC let's give it a little let's give it
a little
hip shall
we got this
new
conle this is the wrong tip for
this but it should get the job
[Music]
done might have to crank up the juice
people we were working on something
earlier that didn't need as
much
temperature
all right here we go that's
better so to to the
amateur soldering people out there like
me um if you add a little
solder it makes it easier to remove the
solder basically you're mixing new in
with the old
and then you really need to make sure
that the board is marked right so it's
saying positive is here and the
capacitor is saying that this was
positive so but see how the end of it's
all mushroomed up now a lot of people
would say oh look that one's exploding
I'm not so sure man that might be how
that particular type was originally made
I don't know but it sure looks bad so
we're definitely going to replace it oh
you know
what it's like rubber or something what
the
hell I I think that might be how they
made it that particular type just my
opinion see if I've got a solder sucker
here that wants to
cooperate likely
no
cooperate with us people cooperate with
us you know usually when I'm working on
this stuff if I'm not filming it I'm
listening to music but I can't turn the
music on because then
YouTube mutes all the audio and the
videos so you can't hear anything I'm
saying which some people would prefer
but most of you would probably be
annoyed by that
okay so we're going to put in our
capacitor make sure that it's oriented
properly so it's saying negative is this
way which means positive would be this
way get it back to somewhere near the
center there I always like to turn mine
where you can read them doesn't really
matter but like see this one what's what
cap is that I don't know because whoever
put it in there
didn't give me any
respect so I'm giving the next guy some
respect he'll be able to tell what that
is because of the way I put it in
there or the next girl it's the royal
guy women can do it just as well as I
can they'd probably be better at it
because they would
uh well there's no reason they'd be
better either they'd just be exactly the
same
gota watch what I say I don't want to
make anybody
angry tried to bite
me see I can get it looking nice and
clean so fresh and so clean
clean that's good all right good enough
good enough we'll cut the leads
off and
then just to tie it up with a pretty
little
bow put a
little zip tie action on
it like they
had
man look how nice that looks look at
that look how beautiful okay so I'm
going to replace these three as well and
I'm going to check these uh
resistors and then we'll see what we can
figure
out oh you know what I'm also going
to
what's that I
see could be could be could
be I'm going Reflow those too because I
don't see any cracks or anything but
might have
some screwed up solder joints there
give it a little
Reflow little Reflow never hurt
anything
all right so I'm going to kick y'all out
of here turn on the music and I'm going
to replace those three and I'm going to
test the resistors that I didn't test
they look fine you know I wish I knew if
I had the schematics it'd be so much
better I could check the voltages going
in on the wires see where what's going
on check the voltages at the fuses and
all of that
but a said is not to
be uh so uh I'll do that and see what we
got
okay folks so I've got the Caps back on
it got the board back in it we're going
to
try plugging it up and see what we
get even
though there were no fuses blown or
anything I'm rig it back
up put it back out once if I
can
um and then we're going to see if
anything has
changed and then we may be able
to at least try to test some of the
voltages on this board and see if we get
anything I don't know without the
schematics something some of you that
are
more experts on this stuff could
probably look at
the that board and tell what's
happening okay where is my power switch
okay it's down there okay so we're going
to plug it up and hope we don't blow
anything
up nothing is touching everything looks
[Music]
cool
so this is when you know you need to be
careful don't do as I
do just watch me do
it so we may Sparks fire might have all
kinds of problems hopefully
not holy
crap
I'm better than I thought I
was I wonder if there's something where
whenever it's in the
cabinet it uh something shorting those
lines out or
[Music]
something oh you
that H that's very
interesting so you have those four LEDs
on it means the voltage is there it
might be wrong you know what I mean like
you might like it's supposed to be 25
that led is not measuring 25 it's just
being turned on by something in the
circuit
but hell I got all four lights
on boy I like the looks of
that I have fixed not maybe maybe the
same block I don't know but so these
power supplies for the rockolas a lot of
them are they're very similar but
they're a little different so a lot of
them have this little board um with the
LEDs on
it um and I have fixed a couple of them
before by taking going down to that
little board we were just messing with
uh and and working on that but I've had
some before where there was actual
damage down there so there would be like
a a resistor that was burned up or a cap
that that exploded on one of them that
was real fun I don't know how that even
happened it didn't leak I mean it looked
like it caught on fire you
know
so maybe that board usually needs some
work I mean clearly it did with these
old capacitors let's look at the date
code if there is
one I can't decipher that one let's see
if this one's got a plain one yeah so
this one says the 16th week of
1984 um so April
84 okay so I'm going to turn it off
unplug it very carefully make sure
everything's cool put that
uh back down and then we'll try it back
in the uh we'll try it back in the uh
cabinet see if we get anything
different okay so I've got it back in I
haven't turned it on yet but to be
honest I'm a little suspicious that that
fixed it because I'm what I'm thinking
is is that I didn't try it before with
anything unplugged and then I didn't try
it before I replaced those capacitors on
the bench so it could just be that
whenever it has a load on it it doesn't
work right so we'll try it and
see but I I don't know so my I hate to
be a pessimist but it very well could be
that whenever we turned it on it didn't
fix
anything and my pessimism played
out okay so the next thing we're going
to do is we're going to start unplugging
stuff hm you know what though that could
be
it still could be the power supply
because it could be that there
whatever like whatever creates the 25
volts or whatever the 25 volts is uh
doesn't work under load or it could be
that whatever is plugged into it is
um shorted or whatever so it's making it
turn itself
off I'm going to turn it off and I'm
going to unplug everything and then
we'll plug it all back in with nothing
on it and see if it if it does what it
did on the
bench so I unplugged just the amplifier
and we've still got the same
problem all right so yeah we got our L
our our uh lights back on with both of
these low voltage power plugs
unplugged
so we replaced those capacitors which I
guess is good but that didn't fix
anything so we still either got a
problem with the power
supply uh not being able to put out
enough uh Power underload or we've got a
problem where
um the
mechanism is shorting it out or I guess
it would be the mech either the mech or
the uh control unit let's see if there's
a different plug for each
one okay so with the amplifier and the
smaller of the low voltage power plugs
plugged in we still
good so it's something on that Big 12
pin plug
there okay so I've got four lights and I
unplugged the CPU and we're good so the
mech is still plugged up I don't even
know you
know I wonder if I well without the CPU
I guess I can't scan or
anything
and this board
here I'm trying to see if there's like
power over here at
all I'd like to know for sure that it's
a control unit I didn't unplug anything
over here
so H schematics would help a
lot okay
um
let me you know what I could do I've got
a control unit that does not work so I
could try putting it in plugging it up
and seeing if it still does it if it
does still do it I've tested that one in
other machines it doesn't work but it
doesn't short out the power supply so if
I put that in and it doesn't work but it
doesn't you know what I mean so if I put
it in and that one also makes the power
supply do its thing well then we' got a
problem in the power supply but if I put
it in and that one's fine then we've got
a problem on the control
unit
all right so this is the one that I
stole out of
there and this is the one that I put in
there see how the system test light is
on I know with this big
old um fluorescent here it's making it a
little hard to see so the system test
light is on because that's what it was
doing
but all of our LEDs are fine with that
one on so
there is
something on the CPU that's in there
that is shorting out the power supply
and making it not work but hey we've
tracked it down
right so um this video is getting pretty
long but I'm going to take this another
room and we'll pop the front off just to
see if we see anything
obvious so looking at the wrong
schematics uh it has this one power plug
here that it says is the the mech
CPU power cable now this is probably
slightly
different on the U on the 490 the 49-1
the 49-2
but the CPU and there are two different
CPUs too with different connectors but
the power connector seems to be the same
right but look look real close at what I
found here so there's c203 and c204 10
mf35
volt right now look what they're
connected
to pin 11 on the connector to air saying
is the power
common right and then c204 connects
around and connects over here to 26vt
DC and then c203 connects over here to
-28 volt DC that's our
two that we are having a problem with so
c203 and c204 Bridge across the ground
and the two voltage that we do not
have Okay
so I've taken
the board out of the
game and then on the this is the power
connector
here here right and on the very back of
said power
connector I'm trying to get it where I
can show you when I check with the meter
let's put some light on the
situation okay do you see what I see a
star a
star do you see what I see
let me go in a little
farther I'd like to get it just right
for those of you who go why don't you
use a tripod now you
know cuz it's a pain man I'm all over
the damn building I'm going in the back
working on it bringing the stuff back
trying to show you this looking at the
schematics I just don't have time to set
up the tripod all the time but this time
around we're going to do
it that's c203 and that is c204
okay and they're tantalum caps now what
do tantalum caps do they short all the
damn time
right so you probably won't be able to
see this maybe you
will cap is shorted and the other one is
too it's just hard to get to it from
there either the Caps are shorted or the
two rails are just shorted because of uh
maybe there's something else doing it
but I'm seeing myar caps right across
the power rails come on and they're
shorted whenever you measure it in
circuit you know it's those caps but
here's the
thing this video is long as hell I'm
going to leave you hanging because this
thing takes like 10 minutes just to take
the freaking board apart
right and uh just looking at this board
would be really cool video
right so I think we're going to leave it
here till next time and then I'll film
another video of us fixing that now so
what did we accomplish in this video all
we accomplished in this video was we
tracked down that the power supply was
probably fine the whole time but we
replaced the capacitors on that one
board so they won't be a problem in the
future we were my brother had already
replaced the capacitors on that board on
the front so they won't be a problem in
the future so
and and we put another board in so by
testing The Other Board in it we know
that the power supply is good to go no
problems
right um but now we're onto the CPU so
we'll do that on the next on another one
so we've basically we've met we've
narrowed it down to this CPU when
plugged into the power makes the uh LEDs
turn off on the power supply when you
put another uh known to not work but at
least attempt something uh
CPU in it doesn't make the light short
out then whenever you test you find that
the two the the two rails the -28 and
the positive
26 um are both shorted the ground on
this board so clearly this board is the
problem so I could just swap those two
caps and throw it in but I've I've got
history with these it takes 10 or 15
minutes to take it apart there's a
battery in there that needs to be
removed and replaced it'll probably have
a bunch of battery damage that we have
to clean up uh and then even once you do
that the board may not work so
um we can do a whole video just on this
and we will so we hope you have enjoyed
it we've at least narrowed it down
right so leave your comments below let
us know what you think we're going to
bring this sucker back from the dead now
if you are watching this
video you can rest
assured that I've already fixed this
thing or I wouldn't have uploaded that
video that's how I do right so for
instance the uh We've got another
jukebox we've been working on a
ds160 I uploaded those before I rebuilt
the amplifier and all that stuff but the
reason I uploaded them was because the
machine is up and running and playing it
still needs work done but it's fixed
right so this one is not up and running
and playing yet but the reason I
know in this video to tell you that it's
up and running and playing is because I
will not upload that video until I get
this thing up and running and
playing so if you're watching this video
I'm not going to leave you hanging oh
hell no you just need to wait for the
next video to come out it's coming soon
or I wouldn't have uploaded it um so our
next video we will work on this so leave
your comments below let us know what you
think let us know if you're having a
problem with yours maybe we can give you
some advice if it's real deep in the
weeds sometimes we don't have the time
to get all into it if anybody out there
finds the schematics for the original
490 not the
491 and I don't it's it'll say 490 das1
not that one I got that one not the 490
D2 not that one that one's out there all
over the Internet the one for the
original 490 hard to find you can't even
buy
it so uh if you find that let me know I
sure could use it uh but leave your
comments below let us know what you
think about it make sure to give us a
thumbs up for taking the trouble to film
it for you and uh we down below we'll
put a link to Amazon we've been trying
to get people to do this little Amazon
thing for us if you go to Amazon to buy
anything doesn't have to be something we
suggest or anything if you use our link
below then Amazon counts that as we sent
you to Amazon because I'm doing a
commercial for Amazon right now just by
mentioning it right so if you go to
Amazon through our link it doesn't raise
your prices or anything but it puts our
name up in the URL of your of your
Amazon site whenever you go there and
then everything you buy on
Amazon they pay us a royalty for it's so
cool so people keep uh people keep
buying things just you know anything
small you know like food a lot of people
buy a lot of food on Amazon and uh
whenever they do that it gives us some
of Amazon's money not your money because
it doesn't raise your prices you don't
have to do anything you don't have to
sign up for anything or log in or
anything all you have to do is click
that link and whenever you do it uh it
tells them that we sent you there so we
appreciate all the people that have been
doing that uh that's pretty awesome and
we're happy that we found a way for
people to contribute to us but that they
don't have to spend any money you know
because it doesn't charge anything extra
or anything people have been asking us
if we're going to do patreon we're not
going to do that uh just because we're a
business and we don't want you spending
your hard-earned money on some guy just
ranting and raving on uh repair videos
we want you to be able to watch them for
free and not have to donate or you know
um you know we've got special videos for
the patreon people and all that we're
not going to do that now if other people
want to do that I have no problem with
it I'm just not going to do it for me um
we'd rather keep everything free where
you don't have to pay anything but if
people want to click our Amazon link
that helps us out and we appreciate it
so leave your comments if you have if
you need something on Amazon click the
link and uh we'll see you on the next
video thank you for watching hopefully
we'll get this sucker running tomorrow
but tonight it's late I'm going
[Music]
home
[Music]
people you may not have heard yet but
we've got a second channel that we've
opened up for our brother Donnie my
brother Donnie and the name of the
channel is my brother Donnie so go check
that out if you like it has nothing to
do with arcade games but it's more like
farming mechanical work if you like
seeing things be repaired he does stuff
like that a lot of times if you like the
kind of vibe we bring to things
positivity
and uh a uh can always get it done
attitude I get that a lot from my
brother done so go check him out um me
and him I'm also on that channel right
now me and him him and I are working on
this old dilapidated mobile home that we
bought and it's kind of funny cuz the
thing's destroyed and we're trying to
fix it so uh if you get time go check
out my brother Donnie here on YouTube
the link is on our Channel see you on
the next
video
[Music]
n
[Music]
n