1K Video Views·Sep 15, 2025
Have A Question About Repairing YOUR Jukebox? Join Our Patreon Account For Direct One On One Repair Tips And Advice.
https://patreon.com/JoesClassicVideoGames
------------------------------------------------------------------------------------------------------------------------
Joe's Jukeboxes is our channel sharing all the repairs we've recorded videos of over the years. If you've got a jukebox that needs repair, if you watch our videos you may be able to fix it yourself. There are playlists here on the channel of each manufacturer, keep in mind that the boxes usually used similar if not exact mechanisms from year to year, so if you can fix one Rock-Ola, others will be very similar.
This channel is a subchannel of our main channel @JoesVideoGames !
ladies and gentlemen this is Joe's
jukeboxes back with another cool jukebox
repair video for you this evening
now five years ago we did a couple
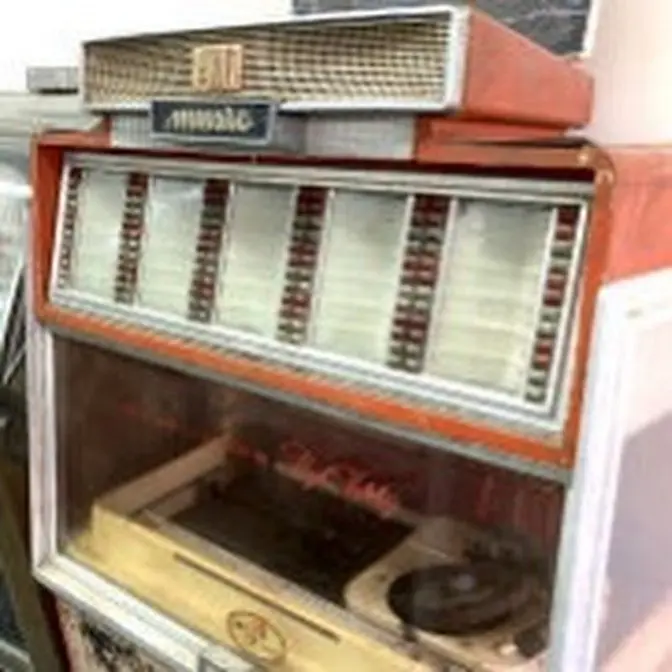
videos on this seberg ds160 jukebox the
same exact
one and I'm sad to say it's been sitting
here for five years five years we
haven't messed with it other things came
up we worked on this we worked on that
um and the reason that we
uh haven't worked on it in so long is
because uh when last we left it it had
a couple little issues now we the videos
that we did before were all about the
torat memory unit that's in it I
rewatched the videos just to uh re uh
familiarize myself with it and basically
we had a problem where it was giving you
extra selections and uh I think we've
got that fixed but now we're to the
point where we need to rebuild the amp
so like I said it's been sitting around
a while it needs a little bit of stuff
done like some of the paint touched up
cosmetically and things like that but
it's a it's a really cool jukebox so I
figured in honor of our new channel
here that maybe we'd finish this thing
up so we could sell it what do you think
now this particular juke box belonged to
a lady named Janet and it says Janet
music and game room that's pretty cool
uh so let me show you what it's doing
it'll play but after it's been on a
while you start getting more and more of
this Rumble in the in the amp I think
the amp's been rebuilt before um but
it's probably do to have the capacitors
replaced again I don't know what they've
done with it uh some of you are going to
say well then why are you playing it
because everybody else has played it so
it's fine so let's try to play um this
for instance so let's see if it'll
select it and if so we've got that part
ready but you'll you'll hear The Rumble
in it now if they if this part goes uh
dead it's because the uh
uh they uh were not happy with me
playing this
[Applause]
song okay so you hear The Rumble in
it and it's slightly too slow I
[Music]
think all
right so I don't know if it's going to
let it play that but basically the thing
will select now um but all of the uh the
tone is there's a lot of rumbling going
on and there's just too much base which
we might be able to adjust but I think
we're probably to the point that we need
to rebuild the amp to get a better tone
out of it so I haven't even looked at
that yet um we've had it for years but
that's the next step I think I think the
selection thing let's try one
more
j3 I think the selector is working fine
but I don't want to leave it on too long
because the amp seems to get worse as
you leave it
on
j3 j3 for
sure here the
[Music]
hum and it's just slightly too slow so I
don't know how easy that will be to
adjust out but hopefully it's a belt or
something okay so let's open up the back
and take a look at the uh amp and uh
we'll go from there so here is our amp
it mounts on the back door uh appears to
be a stereo amp to
me um and you know 62 I think is when
this was made so of course it would
be the seaburg stuff they always had
such a cool way of mounting everything
they're they have U some of the models
from around this time and a little bit
later had a um pieces entire pieces that
you could just easily remove and and and
things like their Auto speed unit or
whatever it was
called um
but yeah okay so I'm going to unplug
everything and we'll pop this out and
take it onto the work desk workbench
onto my
desk we'll put it where we can look at
it all right folks here is the underside
of the amp it's actually uh less than I
was expecting I figured it would be be
have more going on than this it isn't
that bad um and it does look like it's
been worked on at some point let me zoom
in on some of it
here so we've got lots of
resistors couple
dodes
couple um disc
capacitors there's an electrolytic that
they didn't swap
some film caps which I would think are
probably fine is this a cap or a
transistor three legs is some kind of
transistor
yeah all these film caps I think are
going to be all
right so here's a cap that someone has
replaced at some point maybe it was a
paper or an electrolytic there's another
transistor here's a cap someone
replaced this is actually this is
actually the filter cap and they did not
replace the filter cap which
if you're getting a bunch of humming
that would kind of
be um the first thing I would assume
that it's something to do with that
but we shall
see so one of
the
capacitors has a yellow wire running to
it that runs over to this socket
one of them has a couple of orange wires
to
it that runs to
here and over to here I'm looking for
opportunities to mount the Caps away
from
here really though you could get a
pretty good I think I think we're going
to be able to just put them right there
on
the you know I've got this screw here
too it' be really easy to mount a
terminal
strip H decisions decisions decisions
how do we want to do
it they have been in there doing
something see the
solder they've screwed around with
something
there all right so we got all that going
on that needs attention
uh we've got some more electrolytic caps
down
here I'm going to look in the schematics
and see what those do it' just be
interesting to see what they chose not
to replace
um today in the modern you know this is
2024 that I'm recording this it's it's
very uh common now to replace all the
capacitors electrolytic capacitors or
paper capacitors in an amp now but
back in the '90s I whenever I worked on
Arcade monitors for the first time it
wasn't as common to replace all of the
electrolytic capacitors for a while
there in like the early '90s you would
replace like one cap whenever you did a
monitor that sounds crazy to people now
but um I know a lot more about Arcade
monitors than jukebox amps but we would
work on U well not we it was before me
but um people would there was a list
actually floating around of what caps
did what so basically if you're if
you're Nintendo Donkey Kong if the the
screen was folding over on one side is a
very common problem there is one cap
that makes it do that in the vertical
section and so people would literally
replace one capacitor with a two cent
capacitor and fix the Monitor and then
just keep using it and that was
considered accepted practice people did
that a lot okay so then it got to the
point where you would put a cap kit in
where um like on a Sano for instance it
might have eight or nine capacitors well
these are the ones that usually give
problems replace
those you would never replace like the
filter capacitor or something like that
on a monitor um and then it got to the
point probably 20 years ago where it
became very common for people to say not
replace all of them because they're
going to go bad eventually anyway but it
there was a progression there so my
whole point is this amp was made in 1962
this thing was probably rebuilt in the
if I was just going to guess uh after
talking with the customer that we got it
from and knowing how long we've had it
it was probably rebuilt in the '90s at
some point and we may be able to tell
with a date code or something on
something I don't know I don't how the
Caps usually don't have them but anyway
it was probably rebuilt you know 30
years ago so it was rebuilt 30 years
after it was made and then it's another
30 years as it went by so whenever they
did it they didn't replace some of this
stuff maybe they
uh maybe they just felt it wasn't
necessary or at the time that was what
was considered
uh proper or maybe these were replaced
and I'm just I'm thinking that they're
older than they are but yeah so from to
my eyes we've got to measure all of the
resistors um most of these like orange
drop looking caps we're going to be able
to leave just fine um
we got to measure all the resistors but
we we really have very few capacitors to
actually change You' got three here
you've got two here if we were going to
change it again here's another one six
seven
eight so at first glance I see eight oh
here's another one
nine nine that to me look like there's
something that you should replace and
then whatever's in the filter cap I'm
I'm going to guess that
there's maybe looks like maybe there's
four in there
um so not a huge cap job but it's going
to be a big deal measuring all these
resistors now there's certain resistors
that are more likely to go bad than
others um but maybe I can figure that
out by just measuring through a bunch of
them and uh figuring out which ones tend
to be bad on each tube all right so
there's that and then also we can test
the tubes I don't know if any of that is
going to have any kind of bearing on a
rumble in the in the um music as it's
playing because it seems to me like
that's probably something to do with the
turntable but we need to do this first
just to make sure and we don't want to
burn up the amp uh playing it not
knowing what kind of condition that the
capacitors are in now that I've looked
at it I'm not quite as worried about it
but if these filter caps are original
and it kind of looks like they are it
might cause some issues so let's look on
the top of it so if you watch the
previous videos this actually joins with
the the selector system with these
blades
here there's like a plug that plugs into
it on the side we'll clean that up and
here is our
capacitor this should have a date code
on
it so it's a 40450 a 4450 a 2400 and a
2400
and
8768 9 it says
H let's see if I'm reading that right
oh no there we go 235
628x that's going to be the 18th week of
1962 which makes sense because this is a
1962 um amp now it could be that they
restuffed the contents like new
capacitors up inside this cap I don't
think they did doesn't look like the me
on the bottom it looks like everything's
still original so we're going to we're
going to leave this mounted but we're
going to disconnect everything from it
and put new stuff
in so I need some 40 450s and some 20
400s um and all of our tubes are
filthy but you know that doesn't really
mean anything so we'll check those out
maybe we'll break out the tube tester
and see what those are
like um but essentially we've just got
some capacitors to replace now
let's see what our tone control is
looking
like okay so the base is turned up to
Max that's part of why it sounds the way
it does and the treble is on
medium so the base I want to turn it
down a little bit it I've got the one at
my house set like that too and the thing
with it is it's fine if you've got it
turned up loud so like if you've got the
amp at let's say 60%
um you kind of want the Bas up because
it makes it Punchy and everything sounds
really great but what happens is you
turn the amp down to like
20% and the base just overrides
everything so you you kind of need to
adjust this depending on what volume
level you're going to play the records
at that's what I found with the one at
my
house this says
used
well I mean obviously it's used it's
from 1960 I don't understand why people
write things sometimes
seberg stereophonic High Fidelity
amplifier I know a little bit more about
these than I did five years ago so
hopefully it'll go a little easier for
me all right so I want to look in the
amp I mean in the uh schematics and just
see what those capacitors that they
obviously didn't change see what they're
used for and see if there's a reason
that their logic thought hey we don't
need to replace these so I've got out
the schematics here and uh I love like
taking it slow and looking through the
schematics as you go whenever you're
rebuilding something like this because
it kind of helps you understand how the
thing works and you learn every time
that you work on one so I'm still in
that phase where I'm learning I'll
probably learn the rest of my life if
you look over here on the left there is
a plug with three connections one goes
to ground that's what that little symbol
there is and then the other two one goes
up here to what they calling channel one
and one goes down here to what they're
calling channel two well if you look
they immediately go through a
capacitor so you're looking for
electrolytic capacitors which are
usually uh what gives you trouble when
they age and this one see how There's A
Plus on one side it's showing you which
side is the positive electrolytic
capacitors are usually um polarized so
one side's positive and one side's
negative so if we look on this amp this
is where that's coming in that's the
three posts and you can see that one is
connecting to ground so this is the the
chassis ground right so one pin is
connected directly to ground and then
there's the two others right so one
immediately goes through a capacitor
over to here and this side immediately
goes through a capacitor over to here so
these are the two
caps that they're showing here and here
so the signal from the pickup
uh playing the record runs through these
two capacitors is the very first thing
it does so those definitely if they
haven't been replaced should be replaced
um that could cause you all kinds of
problems it looks like they did replace
these I found in the manual here this
came with it uh where they bought this
jukebox in
1994 so that's when it would have last
been serviced but you can just see the
general dirt and things on it that's an
old cap so that's probably from
94 um maybe even older but so it looks
like they did replace them but it's been
a long time so it's been 30 years and
like I mentioned
before in '94 it was like if we assume
that it was capped in 94 somewhere
around there the thing was about 30
years old and that that was 30 years ago
so if it was time to cap it then it's
kind of time to cap it again right uh so
that's what those two do so let's see if
we can find any of the other ones okay
so so we got this one here I thought
that was kind of strange that they
didn't remove that one cuz that's
obviously ancient electrolytic you'd
think that that would have been
something that they would have
definitely wanted to swap whenever they
did it in the 90s but if you look in the
schematics uh that's this cap right here
now this is the AVC
section um Auto volume control basically
so if it if the record is a very quiet
record it will bump it up a little bit
of the record is a very hot record it'll
bump it down a little bit so that
everything's about the same volume right
um but the thing with this circuit is
you don't even have to use it if you
take this tube out it just gets rid of
the AVC and it just plays the records as
they're recorded so some of them will be
louder than others uh if you got
problems in that circuit though it
really could screw things up and make um
make uh you have sound you know muffled
sound and things like that so our our
problem could bead could have something
to do with that but I you know probably
not but maybe but we'll go ahead and
replace it but this is an example of
like I was saying
earlier for a while it was considered
that you would you didn't re really
replace every capacitor you just replace
specific ones that were known to cause
trouble now we've gotten to the point
where whenever people do a jukebox amp
they pretty much replace all of the
electrolytic capacitors so that's what
that one does
okay so these um if you
look 22 microfarad 47 microfarad and 47
microfarad that's a more
modern
um value so in the past these would have
been 20 50 and 50 or something like that
and we could we know that actually by
looking in the schematics so there is
nothing in here that originally was 22
47 or 4 47 as far as the schematic but
you do find right
here that
c121 was 50 c122 was 20
c12b uh was 50 so we've got a 22 a 47
and a 47 so those are more modern
Replacements someone has swapped those
caps at some point which makes sense uh
and if you look on
this it says 7250 it's probably the 50
week of
1972 doesn't mean that it was capped in
1972 it could have been done in 1994 and
they just used an old capacitor and they
may have tested it and it tested
fine um but these
three are part of the power supply so
it's right
here it's that one that one and that one
so this is a the main Transformer the
power transformer it's getting the
voltage in on that Prime AR and then
it's creating these secondaries right
and so these three are used in the -30
and -35 volt
section so anything on the amp that
needs -30 or -35 will be uh using that I
wonder if that's labeled on here yeah so
-30
here um -30 up here of course both of
the channels will be the same and then
the -30 5 would be used
somewhere as
well I don't know
somewhere so uh obviously very important
are those caps screwed up probably not
but I'm going to replace them anyway um
they're probably doe for it again but
they they're probably still fine at some
point someone has swapped them but
that's what those are doing it just it's
kind of shocking to me that they
replaced those but they didn't replace
the filter capacitors so let's see if we
can find
those so they're actually here on the
other side of the Transformer so this is
the primary these are secondaries this
is a rectifier
tube and see how it says 120 a b c and d
That's our four values that are inside
of that capacitor that uh can um they
did such a clean job with this cap kit
it almost makes me wonder if they
restuffed the can but it doesn't look
like they
did um but I can't really get in there I
don't I don't know I don't know what
they did but we're definitely going to
swap those those are just begging to
cause problems so we're definitely
swapping
those so if you look on the schematics
right after we go through that initial
capacitor there is a transistor here and
then on one leg of the transistor there
is a
cap that was a 50 micro farad capacitor
um back in the day one on each side and
that is this
one so that that's the original one
right there probably from way back in
the day but on this side they actually
replaced it so it's kind of weird that
they only did one side but
whatever 50 volts and 47 microfarad all
right so both of those we will
definitely replace as well that's a very
common cap it's easy to get those all
right the only other one that jumps out
that they've obviously replaced is this
one which is strange because that was
originally a myar cap and I believe that
is actually cap c104 which just happens
to be a labeled a 104 as well because
it's a
0.1 uh microfarad capacitor so and and
since it's a stereo unit you know that
side is just like this side so the cap
over here that that correlates to that
is this one and they didn't replace it
so must have somehow tested it and knew
that it wasn't quite
right um and you can see it on the
schematics right here it's either that
one or it's this one these stereo ones
are fun to work on because you can
compare side to side they should be
pretty much the same on both sides
they're doing the exact same thing um
when you're playing a record though the
input on a stereo record is different
you know you may have more volume on the
left than the right or there may be a
drum pounding on the left and it's not
on the right or just depending on how
it's mixed so you get different signals
in which changes some of your voltages
and things where or not identical um if
you're trying to test things while a
record's playing um but it's actually a
pretty simple amp so if you if you think
about what we just looked at they
basically have replaced the capacitors
in the power supply section they didn't
these for whatever reason but we're
going to so you're replacing all the P
capacitors in the power supply section
and then there was one cap in the um in
the ABC section and then there are there
is a
cap a couple caps at the beginning of
each Channel and that's kind of it the
other ones are not electrolytic they're
film caps myar
caps so it's actually a simple little
design so we're going to swap over some
of those caps and the main one is that
filter cap that they have never uh
redone we definitely need to get that
done before it starts burning up
something your your problem with that is
if you if you're not getting a good
filter you can literally start burning
up Transformers and everything else and
plus if your voltages are wildly off um
if you're
running too high of a voltage on the
tubes you can burn them up if you're
running too low of a voltage the bias
might be off so much that it causes
problems there's just all kinds of crap
that can happen so you kind of need to
get
everything uh working up to spec but the
the not not only the capacitors you also
need to go through and check the
resistors to see if any of them are way
out of tolerant um you know most of them
are are spec to be within 20% or so of
whatever the value is so if it's 100 ohm
it shouldn't be more than 120 or less
than
80 um so you you really need to check
that too if you get that and your caps
so if your caps are new and you get your
resistors intolerance and you still have
voltages that are wildly off it could be
that You' got a short in a tube or
something um but you can figure that out
with a tube tester so and it everything
doesn't have to be exact but you want it
as close to the specs that they've got
listed as possible so that's what you're
aiming for and once you get it to that
you're going to get it closer to how the
engineers designed it so it's going to
sound
better okay folks so here's what we've
got so
far um the big fat one I replaced now
some of these I used um axial radial
caps instead of axial caps just cuz is
what I got in um
you it's not really that big of a deal
on the bottom of the cabinet and if you
look they did the same thing with all of
their little orange drops I mean look at
that that's Factory that's why there's a
clip there right so I don't want to hear
no crap you can do it better if you if
you don't like it when you do yours do
it better so we replaced those two and
that
one um the two on the end in now one of
the ways that I do
it
is I cut off the old leg and then just
hook the new leg around it now why would
you do that so that you don't overheat
this if this fails and falls off of this
strip you're in big trouble right so it
might be a better idea to just work on
the the old leg um so that you don't
have that problem I try not to solder
directly to the tube sockets either just
because there's only some many times you
can do that before the thing starts
falling
apart um replace the three down here the
same way I actually had a
couple axial for those of you that care
and then of course the biggest part was
this filter cap so I removed everything
little by little and put in a terminal
strip here which I actually drilled a
hole and mounted it with screws but that
will actually uh you'll have a ground
post there where the screw goes through
you're grounding it to the chassis but
you don't know for sure that that's
going to hold and unlike the filter caps
you kind of want to make sure that
they're grounded so the the two you
can't see them now because I've got the
resistors in the way but the two uh
screws I actually have a wire soldered
to them as well and over to this ground
wire that was soldered to the ground on
the can it just daisies along and gives
ground to all this as well and then I've
got the four caps mounted um to the
terminal strip and then the four
resistors that I had mounted to the
terminal strip and then there's one two
three four
five six wires that I had to move over
too so it really it took a lot of
trouble I am really surprised though
that they didn't replace that before
because it's kind of the most important
thing to replace um maybe they were able
to test it and it was still fine but the
you know the filter cap is your your
main thing that's going to cause you a
bunch of problems if you uh if you're
running with a worn out capacitor so I
need to go through now and check
resistors I did check the four that I
swapped over and they were all still
within spec um but I'm going to go
through and check the rest of them um
just to see if we've got any other
problems and replace what needs done and
then we'll test the
tubes it took
probably two hours to do this um these
ones were obviously very easy um this
took about an hour by itself to do just
because it's you got to do it one by one
move it over just to make sure that you
don't get something in the wrong
spot but I think we're good and we can
go from there I don't like that wire on
the resistor that's probably not good
get that down away from that sand
resistor so it doesn't burn it
up um okay so um yeah let me start
checking resistors and we'll see if any
of these are out of spec well I can't
find any resistors that are far enough
out of spec to replace um there's
they're all within 5 or 10% this one
here it looks like they replaced
whenever they recapped it before that's
a newer one so I thought for sure maybe
on this side the one that complements it
um would be messed up but it's not it's
within spec so um I can't find any of
them that need to be replaced so got off
easy
there um all right so now we need to
check the tubes and see if they're all
kind of within tolerance I've got a tube
tester here that's not the greatest one
but it'll work so um let me get in out
and we'll run through the tubes and see
if everything seems all right with those
okay so this is an Old Mercury
301 tester uh that I bought on eBay
whenever I first started screwing around
with these um since then I've got
probably six or seven other tube
testers um somebody sent me a message
the other day wanting to know if they
could buy one of them but I'd rather not
because then I I mean I'd sell it here
at my shop but I I don't really want to
ship things um and you know they're all
over the place you can get them
everywhere anyway um we're going to do
the 5 u4 first I already did it actually
but when I went to put it in the the
socket is screwed up it doesn't have the
little guide you know there's a
key so that you can't put it in wrong
right it's missing off of that one I
don't know what they did I'll show you
here in a second so I had to go back and
watch the
video and look how it was situated in
the in the uh amp on the
video and uh but it was pretty obvious
because I could see the getter the
getter on the video um so I was able to
put it right back how it was so if you
this is just a I guess it's a
rectifier um and it tests good on both
of the tests that you're supposed to run
on it um but let me show you the bottom
so you can see what I'm talking
about so the the
key is missing somehow I don't
know it's just broke see the plastic see
how there's something missing in the
middle there so that piece is broken off
so after after finding how it went on
the video I stuck it back in the amp the
way it was and then I drew a line where
the uh key is and if you look on here
they've got the rivets lined up with the
line um and also on the but anyway this
one's good so no problems there all all
right so looking at the schematics that
capacitor that we replaced that I was
saying was in the ABC section the
v109 so I'm testing the tubes and I'm
testing v101 half of it's used over here
and half of it's used over here in the I
guess this is the preamp section that's
what that sticker is that says
used it's over the socket for the ABC
tube so they they removed the ABC tube
so that's just disabled so that explains
why they didn't feel that necessary to
replace that cap they're not even using
it so um interesting it does say here in
the schematics that if you don't want to
use the ABC just pull the tube out so it
was acceptable back then uh okay so I've
got this and I've tested both of the
uh the settings on it and we get a
pretty good result out of it nothing
great uh both tests perform about like
that so for for the the old tubes that
I'm always testing that's pretty typical
I mean I don't get any that Pegg this
sucker we're always in through here if
it's a good tube so that's about as good
as I ever come across usually so I'm
cleaning these off a little bit and
putting it back in the amp the the risk
you run cleaning them is that you wipe
the um the labeling off of it of course
which I'm sure all of you know about if
you know anything about tubes U but I'm
wiping them down a little bit just to
clean it up a little bit and putting
them back where they go all right so
this is our first
$71.99 what a beautiful little tube it's
got good glow at least right let's test
this socker on it's first test it has
two well that one proved me wrong about
the other thing so it's actually
performing a little better than usual
and then on this one you can check for a
leak between G1 and G2 by rotating this
to
X3 no short so we're good
all right so um let me test the other
one while I got it set up for
this all right so this isn't good so I'm
doing the F the both of the 71 55s um
7199 tested fine on both
settings uh so I'm doing the first 6973
and I've got a little bit of a glow on
the uh this short indicator so this
thing's got either some leakage or a
short in it so what I'm going to do is
swap in one of the other ones just to
see if it's just on this tube or if uh
this tester is just doing that on all of
the 69 73s I've checked I've got
everything set right um but I can't even
test it if it's got a short because it's
going to uh short obviously so let me
try another one and uh see if I'm
getting this on
multiples all right so tube number two
I'm getting the same
thing 457
e3a four five
7 e
3 a hm yeah it does not like the 69
73s which I wouldn't think there'd be a
they're probably just leaking it's
probably not a complete short it's just
leakage um because you heard the things
were
working um those are both from the same
channel I kept them
separate um on the table so maybe that
Channel's got some problems or had some
problems uh okay let me move on and
check another I can't even test them
though if it's
leaking you screw up the tester
um let me try another one all right so I
am now up to I have tested eight
different 6973 is on it and they all do
that so I I Googled it because you know
the internet is your friend and uh
Google is saying some people on forums
are saying that oh all of their 69 73s
do that too they're saying that it's
probably the way that the testers design
because they said that there's two G2
Connections in the 6973 that are shorted
together so it's it's probably just
reading that as a
short so I think on on this particular
tube you can ignore that another
gentleman said that on a power tube that
it uh the way that the amplifiers are
designed usually it doesn't cause noise
whenever there's a short in it or
leakage in it um so I went ahead and
tested a few of them these are ones that
I had laying around that aren't very
good and so they don't test all that
great the ones over here are testing a
little better which are the ones that
are in the seaburg so I think we're all
right on the
tubes
um I you know most of this noise like I
was saying uh earlier I believe is
turntable noise turntable Rubble or it
could have been those filter caps but I
think we're about ready to actually pop
it back in the juke box and just see if
it sounds any different with the filter
caps replaced like
that all right so I've installed them
all back in and two of them were
slightly weaker than the other two so I
put two that were similar test similar
measurements in one channel and the two
that were lower in the other channel
which means one channel I guess would be
a little worse but um there's a balance
adjustment on this um and it's Push Pull
so I would assume assume that it'd be
better off if one channel if they're
matched than than having one test higher
than the other but you know what do I
know so that's my thoughts though okay
so we're going to slide it back in and
make sure everything still works and I
didn't blow anything up by putting a
resistor in the wrong spot and um we'll
go from there this one thing I don't
like about this is the since you have to
attach it to that
other uh uh case that's in there you
can't really get to the back of it to
test voltages and stuff if I had some of
those little tube sockets that or like
tester sockets where they've got wires
sticking out so you can use a meter on
it but I don't have a good way of
testing uh voltages at any point in it
so I don't really like that you know
it'd be it'd be cool if I could see what
these power supply voltages
are um but you can't get to the back of
the amp installed in the
machine so I have to think about that a
little
bit okay so I've installed it back in
this is how they've got the speakers I
put them back exactly how they had
it uh it's very confusing
though so you've got three wires black
red and
blue that actually go to a crossover or
some kind of crossover right
there so they're connected up on the top
and they got this
little thing here set to yes be sure to
set this switch correctly when equipment
is installed are twin speakers our twin
stereo speakers in use without jumpers
between vc1 and ground in the same room
as the phonograph what am I seeing in
the am I seeing smoke there
that's I think it's just cob
frightening whole thing's kind of dirty
uh okay so who knows right and so they
had them hooked up like this but it's
kind
of off so they've got the red wire going
to pin
four but it's not really pin four that
means 4 ohm of one
channel and then they've got the black
wire going to 16 ohm of one channel
which would be a difference of 8 ohms I
guess yes if it'll even work like that
uh and then over here they've
got you know the red if if maybe that's
the common I don't know see where it
says red that doesn't denote on this
strip it's talking about this strip that
should be red and that should be blue
there's a blue over here all right but
they've got the blue on
four so four to four maybe they're
thinking is eight and then four to
16 um is 12 I don't I don't know what
they're doing so anyway and then they've
got one these two speaker wires the
reason that they have
new uh wiring for that is because those
are the directional signal wires here
and here those only worked originally on
the 33 and A3 records it was just the
way the thing was designed so what
they've done is they've straight wired
them into the terminal strip as if
they're external speakers so this is all
fairly confusing but that's what they're
doing so here they have them connected
between 1 ohm and 12 ohm I'm sorry 1 ohm
and uh 8 ohm and then here this is
actually the
ground and 8
ohm so you know I don't know but that's
how they had it hooked up so we're going
to leave it like that so I'm going to
turn turn it on and we'll see if
anything burns up hopefully
not especially with me sitting
here it's moving the carriage I wonder
if there's a selection on the tour mat
or if it just does that when you turn it
on do you see anything burning up do you
see any
smoke everything looks good
all right so I'm going to try my Beach
Boys record that I was playing I don't
know if you I don't know if I played
that on here but it was kind of rumbly
sounding so my theory is that the the
the you know that the base was turned up
pretty high I turned it back down to
medium and then also the uh I think
there's some rumble going on with
something going on with the turntable
that we might be able to
fix so let's see if it sounds any better
if it cuts this off it's just YouTube
doesn't want me to play anything
[Music]
you hear that kind of Rumble in
it so that's still there but not as
[Music]
bad everything looks cool nothing's
burning up it sounds pretty good but
there you can hear that Rumble the whole
time
[Music]
so turn up the
[Music]
volume so the directional
speakers you don't hear it
[Applause]
[Music]
in it's almost entirely down here
so it's just a Basse sound that's
[Applause]
rumbling so another problem is that all
of the records skip at the exact same
spot which would definitely be some kind
of turntable
[Music]
issue it's like a
remix all right folks so that's it for
today we we got the amp caps replaced so
I don't have to worry about running the
thing with out you know with with fear
of uh burning the mech or burning the uh
amp up we know it's not going to burn up
it's been recapped everything should be
cool but we still have issues so next
time we'll work on the turntable a
little bit I'll see if I can do some
research and see what if turntable
noise what would cause that to get into
the amp which it sounds to me like it's
what it is um and then we'll also uh
figure out why it's skipping at the same
location on each record about 2third of
the way through the record it'll skip
I've tried three different records and
it doesn't um and we may have an issue
with the way they've got it wired with
the uh speakers so we might have to
research into that on the schematics and
see what they're doing with that
crossover that's down there so I hope
you enjoyed it we'll see you on the next
one