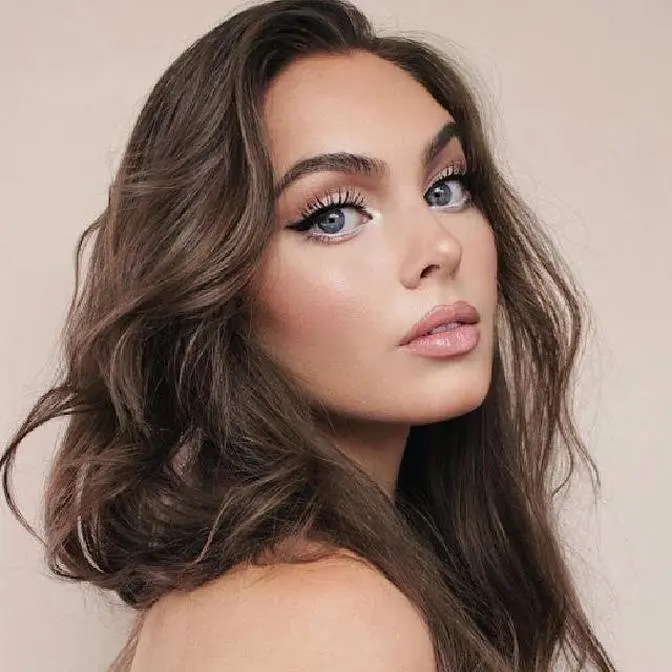
Thank you to Dyson for sponsoring today’s video! Hey it's jackie wyers & welcome back for Iconic 1960s hairstyles perfect for the holidays! Call Dyson's customer service line at 866-861-2565 for an exclusive stylist discount if you have an active cosmetology license!
I'll show you how to take the 5 min perky ponytail up a notch using the Dyson Corrale™ straightener as well as demonstrating how I use the Dyson Supersonic™ hair dryer professional on long, fine hair. Again, you can call Dyson's customer service line at 866-861-2565 for an exclusive stylist discount if you have an active cosmetology license! (info I wish I knew!)
timestamps🎀 0:00 2 Iconic 60s Looks! 0:17 Dyson Products Featured 0:47 Dyson Exclusive Stylist Discount 1:00 How I Blow Dry/Hair Prep 3:32 The Half Up Style 4:20 Flat Iron Curls 6:11 Audrey Updo 7:55 French Twist Made Easy 10:00 Pearl Details!
You know I love Audrey Hepburn, Brooke Shields, Jean Shrimpton - so if you have any ICONS you want me to recreate, comment below! Don't forget to subscribe & put those post notifications xo :)
On my channel find iconic POP CULTURE beauty moments and how to re-create the look on yourself! The goal of my tutorials is to teach practical makeup & hair tips and tricks so you can Switch Up Your Style With Confidence while celebrating what you love.
For new 🍿POP CULTURE🍿 & 🎀VINTAGE VIBES🎀 tutorials - subscribe so you don’t miss an upload every week & tag me if you try out a look so I can feature you in my next upload! xo Jackie
Disclaimer: Sponsored by Dyson! Exciting to work with such a top notch brand.
if you are reading this... comment, "60's vibes!"
hey it's jackie and welcome back for 60s inspired holiday hairstyles i'm working with dyson on
today's video and i'll be showing you how to use the dyson corral professional straightener it's
how i got these really fun curls and then i'll also be demonstrating how to use the supersonic
professional blow dryer so i'm pretty new to using dyson products and i wish that i had invested into
my career earlier so if you are looking to buy dyson products and you have an active cosmetology
license you can call the number on screen i will also have it linked in the description bar
and you can get a discount on your purchase so if you didn't know now you know and i hope you guys
enjoy these two hairstyles the two of my favorite looks and let's get into it i've already done my
favorite 60s inspired makeup while letting my hair air dry a little bit and now i'm detangling
with the dyson designed detangling comb brushing through my ends and then i work towards the top
of my head and i always brush my hair before i go into the shower so that this step is a lot easier
and this is the dyson supersonic professional hair dryer you turn it on you have options for heat as
well as how strong you want the airflow to go a cool button and i have the gentle air attachment
on which is one of five hair attachments that it comes with and this one is my favorite because i
have very fine hair a sensitive scalp so when i've gotten blowouts professionally i'll often
get flakes or a really red scalp so i take the gentle air attachment on the lowest heat
setting on lowest airflow and then diffuse the hair around my scalp while still quickly drying
the hair i'm making sure to really get around my roots and this is what i do most frequently if i
have nowhere to go i'll just blow dry my scalp and then let the rest of my ends continue to air dry
but since we are going to style i'll show you how i do a quick blow dry for my really long
hair i'm going to divide into two sections the top half i'm going to get out of the way and
let's pick up the dyson vented barrel brush and the next attachment is the styling concentrator
so this has a wider thin design and the air is really focused so you can blow dry
each section without the rest of the hair getting blown out all over the place
i pick up my brush in the non-dominant hand and run through giving it a curve at the ends
and then for the top layer i'm going to have my hair pushed back into a half up half down style
so i'm blow drying in that direction backwards
and i'm super impressed with the short dry time the super sonic protects against extreme heat
damage and it has intelligent heat control that measures the temperature over 48 times a second
and finally dyson has a new flyaway attachment and all these attachments are magnetic when i blow dry
my hair i can get it really straight so there's no need for a straightener when i'm going for a sleek
look and this flyaway attachment hides flyaways under longer hair to give it a really smooth
shiny finish with just air you want to push the airflow in a downward motion and bend inwards and
you can see how sleek that made it in one pass and these are my favorite three attachments but there
is also the diffuser attachment for curly or wavy hair and then also for very coily hair there's the
wide tooth comb that helps shape and lengthen the curls as it dries i'll show you how to do
an upgraded version of the perky ponytail tutorial i did about two years ago instead of all the hair
going up into a pony this is going to be a half up half down version so you get more volume but since
my hair is really long it doesn't read as 60s as i wanted it to to have my length fully out so i'm
going to demonstrate with some shorter extensions clipped in this is the same version with my hair
left out and i'm going more for this so it does work better if you naturally do have medium or
shorter length hair but if you do have really long hair and you want to try out the version
i'm showing you can always use the hack of putting your hair into a very high ponytail and when i say
hi i mean super high like right at the very top of your head and then to mimic the half up half down
style you can clip in extensions right underneath your pony so it lays flat against the head
i'm going to show you how to create ringlet curls and i love how they turn out with the dyson corel
this is the convenient dock so i place it on the table in front
of me and then in between styling i'll place it back so it continues to charge
and i love to use it without a cord the purple's super cute and a unique feature
is the plates are flexi plates so they bend slightly around your hair providing more
control with less heat taking my first section i'm wrapping upwards and creating a smooth pass
all the way through and we get a cute little ringlet and i'm focusing this more on my ends
this is really fun to do and you can leave it as a ringlet or brush it out if you want it to be
more soft and fluffy but because i'm using the 60s as my inspiration i think ringlets are really fun
i also went with shorter hair because i couldn't get myself fully in frame doing
these curls and i'm doing this whole section and then i placed the crawl back into the dock
giving my hair a quick spray with hairspray and let's work with the top pony
if you really want an elevated ponytail you can also take a mini bun or a mini hair piece and
place it directly behind the elastic and the ponytail i wouldn't recommend this if you have
very very fine hair or the top pony doesn't have a ton of hair to it
but if you do have enough hair to cover a mini hair piece this is a fun little trick to try
the bottom curls i went with curling towards my face and the top curls i'm curling away
and if you do use any sort of hair piece you want to use a couple bobby pins to make sure your hair
doesn't move around and show that piece if you are a fellow stylist i highly recommend
the chorale it has the thermal performance of a corded product with the cord free versatility
finally go ahead and add a bow to make it cute and festive and if you have darker hair go with pastel
or a light shade it really pops and if you have blonde or red hair i think black bows look amazing
i hope you like this look and now let's do my take on the most iconic 60s updo
that looks complicated but i've broken it into a couple steps and it's so elegant and fun to wear
i just had to try out this style before i moved away from manhattan and again i'll be using the
dyson corral professional straightener i much prefer to style in sections rather than curl my
whole head and set it and then style first step is to divide a center section from the arches of
your brows backwards create a bit of a tease and then twist the hair into a poof and pin in place
you want to make sure you use an x with the bobby pins so that this stays
and then the remaining hair left over we're going to put into a high ponytail once again
with a tiny plastic elastic and this will be looped towards the front portion of the updo
again if you don't have a lot of hair to work with for this step you can add an extension
directly under the poof if you need to curl using the super cute purple dyson corel and i'm using
the heat setting 365 degrees fahrenheit here it has intelligent thermal system that ensures
accurate heat create a couple curls and because the front portion of the hair is already styled
make sure that you're holding the section that you're doing before you curl so that it doesn't
disrupt what we've already done and then with our fingers just loop it forwards and pin in an x
and with more of the length i'm doing it again on the other side
you can do just two loops three loops depending on your hair and you can leave it like this in a bun
or create some pin curls so i actually go in in the end and create more pin curls but it's
easier to do it in this step so make sure that you style however you want it to look before
moving on to the next steps take down the rest of your hair and separate two side sections in a
diagonal that goes from right in front of the bun we just created downwards to the side of your neck
and here's a very simple french twist and i am no pro at french twist so if i can do it you can
do it just gather your hair into a pony in the middle slash low section of your head and have
your fingers looped around the base instead of an elastic start to twist the hair upwards and i have
a lot of length so i was kind of fumbling here it takes me a couple tries but once it is tightly
twisted we're not going to tuck the hair back in to make it easier so hold the hair in place and
then take pins and make sure to grab the underside and wedge into the hair that's twisted up
my hair stays with bobby pins but you might need french twist pins if you have thicker hair
and i'm pinning this top section down
and then creating a pin curl with the ends adding in some detail into that front bun
if you already like the amount of detail you've done you can just pin it right directly behind
the bun in a pin curl and now all we have to do is finish off the two side sections depending on your
hair thickness it might be easier for you to add an extension here as well to make sure it's smooth
i always like to mention that because i do have quite fine hair and i know it can be hard to
replicate a lot of looks that you see without sometimes using a little extra help and i'm
going to guide the hair with the coral upwards and backwards as it's going to lay up and over to the
other side of the style after heating up the hair i'm combing up and holding it tightly and creating
a pin curl on the other side heating up the hair and setting it in the place that you want it to go
will really help first section we went up and over to the other side of the bun but this next section
is going to lay a little bit back and over and create a pin curl at the top of the french twist
i'm creating more of a curl at the bottom so it's easier to pin curl with the corel again and i'm
pinning up top first before creating the loop detail as you create the pin curl make sure that
you're getting all four corners and hiding those bobby pins as best as you can so it stays put
and here i messed around with the front of the bun since it was looped forward i just repositioned
the side of that loop so that you can see more of a loop from the side but again it's easier to do
this step before you've done the rest of the style there's just a lot more room for error when you
try to do it at the end and as a nod to audrey i wanted to bring in some little
faux bangs and hers are so wispy so i took a tiny amount of hair from old extensions
glued them onto my head and honestly i really like how it looked yay for baby bangs and to put my own
spin on the style because my hair is all one shade i don't have any highlights or anything i wanted
to make the detail for this updo pop so i added in pearls into the loops and it really added to this
whole style so let me know which look you look best out of these two with 60s inspired holiday
hairstyles and for the pop culture password comment bows pearls and little black dresses
and if you're looking for a 60s makeup look to go with these styles check out the iconic 60s makeup
tutorial on my channel or if you're looking for more hair inspiration i have some heatless
fall hairstyles that you might enjoy and i'll see in my next video