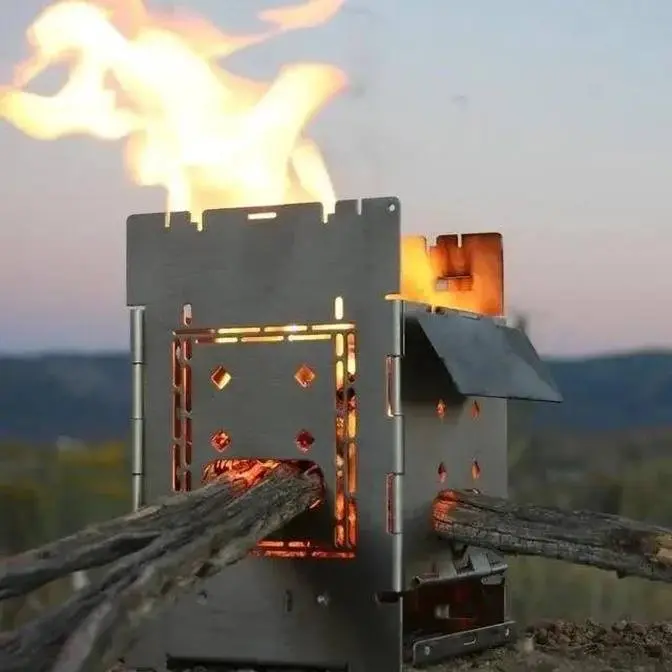
It blew my mind to learn that you could turn a pot sideways to make it into a camping oven. Once you see it, It makes perfect sense but the initial idea is quite counterintuitive. Whoever first thought of it was a very creative/out of the box thinker which makes me love the idea that much more!
When I realized that the Firebox Billy Pot, with its internal dimensions as wide as it is tall, and its patented metal clips that hold the lid in place, the concept of turning it into an awesome little camp oven with all the accessories, was born.
The Oven Bricks…our latest addition…elevates the Billy Pot baking performance to a whole new level. The Oven Bricks increase the thermal mass at the spot where the heat is most intense, and not only evenly regulates the temperature, but prevents the Billy Pot from warping due to overheating. The shape of the Oven Bricks matches the Billy Pot’s curved surface allowing the heat to absorb more quickly into the bricks, and then radiating slowly into the oven. The result is amazing! Golden brown success every time!
One of the coolest bushcraft cooking tricks I know is how to cook a square cake in a round pot.
Check it out. Let's start by clearing away the flammables.
Just creating a nice spot where we can cook with fire safely. Get out the five inch G2 firebox stove.
Set up right there. We'll put the fire sticks in position.
And what these fire sticks will do, set up like this, is allow me to put my pot
in a horizontal position right there on top. But let's build our fire up first.
Let's start with some of this really small kindling. I'll just get this down here by one of the
fuel feed ports where I can then light it. And then we're going to feed in some of these bigger
sticks because we're going to need some big hot coals to go on the top of our oven. A couple of
eggs. I've got coconut cream. I've got coconut. I've got some cream cheese frosting. That's flour.
So we have a few more things over here. I've got my cake mix and I've got butter.
Get it in here. Two eggs. We'll get some of this coconut cream in here. This is what
makes it good. Usually comes in a can, but coconut cream. I'm sure you can find it.
And it's surprisingly thick. All right. Cake mix. We'll put some of our shredded coconut in there.
Let's go ahead and move our pot over here. I've got some stuff inside. This is the firebox
three quart billy pot. And this is the baking kit that all fits inside. So this gives you a square
cake pan. Gives you a bread pan. This is the coal rack. And I'll show you how all this stuff works.
Then down here underneath, this is the actual oven rack. So one of the things I have here
is a thermometer. This goes in the lid here. Just like that. Then we have, these are a new product.
These are made of a pizza stone material. And I'm kind of calling them oven bricks.
But there are three of these. And they fit right down in the bottom. And they absorb heat.
And then they release the heat back into your oven. So they're thermal mass to make your whole
oven system work properly. Now if I put this on here with no thermal mass on it, it would warp
the pan. So having this thermal mass inside protects the pan and makes it so it can handle
that heat. So I'm going to put my oven rack in. And then I'm going to go ahead and put this on
the heat. Let's put our, this is our oven door. And these wire clips on the pot hold the door
closed. So I can go ahead and just set that right there. And we will start heating up those stones.
When I was a kid, this was always my job to butter and flour the pan. So I've had lots of
experience with this, lots of practice. One thing I like to do is put a little salt on my butter
before I put my flour in. I'm just going to crack some salt in there. It just gives you that
sweet and savory, sweet and salty kind of thing going on with the bottom of your cake, which is
always yummy. We got flour going on here.
And it's a little easier to just push it out of a corner. I'm just going to pinch this corner and
get the batter kind of away from the corner and then bite it up.
Then I'll be able to squeeze that cake right through that hole.
Now this cake is going to rise, so I don't want to get too carried away and make a big mess.
But I do like a nice full cake, so we'll have to try to find balance, I guess.
Let's try that. That should work. Let's open up our oven door, put our cake in,
just slide it right on in there. Perfect fit. Put our oven door back in place. Close the latch.
Now we just need to be patient. Putting the cake in did drop the internal temperature just a bit,
but it's coming back up. We've been running for 10 minutes, so it's a good time to check it.
You want to be gentle because you don't want to cause your cake to fall. Looks good. Looks like
it's rising. I think I want to pull some heat and put some heat on top. Let's put the oven rack on.
This just goes right in there under this bracket. Lift up your oven and pick up a few good hot coals.
Take your time. Be careful.
That should do the trick. Okay, it's been about a half hour, and I think my cake is done. It smells
really good. Let's check it. Grab a stick here.
Let's get a hold of it. Slide it on out. Look at that. Oh, it turned out beautiful.
Let's see if it's done. Yeah, it's coming up clean. I think it's done. Get a plate here.
See if we can get it to come out. Maybe I should work around the edges with my spatula.
Oh, it looks awesome. It doesn't look like it's going to stick, but oh yeah, it's not sticking.
Looks like it overflowed just a tiny bit on that back edge. Let's see if we can get it to come out.
See what the bottom looks like. Oh wow, that turned out beautiful. What a gorgeous cake.
Nice and moist. Oh yeah, that's a beauty. Just to see what the inside looks like.
Oh yeah. Oh, that's gorgeous. Let's break out the cream cheese frosting.
Rip off that corner. Get my fork out.
Now you can see the coconut in there. Oh, this may very well be the best cake I have ever made.
The coconut, the way it kind of crystallized on the bottom here.
Oh, and the texture. It's kind of chewy. It's hard to describe, but it's kind of
caramelized. It's kind of a caramelized chewiness. It's really delicious.
And this cream cheese frosting was a perfect pairing. Well, that was a success. It turned out
beautiful. And what I learned this go around was as you see the temperature start rising and getting
close to 300 again, then you know the cake itself has come up in temperature. At least that's how
it worked out this time. I'm going to watch that really careful next time and see if that's kind of
how I should expect it to work. But right as it was kind of going up and kind of holding
near 300 degrees, that's when I started smelling it and I checked it and it was done. So
about 30 minutes, but it really was worth the wait. Turned out great.
Absolute perfection. Thank you everyone. Bye-bye.