
Rock Ola Jukebox 496 Amplifier Repair - It's Easier Than You Think
717 Video Views·Apr 29, 2025
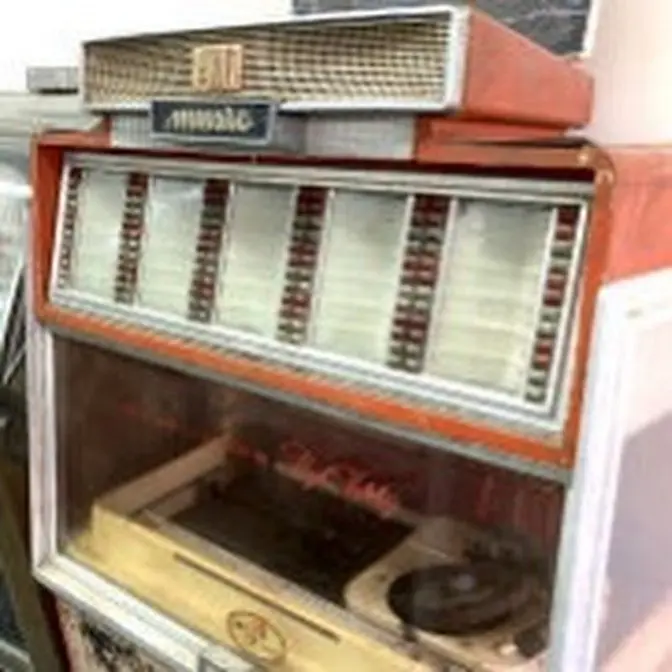
Today we look inside a Rock-Ola amplifier from the mid 80's. This is similar to the Amplifier in the 490, 488, 484, 480 etc.
ladies and gentlemen this is Joe's
classic video games back with another
cool rockola jukebox repair video for
you today this is a rockola
496 that's trying to find a record
here let's see if it'll play
it we've been working on this bad boy
and we've got some problems with the
amplifier so we figured we would do a
video repairing the amp amplifier so if
you've got similar problems in your
jukebox hopefully this will help you um
I've worked on a lot of these probably
50 of them or so maybe a little more and
you run into the same problems on the
amps usually so we'll check them out but
uh I've got it turned down right now
because the copyright protection on
YouTube is so strict they're not going
to want to let me play you a song but
I'll turn it up a little bit so you can
hear what our problem is
okay
[Music]
we have weak volume here we have no
volume here we have very weak volume
here and no volume
here so we got some serious
issues
so I
suspect that the reason we have no
volume here is because the left channel
is out the reason that we have volume
there but not there is because they have
reversed the wires I think right here on
the the audio uh connections on the
speaker terminals um so I think this
amplifier has a dead Left Channel and a
weak right channel is what's going on um
I'm going to try to test that a little
bit well I think I'm just going to pull
the amp out and we'll start taking it
apart and look at it uh I'll show you
what's inside of one of them and uh what
usually needs to be replaced and we'll
test what we can in there and then we'll
put it back together and see uh what
kind of results we get but I'm pretty
sure on the bottom the wires are
reversed there's a
little this little bad
boy these uh terminals here are so that
you can hook up extra speakers to your
jukebox so let's say you're putting in a
bar Frankie's bar and Frankie uh has
speakers in the ceiling and then he's
also got some big woofers Down Under the
bar whatever you know you hook them into
these Terminals and you move these
terminals are the bottom
speakers so the two bottom
ones if they're all that's
running you can basically give them full
power right now I'm going to look at the
back of it here and try not to get
Electro
killed let me show you the
back see these four uh gold kind of
spade connectors here that are doubled
up see how there's four of them two here
on the top and then two on the bottom
well this top one is like the Left
Channel and the bottom one's the right
channel see this first one says ground
see how it's doubled on the back what
that is is the black and green wire is
the ground for that speaker okay and
then this white wire here is the audio
for that speaker or the positive for
that speaker and then the two over here
are connected down on the bottom on the
right it's going to hang up here in a
second um so they they have those kind
of hardwired in the back to this 8 ohm
connection okay someone has wired the
base speakers at the bottom to the 2 ohm
connection but I think whenever they did
it they probably reversed the wires
that's why we got the left one working
um whenever the left Channel's dead on
the top so that's what we're looking at
so you can move these and change the
power basically that's going into the
speakers and you then you can also add
external speakers so you can have 10
different speakers playing as long as
you're smart about it all of this is
covered in the manual though so I'm not
going to get that into it uh because I
never hook up external speakers so let
me remove the amp and let's check it out
so here is the amp they're all pretty
similar but you will have a different
model number on lots of them so this is
a
55015 d
a here's the big heat
sink uh for the transistors that sticks
out of the back of the
who this sticks out of the back of the
uh machine I've taken the two screws
loose here of
course um which is how that happened
there is a nut on each one um but yours
will look similar to this probably it'll
have a little bit different but you've
got Bas and
treble uh switches over
here how to adjust the background music
level guess you put a screwdriver
through there if the light is on it
means the speakers are overloaded
Overlord speaker
Overlord I may be wrong maybe there is
an Overlord setting but usually that
says
overload I might be wrong about that uh
caution C service manual for adjustments
and connections there is a scratch
filter on these that you turn on and off
AVC that you can turn on or test which
it looks like is not easy to change so
they I don't think that's broke I think
they just made it where they didn't want
to turn it on and off to that much uh
you can set it on stereo or mono I don't
know
if there's an issue where sometimes uh
if the one of the channels on the um on
the cartridge if the wires broke or the
cartridge is messed up or something and
you're only getting the left
input I don't know if you set this to
Mono if that would make the speakers uh
both transmit the Left Channel it
probably would so that might be a good
thing to do D set it to Mono if you're
missing a whole side like we
are uh mic kit and background music
input it's all pretty self-explanatory
basically uh they in some places you
would have background music playing
until somebody used the Jukebox and then
they would walk up and then the Jukebox
would override the background music and
start playing whatever song they
selected compact disc input the rockola
496 was the first
rockola that allowed you to play to
select uh CDs so it was an add one basic
basically to
this uh 10
amp
lag okay big
fuses speaker terminal strip that's
where the wires come out to go to that
little thing we were looking at in the
front where the Transformer is down
there and power input is literally like
it says it's the power coming in from
the uh power supply okay so with those
screws off or the bolts off who if I
don't break this whole
thing got some wires hanging me up here
somewhere well I don't want it to just
hang on the
wires oh here we
go I got one looped there it didn't like
that okay there we are all
right this wire was looped around that
transistor trying to kill me okay so
here this board here is basically it's
got all of the little adjustments and
stuff on it and then you've got these
two driver boards this is typically
where your problems are you can take
these are the same so you can take one
and swap it to the other side if you're
testing to see you're trying to find out
where you're where you're losing your
channel you know if like the left one's
missing this thing's probably dead or
whichever one's left
right um but it could be as well the
transistors on the heat syn so if you've
got bad transistors and you swap the
boards you're going to mess up both
boards so what we're going to do is
we're going to check the fuses
first okay I'm not going to power up any
of this now the proper way to do it is
to put it under load to power it up uh
to test each component as you go through
I'm not skilled enough to do that so the
way I usually do it is I test the things
that I can like I look for transistors
that are shorted and then I pretty much
um uh shot gun replace the capacitors in
it cuz typically radio of this vintage
or stere um amplifier of this vintage
you're going to have a lot of bad caps
um so that's what we're going to be
looking to do okay so let me do this
I'll check the fuses and everything give
it a look over see if I see anything
that doesn't look right and then uh
we'll pull out one of those driver
boards and start looking at it and see
what we can test on it here's the right
driver board we're just guessing that
this is the right channel I don't I
don't
know um so you've got some little pots
here that are to adjust the bias with
there's a setup in the manual if by the
way if you don't have a manual for your
jukebox you're missing
out at first I didn't want to buy one
because they're always expensive they're
30 40 bucks usually if you don't have it
sometimes you can download them off the
internet depending on the model this 496
I cannot find a manual for or the
schematics it doesn't exist apparently
it's unobtanium but um a lot of times
for yours whichever one you're working
on you can download the manual or buy a
manual even if you have to buy one $30
$40 it's worth it's Wai in Gold because
it tells you how to do things like
adjust the bias uh and it tells you the
part numbers and stuff so like what is
that transistor supposed to be you know
and so there's
probably 30 or 40 adjustments in it that
you can make depending on what you've
got going on you might have the records
not setting down right or what whatever
you know that uh will it will tell you
in the manual uh how to adjust and uh
just the schematics and stuff showing
how everything everything connects how
the the amplifier connects and all that
it's just it's worth its weight and gold
if you can find one but this is what
we've got we don't have the schematics
so let's say an npn an npn transistor
and a PNP a P&P transistor I wonder if
they say that because it's not that
important what the actual trans
uh uh transistor is as long as it's npn
or P or
PNP mj1
15 150 and there's more to it I couldn't
read
it so if you get a transistor that's
shorted a lot of them are going to blow
the fuse right I check the fuses none of
them are blown these four now why do
they have four fuses I'm guessing I
don't know for sure but I'm guessing
it's these four
transistors right or maybe it's two for
the transistors I don't know but none of
them are blown so these chassis mounted
transistors are probably fine I did
check these three
already and the small one and they're
not shorted so it seems like they're
fine who knows under a under a load
though and they might be
leaky uh but I'm more concerned with
this little board here
so you've
got couple transistors here couple
little baby ones there little pre-
drivers or
something a few
here I see a diode or two there and then
a bunch of capacitors youve also got
this thing what is
this MD 8003 I have no clue what that is
there's the Motorola logo though and you
see the 87 date code so uh it's a late
80s
box so looking on the
back one of those transistors is or two
of them have obviously been replaced at
some
point probably back in its days of
earning that
money let's see if there's any cold
solder joints we this B huge connector
connects to
it sometimes on arcade games and pinball
machines especially we get cold solder
joints here and it's always on the end
usually those look pretty good I don't
know probably worth
reflowing but I think they all look
pretty
decent okay so that doesn't look like an
issue but again I think this might be
the working
board um
the Box caps I ually I don't have any
trouble with so yeah I think I'm just
going to recap it so let's see here I've
got
one two three
four huh four little
capacitors um I leave the Ceramics of
course and I'm going to test these
transistors just with the the diode
check just just make sure there's
nothing that's obviously
shorted um
and then we'll put it back in another
thing I like to do whenever I mess with
these two some people don't like this
but this these are the bias
adjustments right I like to just turn
them and turn them back just kind of
just in case they're stuck on a spot
that's it's not happy
with
right so uh I'll check these like I said
with a multimeter replace the caps and
then we'll move on to the other one I
think the other one might might be
messed up or something I want to show
you something on these bias pots too so
this is the one I just recapped this is
the one I haven't if you
look the bias
parts are set pretty much identical on
them so it's probably like a factory
thing um now two of the Caps I have
changed the value of because I had
to um I don't know if that mess up our
vas voltage or not though
but we have here all of you audio files
are going to hate this but look I am not
an audio file clearly I am not an audio
expert so this is a
150 micro
farad my camera is acting
up 150 microf farad uh 16 Vol and I
don't have 150s so I put a
220 okay and oh no it's an 85 degree
from the factory oh what were they
thinking oh that's so horrible they only
put the cheap cap in it from the
factory I have seen it all
now why would they do that I'm trying to
see if the other ones
are I don't know what the other ones
are
I don't know this don't look like a high
quality cap to
me so like I said we shotgun replac them
there just a few anyway uh and that's
kind of because we mainly deal with
arcade monitors and we work on the same
like um it's just a it's just a kind of
different setup than how most people do
radio repair but we're working working
on a lot of arcade monitors and on a on
a monitor if you have bad electrolytic
capacitors or ones that are just off
value a little bit you're going to get
all kinds of geometric problems on the
screen so you're going to get stuff
folding over you're going to get a curl
the top of the screen you're just going
to get you know a picture that's not as
big um so in a arcade monitor you kind
of have to replace all the electrolytic
capacitors every time so even though
shotgunning them isn't the greatest
thing to do because you're not really
finding the problem and correcting
it you kind of in an arcade monitor you
get away with it because that's that
usually fixes most of the stuff you just
need to replace all the Caps right and
there's other stuff too like the
flybacks often need replaced and you
know on Arcade monitors we can
troubleshoot them pretty well because we
see the same monitors over and over
again and then keep in mind too that an
arcade monitor is on so what I'm saying
is if the cap is a little off you will
see it on the the screen which is kind
of unacceptable on a monitor right so
you kind of have to replace all of them
and we see the same models over and over
again and they're left on all day long
for years and years and years and years
so it's just a thing on these the
jukeboxes it's a similar thing they're
left on constantly they play non-stop
right now on home radios a lot of people
do like radio repair and they're much
more knowledgeable than I am about
repairing them so they can go find the
one little part that's messed up and
replace it instead of shotgunning it but
they're also dealing with something
that's not on all the time you know so I
wish I had the skill to go through and
and find the exact spot where
something's not quite right but I'm not
there yet so I've had good luck though
on a jukebox amplifier with shotgunning
the electrolytics so that's why we're
doing what we're doing all right so uh
another thing I'm going to do just for
testing purposes is I'm going to put the
one that took out of here back in here
I'm going to swap them all right I've
checked the transistors and they they
test identical so they're they're not
you I'm just testing them with a diode
check but I'm not getting one that's uh
a big problem and I'm also not blowing
any fuses so we don't have a short
situation that or it doesn't seem that
way and then what we'll do is whenever
we power it back up if we still have the
same problem on the same channel well
we'll know that it has nothing to do
with these if we still have the same
problem but now the channel is switched
we'll know that it's with one of these
right so it's just a little looking
ahead a little
bit so uh I didn't find anything bad on
here whenever I tested it I tested all
the transistors again with the diode
test no problems so I'll check this one
and uh then we'll move on to Big Papa
here all right so here is the board that
I was assuming was for the left
side now my multimeter is over here it's
on diode check you can't see it but you
can
hit hear
it this transistor shorted now it could
just be something else on the board is
shorted so we're going to pull it out
check it out of the board now keep in
mind on the other one these two had been
replaced huh
huh seems like we found something let me
try on this one up here that's in
circuit
ain't that some
crap all right look what we have here
what are they calling this little bad
boy the amplifier PC assembly
okay okay so the AVC is made like that
they just have it so you have to put a
screwdriver in there to turn that on and
off
okay so uh yeah this is where it gets a
little
dicey my idea of just shotgunning the
Caps might not work on
this there's like a 100
caps um okay so the input from the
uh uh cartridge comes in
here and then immediately runs over to
some of these
these we've probably got everything kind
of divided into twos I would
imagine are those just 555 timers that
says
RC everything's upside down to me right
now
4555 is that what it says
4550
let's put way too much light on the
situation 4558 yeah those
aren't
4558 uh I don't see anything obvious
your volume control connected
here here's some more RC 45 58s up
here
um
H and then you've got some
potentiometers here these are the kind
that kind of get dead spots in them
but so it's you know base trouble base
trouble or something like that which I
would assume these are connected
to there's also a whole bunch of
modifications on the
back that are probably
Factory
uh let's see what are these connected
to so it says right B might be balance
and
L and then an extra
one there's a test
Point all right yes I'm going to poke
around a little bit see if I find
anything that's obviously messed up and
if not we're going to try it back in and
see if our
uh see if our little swapping the two
channels trick has uh yielded any
results but I'm going to uh test like
the few transistors and stuff that are
on here but you know it's not likely to
do anything because like this one
there's only one and we're missing a
channel you know it could even be
something with the um with the cartridge
still you know we don't know but I don't
see anything obvious you know there's
nothing burnt up
or obviously shorted or bad solder or
anything everything looks pretty
good so we're going to have a flaky cap
somewhere doing it or one of these
four preamps or whatever they are has
a the bed on
us or it could be a a wouldn't be one of
these but it could be a
uh it could well I don't think the if
one of these was bad I don't think that
it would completely block that channel
it would just screw with the tone of
[Music]
it
me like you
just
B okay so um one of the channels is
woken up and it it's much louder now but
we've still only got the one speaker so
one of the channels is still dead
and we got a problem down here on the
bottom so I'm going to check to see uh
if that's supposed to be on two ohm like
it is that might be in the wrong spot
let's look in I don't have the manual
for this but let's look in a manual and
see where that's supposed to be okay so
we've got this little chart here uh in
the manual for a CD
3000 which was a little newer than this
but it uses the system 4 M CPU this is
the system 3 which is very similar and
it uses that same uh Power setup that or
speaker setup that we're looking at down
on the bottom and so it's it's basically
a little cheat sheet to tell you how to
hook stuff up to
it it's hard to read but it says phonos
speakers connected to left and right the
4 ohm Terminals and
ground power per Channel 65 Watts if you
were to connected to 2 ohm terminals in
ground 32 watts the 1 ohm terminals in
ground 15 watts bubble blah blah BL blah
and what they're doing is they're
dividing the wattage between where
you're connecting the internal speakers
and where you can connect the external
speakers so 65 ohms so like in this
instance you could have 98 n ohms 65
Watts you can have 98 Watts outside of
the box and 32 inside the box if you
connect to the two ohm terminals so
that's where we're at right now I
believe so it's not going to make the
speakers work but they should probably
be on the for since we don't have have
any um external speakers hooked up and
then uh it shows you here that if you
have it on that uh you
can't um hook any speakers to the 4 ohm
terminals any 4 ohm speakers to the 4
ohm terminals for external right but you
could hook one speaker to the 4 ohm
terminal uh you could hook one 4 ohm
speaker to the two ohm
terminal blah blah blah blah blah right
so it's like a little cheat sheet so it
looks like we should be on the 4 ohm
terminals okay so I I've
got I think three speakers working but
not this
one little whing Jennings for our buddy
n that watches um so here's what I did
this is not permanent we're
testing this is not the same one is that
manual I was looking at but it kind of
works the same
so Red's right so where it says phono
apparently is where they're supposed to
be but it's 6 ohms in the manual it's
saying 4 Ohms there's also an 8 ohms but
I left it
alone so with the red here and the white
here you've got the one top right
speaker working so this is the Left
Channel I just since we you can connect
external speakers I just connected it
over
onto two ohm and both of the left
speakers are working okay now we can't
leave it like that but that's what's
going on so this left channel is dead or
not hooked up right so there maybe maybe
we got a bad wire connection
somewhere uh and I think this speaker is
probably bad or it might just be
disconnected it's really hard to get
down in there though there's no way to
take it apart on this so so we've still
got half of our um half of our amp not
working
working so next piece of the puzzle I am
looking at the schematics for the the
amplifier in a rockola 490 which should
be very
similar uh and this is where the
cartridge plugs in the middle wire there
is the ground and then you have the um
I'm talking about J1 here the top
connection and the bottom connection are
the two different um sides of the
cartridge left and right channel so you
can see that the way the mono and stereo
switch works is it is right there at the
beginning which is actually good because
it can help you test the cartridge so
you know if you had a scenario where one
wire was broke off the cartridge or
something was messed up uh and let's say
that the signal was just coming in on
the Left Channel off of the cartridge
well if you slid this up to Mono this
switch it's going to short the left side
with the right side that you don't
have which would provide the right side
so you know what I mean so if the wire
was cut that line would be dead but if
you put it on mono it wouldn't matter
that the line's dead you're getting a
signal on one side or the one channel or
the other and it would join them both
together right at the beginning so it's
if it did that all the way at the end or
something like that uh you wouldn't be
able to use it to troubleshoot very well
because U
um well actually that would help us
because we wouldn't have to fix one
CH but this helps us determine that it
is in fact not the cartridge because if
I slide it on mono we still only have uh
we still only have uh one channel
working so that's not it and that has
eliminated the tone arm so it's
something actually on the amp all right
I'm back inside of it now I found
something though I have went back and
watched the video maybe you can go back
and tell I don't know depends on how
much time you have I went back and
watched the video because of what I
found check this out so I was telling
you that there's all these mods on here
uh most of these wires are actually for
this mute board over
here mute relay board whatever that it
uses to mute it uh whenever it cancels
the record it mutes the amp right okay
so that's what most of that is but there
are a couple other mods like there is a
resistor
there and there's a little jumper wire
there and this is probably stuff all
done at the factory there's a little cut
there they um they just did stuff like
that sometimes the the silk screen
wouldn't be quite right and so they just
mod every one of the boards for
thousands of machines it doesn't seem
like they would do that but they did
okay and then down here let me see if I
can set it up
here I'm going break the freaking thing
if I keep finagling it is Finagle a
word that we can
use so we got this little number
here okay this is where the not only
does this connect to the mute board but
the plug plugs in here that connects to
the two driver boards
okay so look at this little mod they've
done basically you've
got left channel uh Left Channel right
channel ground
right so look at this little mod they've
done they have cut the
trace and soldered a resistor to
it and jumped it to the part of the
trace that they cut and then they've
soldered a capacitor to that and then
cut the trace again and jumped into the
new the other part of the trace so
they've made this little island in there
to to connect the resistor and the cap
to pretty wild of course it's broken
loose a little bit right but it's still
connected however this
one they did the same thing except the
resistors broken
loose the resistor is not soldered to
that
and guess what that's the Left
Channel so the signal is broken right
there so I'm going to solder that back
on I can't tell by looking at the video
if it was like that when I took it apart
but it is now that would kill the entire
Left
Channel which is what we're doing what
we've got so I'm going to solder it back
and see if I can clean it up and figure
out how to keep that from
shorting and put it all back and then
test it one more time I looked at all
the caps and everything I can't find
anything wrong with them the the four
little
um these little chips here that I was
calling preamps I don't know what they
are opamps maybe
um I I used a diode check and just
tested the legs against each other you
can any kind of any kind of IC that has
like uh a uh a gate in it like a you
know anything any kind of any kind of uh
IC that has a transistor relationship
inside it between the pins you can check
with a multimeter to look for shorts or
opens you can't tell if it's working
right but you can check and see if
there's anything obviously wrong and I
can't find anything obviously wrong with
those four they all uh
measure identical to each other in
circuit and uh we know two of them are
working because the right um the right
channel is working uh so hopefully that
little resistor being broke loose was
like that from the very beginning and
that was all that was wrong with it cuz
I can't find anything else wrong with
[Music]
[Music]
it fixed
it that freaking resistor must have been
broke the whole time but I can't tell by
the video I just can't quite
tell wow so
cool I can't play any music though
YouTube they hate me okay uh so uh we
need to put this speaker still isn't
working though we need to get that out
and see if maybe the plug came off maybe
we'll get
[Music]
lucky sounds
great
all right so we pulled out the speaker
bad news folks the speaker's
blown if you check continuity between
here you get high you don't get any
resistance I mean you get a lot of
resistance infinite resistance um and if
you look the
cone has completely
detached from
the whatever you call it I believe this
can be fixed right you people tell me
down below can this be fixed now if I if
I don't don't have like this is
open this is no longer connected but if
you look it's still connected to the
paper down there I figured that that
would still be connected that you'd get
your 8
ohms like the other
one um and then it would just need the
cone glued back on but apparently that
is not the case so it could be that the
cone's messed up and something else is
messed up I don't know I don't know
though you let me know what you think
down below but you know what we did
we put another one in
it we had uh we have some brand new ones
that we put in them if they need it so
we put in another one everything's cool
same size everything's cool um and uh
all four speakers are now
working wow so I'm going to see if I can
find one of my uh Records that YouTube
allows us to play and then I'll slide it
in there and uh we'll finish
up um but uh
basically just looking at connections
inside and replace the caps on the
driver boards and it brought that one
channel back but to be honest I don't
know if the Caps did it or if it just
was a bad connection or something but we
got it up and running all right folks
we've been cleaning it up a little bit
this is the uh David rockola signature
model which I think they all wear so
it's not like it's valuable or anything
it's no more valuable than just a nice
clean cool rockola jukebox
so cool so I'm going to play you a song
that I believe will defeat
YouTube's uh uh copyright system we'll
see we'll see if it plays the wrong song
or if it just disappears then you know
that something happened okay so I'll
I'll do my little spill and then I'll
play the song and then if I had to cut
it off I'll cut it off so uh we hope you
enjoyed the video we replaced the
speaker everything's cool everything's
looking good
uh if you're working on your amp don't
be afraid to get in there and check it
out that's what you're kind of looking
at that's kind of how we go past them
but really there wasn't much wrong with
it that I could tell uh we're trying to
learn more about them as we go along
make sure to give us a thumbs up for
taking the trouble to film it for you
and you know how you can support our
Channel go to Amazon uh if you're going
to Amazon go to Amazon through one of
our links Down Below on the video um
down in the description of the video we
have some links to Amazon for different
countries it basically just uh gives us
a tip for sending you to Amazon so if
you decide that you're going to buy
anything online don't ever type
amazon.com use one of our links and then
we get money so we appreciate everybody
that's been doing that we like to be uh
very upfront about that right uh and
finally last but not least don't forget
to check out my brother Donnie my
brother has his own channel here on
YouTube uh where we do arcade games
jukeboxes pinball machines and uh my
brother Donnie does Vehicles old
buildings things like that we we're over
there with him a lot having a good time
so let let's see what I can do
here play a little song to uh send you
home hopefully YouTube will allow it now
this is oldfashioned to to defeat the
copyright strike but you can see that
all four speakers are
[Music]
working
[Music]
[Music]
la
[Music]
[Music]
[Music]
d
[Music]
back time to hit the
[Applause]
[Music]
house