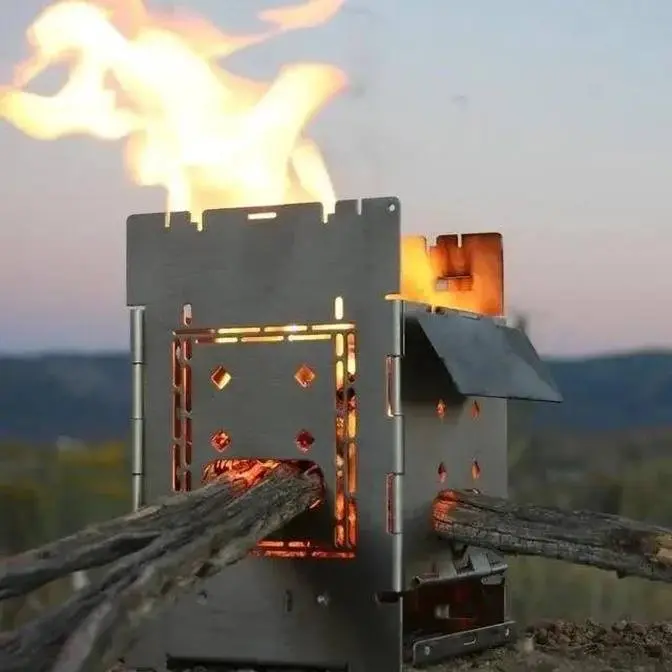
NEW for the G1 & G2 5" Firebox Stoves; The SUMO Stove Expansion System! I did my best to explain and demonstrate the features and ability that I know of so far. In fact I hadn't thought of reversing the Ash-Pan until filming this video. I'm sure with your help we'll realize many more fun functions. :)
I need your feedback! For me to get this right. I need to know your preferences when it comes to the griddle material and thickness. How much focus should there be on weight VS cooking performance. I think a titanium version could be as thin as 20 gauge however, I think 18 gauge crosses a threshold within a range of cooking performance. The problem is that we can't make one of everything. We need to narrow it down as much as we can. Carbon steel is popular and is the most common material used for griddles. If we have a less expensive version of this pan, I think carbon steel is probably the best choice. It won't temper the heat from a wood flame heat source so making it thicker might make a big difference in its performance. A thickness of 16 gauge would probably give the best performance, however, 18 gauge might perform well enough. One last question, if we make the griddle pan of carbon steel, do we make the heat shield pan also out of carbon steel? Or do we make that out of stainless? Carbon steel would need to be seasoned and maintained.
As you can see I really do need your insight. please comment below :)
The G.O.A.T. just got better! The NEW SUMO Expansion System for the original classic wood burning bushcraft campfire stove used worldwide for more than 15 years! The 5-in G1 & G2 Firebox Stove's versatility and performance just got a major boost.
Stay informed as we prepare to launch this amazing new product by being on our email list. I promise and pledge to keep the emails we sent to you of value to you. My goal is for every email you get from me to be something I would want to receive in my inbox.
If you're not already on our email list please sign up by scrolling to the bottom of our home page https://fireboxstove.com/
Thank you so much everyone I appreciate your patience as we work towards perfecting not only the design and application of this product, but also getting the manufacturing right to achieve high value precise parts consistently.
Cheers, Steve
I have the latest prototypes for the sumo stand and for the griddle heat shield hard
case combination that work with the sumo stand.
These are accessories that work with the 5-inch firebox and they'll work with all of the
versions of the 5-inch firebox.
So nobody needs to get a new stove to take advantage of this big leap forward in what
your 5-inch firebox can do.
Not only does it increase your workspace and how much you can do with your 5-inch firebox,
but it introduces a whole new concept to wood-burning firestove cooking.
I have to give a shout-out to Scott and Vanya for how nicely these pans have turned out.
So this top pan is the heat shield.
This is 22-gauge stainless steel, so it's pretty lightweight.
And then the firebox fits inside the griddle pan, and then down at the bottom we have our
new sumo stands.
Okay, so I just want you to get a really good look at these pans.
This is the griddle pan.
This is intended to be used with your pot gripper, so then you have a pan for cooking
your bacon and eggs, for whatever you would like to do with a flat griddle.
What I need your feedback on is the material we should use for these griddle pans.
The materials we have available are carbon steel.
This is stainless, but we also have the option of using titanium.
Let's go ahead and get these set up, and I'll explain all the features that this system offers.
Open up the 5-inch firebox.
Your sumo stands need to have this little T-bracket rotated so it's in line with the
slot, and then you can just slide that on and rotate the T-bracket.
It needs to be rotated all the way up in order for you to get your heat shield in place.
Just rotate the whole stove, and slide that into position, and then rotate that T-bracket.
Slide our heat pan shield into its position, and I'm going to go ahead and rotate the whole
stove around and show you what you can do with this T-bracket, is put one of its arms
down just enough that this can't slide past it.
So that will just hold your heat shield from falling out.
So if it gets bumped or something, it won't be able to just fall out.
So you can do that on both sides, that way the heat shield can get pushed around a little
bit, but it will never actually fall out.
And then we can also put our ash pan in place, and it needs to be in place to give you full
heat protection.
Here's a top-down view of that heat shield.
Since the sumo stands give us so much more stability, we can set up side workstations
on both sides of the 5-inch firebox.
So if I put these hangover sticks in their position, I can place a grill on the side
here, and actually I'm going to lower this windscreen, and you can put a grill on one
side, and I've got a coal rack that I can put down here below.
So now we can be grilling on this side, and we can set up another workstation on this
side.
Fit down here, the same as it does on the other side.
The slots on this side aren't quite as big, but the coal rack does still work just fine
right there.
So now we have a warming station where we could put a pot or a cup, and we could keep
our coffee warm, or whatever it is that we're doing.
And we have two options for hangover sticks.
We have the regular hangover sticks.
We also have what we're calling high-low hangover sticks.
So these can be positioned either up high.
So now your workstation at this level has been expanded over to the side.
We do have two heights for the high-low sticks.
So this is the low position for those.
You can use it as a pot stand, or what might make more sense is to use it as a grill.
That gives you a nice close distance between the hot coals and whatever it is you're grilling.
These side workstation positions also enable you to create a reflector oven.
Now this is a special, this would actually go this way, this is a special air bake pan
that it uses kind of a drawer construction.
So you can also store your hangover sticks inside.
But this air bake pan allows you to bake items without burning the bottom of your biscuits
or your rolls or whatever it is that you're actually baking.
The way this works is you use four segments of windscreen, and then you wrap that with
six more segments of windscreen.
Just like that.
And then you use your freestyle fire pan tin to create your oven lid.
So this position is what you would use if you had biscuits, or for instance today I'm
going to be baking cinnamon rolls, and that's how I'll use it.
We do have this special little bracket, and while these, while this fire pan tin will
hang on the edge of the windscreen quite well, so if you drop this little bracket into these
holes then that gives you a little insurance policy that this lid cannot fall back and
fall off.
But it does hang on there without it.
This is just a little bit of reassurance that it'll work like that.
So that is your oven lid, and like I say I'm going to be cooking cinnamon rolls just here
in a little while.
But I'll also show you on this side you can set it up as a taller oven.
So it's a lower position for your air bake pan.
But then you just set everything up on this side, and then you have a much deeper oven
if you were to be baking a loaf of bread or something where you needed more height.
Another very cool feature of this new Sumo system is the ability to broil.
So if you remove your ash pan, you can actually slide foods down under your fire grate and
use that heat from above to broil.
I've tried it with a steak, but I got a lot of hot coals and ashes falling onto it.
So the solution for that is to use an adjustable fire grate dropped right down in on top of
your regular fire grate.
That gives you much smaller hole sizes.
I do think you will still get some ashes on your food.
I don't think it will be very much, and I don't think the hot coals will fall through.
I'm going to test it out while I'm making my breakfast this morning.
Having all these extra working surfaces is really great, and it really gives you a lot
of versatility.
The firebox stove was already famous for its versatility, and now it has just been expanded
that much more.
But that's not even the greatest part of this new system.
What I think is the coolest thing is the concept of maintaining a fire in your center firebox
area and then moving coals down under your other work surfaces.
So this allows you to continuously produce hot coals.
I think it's just a really cool, fun concept.
So that's what I'm most excited about, is being able to learn this kind of new way of
using the 5-inch firebox stove.
One thing that I think a lot of people will appreciate about this new Sumo system is it
totally upgrades and updates your 5-inch firebox stove's performance and abilities without
needing a whole new stove.
So all of these accessories will work with your current 5-inch firebox stove.
In fact, I'm going to be using one of my old trusty 5-inch firebox stoves, and I'm going
to be using it with all these new accessories.
So here's my old 5-inch firebox stove, and I'm going to set it up down here where I have
a little bit more shade.
Since I do want to use the broiler feature, I am going to put the adjustable fire grate
down in the bottom, and I'm also going to turn my ash pan upside down so I have some
English muffins, and I'm going to try sliding them under there to toast them.
So I'm going to put it in upside down.
You have to slide it into its regular position and then push it down.
That gives me a higher position for my broiler.
Before that fire gets too hot, I'm going to get this coal tray in its position.
This side over here is a little bit more difficult to get the coal tray slid in, so I really
recommend you do this one while the stove is cold.
This side, it's pretty easy to get the coal tray in and out.
I need to boil some water to rehydrate my hash browns.
I'm going to set up the hangover sticks on this side, because I'm going to set up an
oven over here, and the air bake pan will sit right here.
Add a couple of chunks of wood so that we continue to produce hot coals.
I haven't really cooked on stainless steel a lot, so I don't really know, you know, if
there's a special technique, I don't know it.
I just wanted to brown this side up a little bit more.
Yeah, I could use just a little more browning.
This piece might be done.
I think that piece is close enough.
We'll go ahead and stack it over here.
I've kind of moved my pan over to the side a little bit, so I'd have a cooler zone and
a hotter zone.
This one looks like it's done too.
So it's quite hot over there, which is good.
What are hash browns if they're not brown?
Let's see if these hash browns are brown enough.
They're not really getting brown.
Kind of weird.
Now I think we're getting kind of close to being finished, so I'm not going to add more
wood.
Take these out.
Put them down here.
By moving hot coals out of there and under my oven, I have a much more mild heat, so
I'll be able to cook my eggs.
But I need to go ahead and get my cinnamon rolls baking.
Now one cinnamon roll is like twice as fat as all the rest, so I'm going to trade it
out so that they'll cook evenly.
I'm going to leave a little air gap in the back.
Let's put our oven lid on.
Oh yeah, they look nice.
Let's go ahead and move them over.
We'll make room for our eggs.
I never did end up using this coal tray, but let's go ahead and remove it.
That ought to be fine.
I'm going to slide my English muffin under there and see what happens.
Meanwhile, I'm going to salt and pepper my eggs.
And then I want to see if I can turn them.
They may be pretty stuck, but I'm going to do my best.
Well, they're actually not nearly as stuck as I thought they would be.
You can see how they're lifting in some places.
These won't be pretty, but they'll taste good.
Actually, I'm going to get some cooking spray under there.
And then I did break the one yolk, but maybe one of them will survive.
Let's see what happened with our English muffin.
Ooh, ooh, ooh.
Perfect.
Let's put the other one in.
This butter is really hard.
Let's take a look at those cinnamon rolls.
I'm just going to move this a little bit more off the heat.
And we'll lift our oven door.
They're looking really good.
Still just a little soft, I think.
Let's check on our other English muffin and see if it's ready.
Ooh, ooh, ooh.
That looks nice.
Perfect.
You can see this egg is still soft and nice.
A little bit of salt.
A little bit of pepper.
Grab our English muffins.
And that breakfast is ready to eat.
I'm actually going to take this lid right off because I think those cinnamon rolls are done.
They look absolutely beautiful.
They're even a little brown on top.
But I don't want them to keep cooking.
In fact, let's go ahead and take off this windscreen so that the heat won't keep collecting under them.
Well, I don't think I used all my new accessories to their fullest potential.
I think the Sumo system is going to work really well.
And I think people are really going to have a lot of fun with it.
And I did get a really delicious breakfast out of it.
Please leave me your feedback down in the comments below about what type of pan you would like to have as your griddle.
If you would like to have a carbon steel griddle or if you'd like to stick with titanium.
Titanium kind of tempers the heat really nicely.
Titanium has a low conductivity of the heat so the heat doesn't just rush right through it.
It kind of tempers the heat a little bit which is great for a fire stove.
Aluminum is the lightest by far but it's almost as expensive because you have to get it hard anodized.
I think just raw aluminum wouldn't really be a choice that a lot of people would like.
And the hard anodized aluminum is just as expensive as the titanium.
Now it is lighter than titanium but I think titanium performs a little better.
It tempers that heat a little bit because it is low conductivity but it's also low thermal mass.
So it has a very unique cooking or I should say it has very unique cooking properties.
And I really enjoyed cooking with it when I tried it out.
So the stainless steel, it did get a little bit hot.
A flame is very very hot.
The titanium seemed to temper that heat a little bit more than the stainless steel just got real hot.
And I don't remember of the titanium having a big problem with food sticking.
It seemed to do fairly well in that regard.
So I haven't tried the carbon steel yet.
I know the carbon steel griddles are very popular.
Let me know what you think.
I really do want to know your opinion about the material and the thickness we should use for the griddle pan.
Now that these cinnamon rolls have cooled down we should be able to look at them.
Oh and look at that.
Golden brown baby.
Beautiful.
Oh yeah.
And they're definitely cooked all the way through.
So I'm going to put them up here where they can get a little bit warm.
And I'm going to put this frosting on them.
Here we go.
Dessert.
And what a beautiful dessert.
Holy smokes.
Wow.
Beautiful.
Well folks, thanks for hanging out with me and checking out the new Sumo system.
I think it's pretty cool.
I think it's revolutionary.
So I hope you guys think so too.
Give me your feedback about the pan.
What material interests you the most.
The titanium I think is my choice.
But I'm going to leave it up to you.
And then also thickness.
Do you think it's worth having a little bit of a heavier pan to have better cooking performance with the carbon steel pan?
The titanium pan that I used was 18 gauge and I thought it worked very nicely.
So I think 18 gauge is a good thickness for titanium.
It's more a matter of what people will want if they want the carbon steel.
So let me know down in the comments.
Thank you everyone.
Until next time. Bye bye.
That is so good.
I got the flaky.
And they are. They're flaky. They're good.