
5 Fun Pokemon DIYs & Crafts
34 Video Views·Feb 20, 2023
5 Fun Pokemon DIYs & Crafts
Comments are disabled for this video.
Hello, hello! Welcome back to Red Ted Art.
Guess what? It's all about Pokemon today!
We have five of our favourite Pokemon DIYs just for you today.
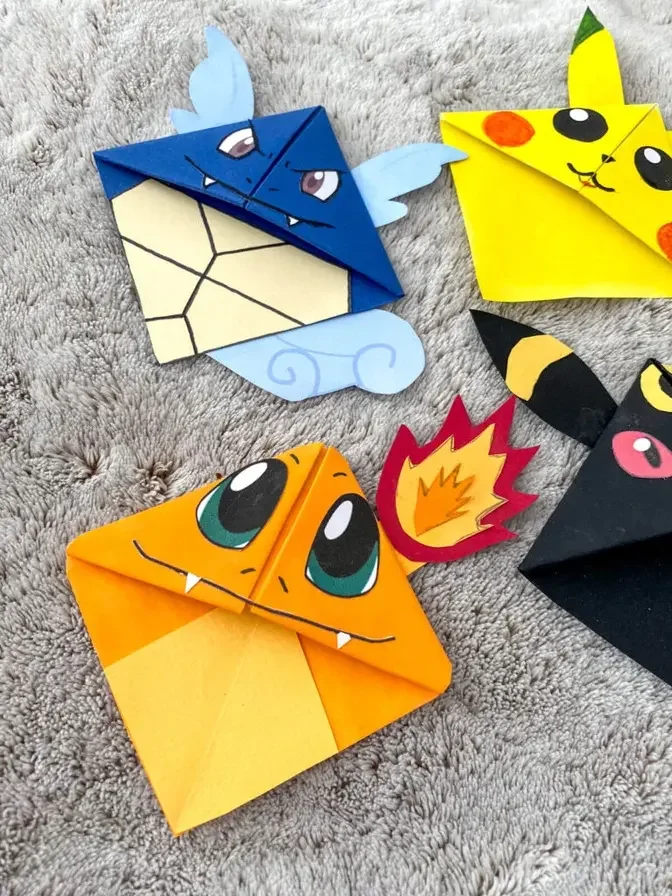
From the kaleidoscopes, the bookmarks to the Pokeball cards
and, of course, a little Weevil Wobble that you could also use as a little ornament.
Let's take a look and see how they're made.
You can either choose to colour them yourself or get the ready-made ones.
I've got two of these on my website, linked below,
and two of these on my fabulous friend Hattie Phan's website, also linked below.
I'm going to show you how to do the assembly right now.
So once you've got the colouring done or you've used the pre-coloured ones,
you start cutting out.
Now we'll speed this bit up because it is obviously a bit boring.
Here we go.
So, we have our cut-out piece of paper.
Now the next bit is super important.
You want to fold across all the lines going this way
and all the lines going this way
and like that.
Now if you fold them in the right order and do it really neatly,
honestly, this is so much easier.
If you don't, it can get quite hard.
So the first lines I'm going to do are the ones going across.
And for that, I'm going to turn mine round
and then I'm going to fold up and use the line as a guide,
like so, and make it nice and neat.
These have to be super neat.
I'm going to fold across but fold it in so the pattern shows inside.
Now, if you've done all your folding correct,
you can then, if you take your glue bit and just point it in,
it should all start folding up just the way you want it.
So test that it's all folding up so it looks a bit like a snake.
And if it's doing that, great, you can start gluing.
If not, just re-score your lines.
So mine does fold up, that's great.
So now I'm going to put lots of glue on the glue bit.
Start off with these three, don't do those yet.
Make sure you get it right to the edge.
There we go.
And then you can tuck these on top.
And again, try and line everything up as much as possible.
You may want an adult to help you at this point.
And then you fold these out.
Add a bit of glue.
Then you squeeze this a bit, like so.
Tuck these in.
And then you gently press down on the middle.
So we've actually let this dry for about five minutes.
Hello, hello, welcome back to Red Ted Art.
Yes, it's time for another bookmark.
So, as always, you will need an A5 sheet of paper.
Obviously you can use A4 and cut it in half,
which is, in fact, what I've done.
I'm folding this over so I can cut and create a square.
And I'm keeping the little piece that's cut off,
because this we all need for the ears.
And then you might as well leave it folded the way it is already.
Take this corner and bring it up, like all our bookmark videos.
So, as you know, we've got tons of bookmarks here on Red Ted Art.
I'll link the playlist and you can check them all out.
Lots and lots of ideas.
Bring this one up and give it a nice, neat crease.
So we've got a nice straight line in the middle
and neat creases on the outside.
Open it up, bring down one flap,
fold this back and tuck it in.
Bring this back and tuck it in.
And you have your basic bookmark.
Let's now create some ears.
Now, the ears are basically some bunny ears.
So I've folded it over so I can cut two out at the same time.
Use my pencil to mark out some eyes.
There you have your Pokemon Pikachu bookmarks.
Aren't they easy? So cute!
Right, now these are really good for posting, putting in an envelope,
sending to a friend as a birthday card.
Really cool. You can colour them in or send them blank.
But either way, I think they're really, really fabulous.
You will need your printable.
So this time you're going to need two sheets.
I'm going to do Pikachu today.
Two sheets of printables, which you can get on my friend's site, Hattifant,
and my site.
So we're going to link below.
So they're different printables on different sites.
Now, I'm going to start cutting.
You should have two pieces like that.
So, next thing you do is move that one carefully to the side,
turn this one around, and you fold it.
There's a line here, OK?
Fold it as neatly as you can.
And now, you open it up.
This is where Hattifant and I do it differently.
I now give this a cut.
Just a straight line.
There we go.
Now you open it up, get the glue stick,
and add glue all over.
Now, this one, I have to cut.
Well, firstly, do your fold.
And now, open it up.
Now, I'm going to cut it like this.
Now, when you do cut it, be sure you don't get the order muddled, OK?
So put them carefully to the side, facing the same way.
You don't accidentally want to swivel this round, yeah?
So keep the order really neat.
Don't accidentally turn this.
Otherwise, it's a mini disaster.
Well, you'd have to do it again.
Good. So, now you have this.
And you have this.
Next thing to do is...
A little bit of a shadow there. That's annoying me.
Let's move it. Here we go.
Next thing to do is...
cut this one.
Carefully and neatly.
And cut this one.
OK, now you take and you flip like this.
Now you have A, B, A, B, C...
No, A, B, C, D.
And now you turn this one and this one.
Now, that needs to glue on here.
That needs to glue on here, OK?
Here we go.
So, now comes the clever bit.
Now, this is a bit that took me a while to figure out.
So, I'm going to flip this open.
Watch this. Flip it.
And this back side comes down, OK?
Here we go.
Same, you're going to flip it.
And this back comes down.
Here we go.
Isn't that exciting?
It's still drying, so I'm just getting it all in place.
Same, so this time you're going to flip it.
And this back goes behind.
And I'm going to flip it.
And this back goes behind.
So, this is the intermediate Pikachu.
Flip and flip.
That, there we go.
Exciting!
Now it's time to colour.
Red Head and I are going to make a...
Pokeball.
So, to make the Pokeball, you will need a small balloon.
We actually used a water balloon here.
Then you'll need some DIY paper, mash and paste.
Do you remember how we made this?
We used water and flour.
And then put it in the microwave for about 8 minutes.
No, about 30 seconds.
But the thing is, you keep stirring for 40 seconds.
You have to keep stirring. It's a bit lumpy, but it's fine.
And then, obviously, strips of paper.
Exactly. So, now, do you want to help me start?
So, you need to get your strips really gooey, don't you?
If you don't like your fingers getting messy, this is not a craft for you.
No, you do have to get a bit messy.
It's a bit sticky too.
Yeah, well, it's meant to be sticky. That's good.
Now, we're going to let this dry, probably about a day, because it's quite a hot day here.
If it's summer where you are, or winter where you are, it might take 3 or 4 days.
So, really, you just have to wait, but it has to be bone dry.
And, as you saw, we put some smaller pieces on towards the end, just to try and get more of an even surface.
And it's probably about 3 or 4 layers in total.
Now, this has been drying nice and hard for a few days.
So, we're just going to take the balloon out of the middle.
Give it a little pull, and we're just cutting it.
Now, most of it will have just disappeared inside, which is fine.
Okay, and we're ready to paint.
And we're going to use acrylic paints, but you can use whatever paints you've got.
Let the white dry. We're resting it on a glass.
And now this is dry, we're going to paint the red side.
So, now we're going to draw the black line across.
Okay, and there you have your pokeball finished.
Now, we have a little hole here, because we decided it would be fun to have that as the centre of our pokeball.
But, of course, if you don't want the hole on this side, you can just put it on the other side.
Also, you could use this as a Christmas decoration.
And then you could actually have your pokeball facing down.
This could be at the top, and you could be hanging it off the Christmas tree.
But we are going to play with it.
Pikachus!
This one is a stand-up Pikachu.
Now, to make your little Pikachu, you're going to need the inside of a Kinder Surprise egg.
You'll also need some tape, obviously some coins, bits of paper, and some very good glue.
The first thing I want to do is tape together my coins, because you don't want them falling over.
Then, I'm going to have to open this up and put loads of glue on here.
I have to use a stick, because this is almost empty with glue, and I can't get it out otherwise.
Right, put loads of glue on here.
Then carefully place it at the bottom and let it dry.
Now, you do really need to let it dry, otherwise it's not going to work.
Now, we need some eyes.
Then you take your wonderful, amazing glue.
Glue it all together.
Let it dry fully.
I think the coins keep knocking it over.
And then once it's dry, we can have a little weebly wobbly.
So, we'll come back at the end.
Don't forget, we have loads more Pokemon bookmarks here on Redhead Art,
as well as lots of other Pokemon DIYs, including this pinata cake.
Don't forget to subscribe to the channel.